Quantcast
Channel: Languages – AMIS Technology Blog | Oracle – Microsoft Azure
Viewing all 163 articles
Browse latest View live

Calling an Oracle DB stored procedure from Spring Boot using Apache Camel

$
0
0

There are different ways to create data services. The choice for a specific technology to use, depends on several factors inside the organisation which wishes to realize these services. In this blog post I’ll provide a minimal example of how you can use Spring Boot with Apache Camel to call an Oracle database procedure which returns the result of an SQL query as an XML. You can browse the code here.

Database

How to get an Oracle DB

Oracle provides many options for obtaining an Oracle database. You can use the Oracle Container Registry (here) or use an XE installation (here). I decided to build my own Docker image this time. This provides a nice and quick way to create and remove databases for development purposes. Oracle provides prepared scripts and Dockerfiles for many products including the database, to get up and running quickly.

  • git clone https://github.com/oracle/docker-images.git
  • cd docker-images/OracleDatabase/SingleInstance/dockerfiles
  • Download the file LINUX.X64_193000_db_home.zip from here and place it in the 19.3.0 folder
  • Build your Docker image: ./buildDockerImage.sh -e -v 19.3.0
  • Create a local folder. for example /home/maarten/dbtmp19c and make sure anyone can read, write, execute to/from/in that folder. The user from the Docker container has a specific userid and by allowing anyone to access it, you avoid problems. This is of course not a secure solution for in production environments! I don’t think you should run an Oracle Database in a Docker container for other then development purposes. Consider licensing and patching requirements.
  • Create and run your database. The first time it takes a while to install everything. The next time you start it is up quickly.
    docker run –name oracle19c -p 1522:1521 -p 5500:5500 -e ORACLE_SID=sid -e ORACLE_PDB=pdb -e ORACLE_PWD=Welcome01 -v /home/maarten/dbtmp19c:/opt/oracle/oradata oracle/database:19.3.0-ee
  • If you want to get rid of the database instance
    (don’t forget the git repo though)
    docker stop oracle19c
    docker rm oracle19c
    docker rmi oracle/database:19.3.0-ee
    rm -rf /home/maarten/dbtmp19c
    Annnnd it’s gone!

Create a user and stored procedure

Now you can access the database with the following credentials (from your host). For example by using SQLDeveloper.

  • Hostname: localhost 
  • Port: 1522 
  • Service: sid 
  • User: system 
  • Password: Welcome01

You can create a testuser with

alter session set container = pdb;

-- USER SQL
CREATE USER testuser IDENTIFIED BY Welcome01
DEFAULT TABLESPACE "USERS"
TEMPORARY TABLESPACE "TEMP";

-- ROLES
GRANT "DBA" TO testuser ;
GRANT "CONNECT" TO testuser;
GRANT "RESOURCE" TO testuser;

Login to the testuser user (notice the service is different)

  • Hostname: localhost 
  • Port: 1522 
  • Service: pdb 
  • User: testuser 
  • Password: Welcome01

Create the following procedure. It returns information of the tables owned by a specified user in XML format.

CREATE OR REPLACE PROCEDURE GET_TABLES 
(
  p_username IN VARCHAR2,RESULT_CLOB OUT CLOB 
) AS
p_query varchar2(1000);
BEGIN
  p_query := 'select * from all_tables where owner='''||p_username||'''';
  select dbms_xmlgen.getxml(p_query) into RESULT_CLOB from dual;
END GET_TABLES;

This is an easy example on how to convert a SELECT statement result to XML in a generic way. If you need to create a specific XML, you can use XMLTRANSFORM or create your XML ‘manually’ with functions like XMLFOREST, XMLAGG, XMLELEMENT, etc.

Data service

In order to create a data service, you need an Oracle JDBC driver to access the database. Luckily, recently, Oracle has put its JDBC driver in Maven central for ease of use. Thank you Kuassi and the other people who have helped making this possible!

        <dependency&gt;
            <groupId&gt;com.oracle.ojdbc</groupId&gt;
            <artifactId&gt;ojdbc8</artifactId&gt;
            <version&gt;19.3.0.0</version&gt;
        </dependency&gt;

The Spring Boot properties which are required to access the database:

  • spring.datasource.url=jdbc:oracle:thin:@localhost:1522/pdb
  • spring.datasource.driver-class-name=oracle.jdbc.OracleDriver
  • spring.datasource.username=testuser
  • spring.datasource.password=Welcome01

The part of the code which actually does the call, prepares the request and returns the result is shown below. 

The template for the call is the following:

sql-stored:get_tables('p_username' VARCHAR ${headers.username},OUT CLOB result_clob)?dataSource=dataSource

The datasource is provided by Spring Boot / Spring JDBC / Hikari CP / Oracle JDBC driver. You get that one for free if you include the relevant dependencies and provide configuration. The format of the template is described here. The example illustrates how to get parameters in and how to get them out again. It also shows how to convert a Clob to text and how to set the body to a specific return variable.

Please mind that if the query does not return any results, the OUT variable is Null. Thus getting anything from that object will cause a NullpointerException. Do not use this code as-is! It is only a minimal example

You can look at the complete example here and build it with maven clean package. The resulting JAR can be run with java -jar camel-springboot-oracle-dataservice-0.0.1-SNAPSHOT.jar. 

Calling the service

The REST service is created with the following code:

It responds to a GET call at http://localhost:8081/camel/api/in

Finally

Benefits

Creating data services using Spring Boot with Apache Camel has several benefits:

  • Spring and Spring Boot are popular in the Java world. Spring is a very extensive framework providing a lot of functionality ranging from security, monitoring, to implementing REST services and many other things. Spring Boot makes it easy to use Spring.
  • There are many components available for Apache Camel which allow integration with diverse systems. If the component you need is not there, or you need specific functionality which is not provided, you can benefit from Apache Camel being open source.
  • Spring, Spring Boot and Apache Camel are solid choices which have been worked at for many years by many people and are proven for production use. They both have large communities and many users. A lot of documentation and help is available. You won’t get stuck easily.

There is a good chance that when implementing these 2 together, You won’t need much more for your integration needs. In addition, individual services scale a lot better and usually have a lighter footprint than for example an integration product running on an application server platform.

Considerations

There are some things to consider when to using these products such as;

  • Spring / Spring Boot do not (yet) support GraalVMs native compilation out of the box. When running on a cloud environment and memory usage or start-up time matter, you could save money by for example implementing Quarkus or Micronaut. Spring will support GraalVM out of the box in version 5.3 expected Q2 2020 (see here). Quarkus has several Camel extensions available but not the camel-sql extension since that is based on spring-jdbc.
  • This example might require specific code per service (depending on your database code). This is custom code you need to maintain and might have overhead (build jobs, Git repositories, etc). You could consider implementing a dispatcher within the database to reduce the amount of required services. See my blog post on this here (consider not using the Oracle object types for simplicity). Then however you would be adhering to the ‘thick database paradigm’ which might not suite your tastes and might cause a vendor lock-in if you start depending on PL/SQL too much. The dispatcher solution is likely not to be portable to other databases.
  • For REST services on Oracle databases, implementing Oracle REST Data Services is also a viable and powerful option. Although it can do more, it is most suitable for REST services and only on Oracle databases. If you want to provide SOAP services or are also working with other flavors of databases, you might want to reduce the amount of different technologies used for data services to allow for platform consolidation and make your LCM challenges not harder than they already might be.

The post Calling an Oracle DB stored procedure from Spring Boot using Apache Camel appeared first on AMIS, Data Driven Blog.


Calling out from Java to JavaScript (with call back) – leveraging interoperability support of GraalVM

$
0
0

imageInteroperability from Java to JavaScript has been an objective for the Java community for quite a while. With Rhino and later Nashorn, two valiant attempts were made to add scripting interaction to the JDK and JVM. Now, with GraalVM, there is a better alternative for running JavaScript code from within Java applications. The interaction itself is faster, more robust and more ‘native’ (rather than bolt-on). For developers, the interaction is easier to implement. And as a bonus: the interaction that GraalVM allows from Java to JavaScript is also available for any other language that the GraalVM runtime can handle – including R, Ruby, Python and LLVM (C, C++, Rust, Swift and others).

By picking GraalVM 1.0 (based on JDK 8) as the runtime environment you enable the interoperability from Java to any of the languages GraalVM can run. No additional setup is required to interact with JavaScript; if you want to call out to Python, you first need to install graalpython.

On November 19th 2019 we will see the release of GraalVM 19.3 with support for Java 11. Note: GraalVM can be injected into your Java VM as the JIT Compiler of choice, bringing performance enhancements to most modern Java applications.

In this article, I will discuss a number of intricacies encountered when making Java code talk to JavaScript code. In slightly increasing levels of complexity, I will show:

  • Evaluate JavaScript code snippets
  • Load JavaScript sources from separate files and invoke functions defined in them
  • Exchange data and objects back and forth between Java and JavaScript
  • Allow JavaScript code called from Java to callback to Java objects
  • Run multiple JavaScript threads in parallel

In a follow up article I will go through the steps of making the functionality of a rich NPM module available in my Java application. And after that, I will discuss the route in the other direction in a further article: calling Java from a Node(NodeJS) or JavaScript application.

I will assume that the GraalVM (19.2.1 – release in October 2019) runtime environment has been set up, and take it from there. Sources for this article are in GitHub: https://github.com/AMIS-Services/jfall2019-graalvm/tree/master/polyglot/java2js 

1. Evaluate JavaScript code snippets

The Graal package org.graalvm.polyglot contains most of what we need for the interaction from Java to other languages. Using the Context class from that package, we have to setup a Polyglot Context in our code. We can then use this context to evaluate any snippet of code – in this case a snippet of js (meaning JavaScript or ECMA Script). The print command in this snippet is executed as System.out.println – printing the string to the system output.

When the snippet evaluation results in an object – for example a function as in line 10 of the sample – then this object is returned to Java as a Polyglot Value. Depending on the type of the Value, we can do different things with it. In this case, because the JavaScript code resolved to function, the Polyglot Value in variable helloWorldFunction can be executed, as is done in line 13. The input parameters to te executable object are passed as parameters to the execute method on the Value and the result from the execution is once again a Polyglot Value. In this case, the type of the Value is String and we can easily cast it to a Java String.

image

2. Load JavaScript sources from separate files and invoke functions defined in them

Instead of polluting our Java sources with inline JavaScript (bad practice in my view), we can load JavaScript sources from stand alone files and have them evaluated. Subsequently, we can access the data objects and functions defined in those files from Java code.

Again, a Polyglot Context is created. Next, a File object is defined for the JavaScript source file (located in the root directory of the Java application). The eval method on the context is executed on the File object, to load and evaluate the source code snippet. This will add the two functions fibonacci and squareRoot to the bindings object in the Polyglot Context. This object has entries for the objects that are evaluated from inline snippets and evaluated source files alike. Note that we can evaluate more File objects – to load JavaScript functions and data objects from multiple files.

Next we can retrieve the function object from the bindings object in the context and execute it.

image

3. Exchange data and objects back and forth between Java and JavaScript

Between the worlds of Java and JavaScript, there is a polyglot middle ground, an interface layer that can be accessed from both sides of the language fence. Here we find the bindings object – in a bilateral interaction. This bindings object may be used to read, modify, insert and delete members in the top-most scope of the language. We have seen the bindings object already as the map that stores all functions that result from evaluating JavaScript sources loaded into our Polyglot context in Java.

(Note: In addition, there is a polyglot bindings objects that may be used to exchange symbols between the host and multiple guest languages. All languages have unrestricted access to the polyglot bindings. Guest languages may put and get members through language specific APIs)

image

There are several different situations we could take a look at. For example: when a snippet of JavaScript is evaluated, any function or object it defines is added to the Bindings object and is therefore accessible from Java. A simple example of this is shown here, where the JavaScript snippet defines a constant PI, that subsequently becomes accessible from Java:

image

and the output from the Java program:

image

Here is an example of Java preparing a Java Map and putting this Map in Bindings in a way (as ProxyObject) that makes it accessible as ‘regular’ JavaScript object to JavaScript code. The JavaScript code reads values from the Map and also adds a value of its own. It could also have changed or removed entries in or from the Map. The Map is effectively open to read/write access from both worlds – Java and JavaScript:

image

image

And the system output:

image 

The next example has a file with data in JSON format that is loaded as JavaScript resource. The data is subsequently accessed from Java.

image

The way we have to deal with arrays across language boundaries is not super smooth. It can be done – and perhaps in a better way than I have managed to uncover. Here is my approach – where the JavaScript file is loaded and evaluated, resulting in the countries object – a JavaScript array of objects – being added to the bindings object. When retrieved in Java from the bindings object, we can check for ArrayElements on the Polyglot Value object and iterate through the ArrayElements. Each element – a JavaScript object – can be cast to a Java Map and the properties can be read:

image

The output:

image

Note: here is what the file looks like. It is not plain JSON – it is JavaScript that defines a variable countries using data specified in JSON format – and copy/pasted from an internet resource:

image

4. Allow JavaScript code called from Java to call back to Java objects

If we place Java Objects in Bindings – then methods on these objects can be invoked from JavaScript. That is: if we have specified on the Class that methods are ‘host accessible’. A simple example of this scenario is shown here:

imageOur Java application has created an object from Class FriendlyNeighbour, and added this object to Bindings under the key friend. Subsequently, when a JavaScript snippet is executed from Java, this snippet can get access to the friend object in the Bindings map and invoke a method on this object.

The code for the Java Application is shown here:

image

The class FriendlyNeighbour is quite simple – except for the @HostAccess annotation that is required to make a method accessible from the embedding language.

image

The output we get on the console should not surprise you:

image

This demonstrates that the JavaScript code invoked from Java has called back to the world of Java – specifically to a method in an object that was instantiated by the Java Object calling out to JavaScript. This object lives on the same thread and is mutually accessible. The result from calling the Java object from JS is printed to the output and could of course also have been returned to Java.

5. Run multiple JavaScript threads in parallel

Multiple JavaScript contexts can be initiated from the Java application. These can be associated with parallel running Java threads. Indirectly, these JavaScript contexts can run in parallel as well. However, they cannot access the same Java object without proper synchronization in Java.

In this example, the Java Object cac (based on class CacheAndCounter) is created and added to bindings object in two different JavaScript Context objects. It is the same object – accessible from two JS realms. The two JavaScript contexts can each execute JS code in parallel with each other. However, when the two worlds collide – because they want to access the same Java Object (such as cac) – then they have to use synchronization in the Java code to prevent race conditions from being possible.

image

Here is a somewhat complex code snippet that contains the creation of two threads that both create a JavaScript context using the same JavaScript code (not resulting the same JavaScript object) and both accessing the same Java object – object cac that is instantiated and added to the Binding maps in both JavaScript contexts. This allows the JavaScript “threads” to even mutually interact – but this interaction has to be governed by synchronization on the Java end.

image

The output shows that the two threads run in parallel.  They both have a random sleep in their code. Sometimes, the main thread gets in several subsequent accesses of cac and at other times the second thread will get in a few rounds. They both access the same object cac from their respective JavaScript contexts – even these contexts are separate. We could even have one JavaScript context interact with the second JavaScript context – which is running through a different thread Java thread – through the shared object. image

For completeness sake, the salient code from the CacheAndCounter class:

image


Resources

GitHub Repository with sources for this article: https://github.com/AMIS-Services/jfall2019-graalvm/tree/master/polyglot/java2js 

Why the Java community should embrace GraalVM – https://hackernoon.com/why-the-java-community-should-embrace-graalvm-abd3ea9121b5

Multi-threaded Java ←→JavaScript language interoperability in GraalVM  https://medium.com/graalvm/multi-threaded-java-javascript-language-interoperability-in-graalvm-2f19c1f9c37b

#WHATIS?: GraalVM – RieckPIL – https://rieckpil.de/whatis-graalvm/

GraalVM: the holy graal of polyglot JVM? – https://www.transposit.com/blog/2019.01.02-graalvm-holy/

JavaDocs for GraalVM Polyglot – https://www.graalvm.org/truffle/javadoc/org/graalvm/polyglot/package-summary.html

GraalVM Docs – Polyglot – https://www.graalvm.org/docs/reference-manual/polyglot/ 

Mixing NodeJS and OpenJDK – Language interop and vertical architecture -Mike Hearn – https://blog.plan99.net/vertical-architecture-734495f129c4

Enhance your Java Spring application with R data science Oleg Šelajev – https://medium.com/graalvm/enhance-your-java-spring-application-with-r-data-science-b669a8c28bea

GraalVM Archives on Medium – https://medium.com/graalvm/archive

GraalVM GitHub Repo – https://github.com/oracle/graal

GraalVM Project WebSite – https://www.graalvm.org/

The post Calling out from Java to JavaScript (with call back) – leveraging interoperability support of GraalVM appeared first on AMIS, Data Driven Blog.

Leverage NPM JavaScript Module from Java application using GraalVM

$
0
0

imageInteroperability from Java to JavaScript has been an objective for the Java community for quite a while. With GraalVM, there is great way to run JavaScript code from within Java applications. The interaction itself is faster, more robust and more ‘native’ (rather than bolt-on) than earlier mechanisms. For developers, the interaction is easy to implement. And this opens up great opportunities for leveraging from Java many of the great community resources in the JavaScript community – for example many of the modules available from NPM.

This article shows how the NPM Validator Module – which implements dozens of very useful data validation algorithms – can be hooked into a Java application. With little effort, the Java developer tasked with implementing and endlessly testing several advanced validations is able to make use of what his JavaScript brothers and sisters have produced and shared. Of course the Validator module is just an example – thousands of NPM modules can be woven into Java applications through the polyglot capabilities of GraalVM.

Note: what we can do from Java to JavaScript can also be done to any other language that the GraalVM runtime can handle – including R, Ruby, Python and LLVM (C, C++, Rust, Swift and others). So our Java application can benefit from more than just the JavaScript community. And vice versa: any language that can run on GraalVM can call out to any other language. So the mutual benefit is not restricted to Java making use of other language resources – it works in all directions.

By picking GraalVM 19.2.1 (based on JDK 8) as the runtime environment you enable the interoperability from Java to any of the languages GraalVM can run. No additional setup is required to interact with JavaScript. On November 19th 2019 we will see the release of GraalVM 19.3 with support for Java 11.

In an earlier article, I have given an introduction to the interoperability from Java to JavaScript. I will now build on that article as my foundation, so I will assume the reader knows about GraalVM polyglot, how to evaluate JavaScript code snippets in Java, how to load JavaScript sources from separate files and invoke functions defined in them and how to exchange data and objects back and forth between Java and JavaScript. With that knowledge in place, what we are about to do in this article is a piece of cake or a cup of peanuts.

Sources for this article are in GitHub: https://github.com/AMIS-Services/jfall2019-graalvm/tree/master/polyglot/java2js

The Challenge

I am developing a Java application. I need to perform validations on input data: Postal Code (various countries), Mobile Phone Numbers (many countries), Email Address, Credit Card Number etc.

In simplified pseudo code:

imageimage

I need to implement (or get my hands on) the postalCode Validator – for starters.

The NPM Module Validator offers most of these OOTB (Out of the Box)

image

image

But… it is written in JavaScriptimage

How could that possibly help me?

GraalVM to the rescue.

The Solution

Spoiler alert: here comes the end result. This is the final code, after integrating NPM Module Validator into my Java application:

image

The major changes are: I retrieve an implementation for the postalCodeValidator from somewhere and I can invoke it. I have not written any code to do the validation of postal codes in 27 different countries. And there is this new package called org.graalvm.polyglot that I import and from which I use classes Context and Value. And finally, there is a resource called validator_bundled.js loaded from file. That resource happens to be the Web Packed bundle created create from all JavaScript resources in NPM module Validator. It is that simple.

Running this code gives me:

image

Implementation Steps

The most important thing I had to figure out was: how to make GraalJS – the JavaScript implementation on GraalVM – work with the module structure in the NPM Validator module. GraalJS does not support require() or CommonJS. In order to make it work with NPM modules – they have to be turned into ‘flat’ JavaScript resources – self-contained JavaScript source file. This can be done using one of the many popular open-source bundling tools such as Parcel, Browserify and Webpack. Note: ECMAScript modules can be loaded in a Context simply by evaluating the module sources. Currently, GraalVM JavaScript loads ECMAScript modules based on their file extension. Therefore, any ECMAScript module must have file name extension .mjs.

The steps to turn an NPM module into a self contained bundle dat GraalVM can process are these:

  • check GraalVM compatibility of NPM module
  • install npx (executable runner – complement to npm which is not included with GraalVM platform)
  • install webpack and webpack-cli
  • install validator module with npm
  • produce self contained bundle for validator module with webpack

When this is done, loading and using validator in Java is the same as with any other JavaScript source – as we will see.

1. Check GraalVM compatibility of NPM module with the GraalVM compatibility check:

image

2. install npx – executable runner – complement to npm which is not included with GraalVM platform

image

3. install webpack and webpack-cli

image

4. install validator module with npm

image

5. produce self contained bundle for validator module with webpack

image

image

#install npx
npm install -g npx 

#install webpack
npm install webpack webpack-cli

#install validator module
npm install validator

#create single bundle for valudator module
/usr/lib/jvm/graalvm-ce-19.2.1/jre/languages/js/bin/npx  webpack-cli --entry=./node_modules/validator/index.js --output=./validator_bundled.js --output-library-target=this --mode=development

#Argument: output-library-target, Choices are : "var", "assign", "this", "window", "self", "global", "commonjs", "commonjs2", "commonjs-module", "amd", "umd", "umd2", "jsonp"

Call Validator Module from Java application

With the Validator module turned into a single self-contained file without non-supported module constructs, we can load this resource into a GraalVM Polyglot context in our Java application running on the GraalVM runtime engine, and invoke any top level function in that context. In order to validate postal codes in Java – here is a very simple code snippet that does just that. Note: the validator_bundled.js is located in the root of our classpath.

image

package nl.amis.java2js;

import java.io.File;
import java.io.IOException;
import org.graalvm.polyglot.*;

public class ValidateThroughNPMValidator {

	private Context c;

	public ValidateThroughNPMValidator() {
		// create Polyglot Context for JavaScript and load NPM module validator (bundled as self contained resource)
		c = Context.create("js");
		try {
			// load output from WebPack for Validator Module - a single bundled JS file
			File validatorBundleJS = new File(
					getClass().getClassLoader().getResource("validator_bundled.js").getFile());
			c.eval(Source.newBuilder("js", validatorBundleJS).build());
			System.out.println("All functions available from Java (as loaded into Bindings) "
					+ c.getBindings("js").getMemberKeys());
		} catch (IOException e) {
			e.printStackTrace();
		}
	}

	public Boolean isPostalCode(String postalCodeToValidate, String country) {
		// use validation function isPostalCode(str, locale) from NPM Validator Module to validate postal code
		Value postalCodeValidator = c.getBindings("js").getMember("isPostalCode");
		Boolean postalCodeValidationResult = postalCodeValidator.execute(postalCodeToValidate, country).asBoolean();
		return postalCodeValidationResult;
	}

	public static void main(String[] args) {
		ValidateThroughNPMValidator v = new ValidateThroughNPMValidator();
		System.out.println("Postal Code Validation Result " + v.isPostalCode("3214 TT", "NL"));
		System.out.println("Postal Code Validation Result " + v.isPostalCode("XX 27165", "NL"));
	}

}

The resulting output:

image

Resources

GitHub Repository with sources for this article: https://github.com/AMIS-Services/jfall2019-graalvm/tree/master/polyglot/java2js

NPM Module Validator

GitHub for GraalJS – https://github.com/graalvm/graaljs

Bringing Modern Programming Languages to the Oracle Database with GraalVM

Presentation at HolyJS 2019 (St Petersburg, Russia): Node.js: Just as fast, higher, stronger with GraalVM

Docs on GraalJS and Interoperability with Java – https://github.com/graalvm/graaljs/blob/master/docs/user/NodeJSVSJavaScriptContext.md

Why the Java community should embrace GraalVM – https://hackernoon.com/why-the-java-community-should-embrace-graalvm-abd3ea9121b5

Multi-threaded Java ←→JavaScript language interoperability in GraalVM  https://medium.com/graalvm/multi-threaded-java-javascript-language-interoperability-in-graalvm-2f19c1f9c37b

#WHATIS?: GraalVM – RieckPIL – https://rieckpil.de/whatis-graalvm/

GraalVM: the holy graal of polyglot JVM? – https://www.transposit.com/blog/2019.01.02-graalvm-holy/

JavaDocs for GraalVM Polyglot – https://www.graalvm.org/truffle/javadoc/org/graalvm/polyglot/package-summary.html

GraalVM Docs – Polyglot – https://www.graalvm.org/docs/reference-manual/polyglot/

Mixing NodeJS and OpenJDK – Language interop and vertical architecture -Mike Hearn – https://blog.plan99.net/vertical-architecture-734495f129c4

Enhance your Java Spring application with R data science Oleg Šelajev – https://medium.com/graalvm/enhance-your-java-spring-application-with-r-data-science-b669a8c28bea

Awesome GraalVM: Create a Java API on top of a JavaScript library

GraalVM Archives on Medium – https://medium.com/graalvm/archive

GraalVM GitHub Repo – https://github.com/oracle/graal

GraalVM Project WebSite – https://www.graalvm.org/

The post Leverage NPM JavaScript Module from Java application using GraalVM appeared first on AMIS, Data Driven Blog.

Oracle Database: Write arbitrary log messages to the syslog from PL/SQL

$
0
0

Syslog is a standard for message logging, often employed in *NIX environments. It allows separation of the software that generates messages, the system that stores them, and the software that reports and analyzes them. Each message is labeled with a facility code, indicating the software type generating the message, and assigned a severity level.

In *NIX systems syslog messages often end up in /var/log/messages. You can configure these messages to be forwarded to remote syslog daemons. Also a pattern which often seen is that the local log files are monitored and processed by an agent.

Oracle database audit information can be send to the syslog daemon. See for example the audit functionality. If you however want to use a custom format in the syslog or write an entry to the syslog which is not related to an audit action, this functionality will not suffice. How to achieve this without depending on the audit functionality is described in this blog post. PL/SQL calls database hosted Java code. This code executes an UDP call to the local syslog. You can find the code here.

Syslog functionality

There are different ways to send data to the syslog.

  • By using the logger command
  • Using TCP
  • Using UDP

You can execute shell commands from the Oracle database by wrapping them in Java or C or by using DBMS_PIPE (see here). When building a command-line however to log an arbitrary message, there is the danger that the message will contain characters which might break your logger command or worse, do dangerous things on your OS as the user running your database. You can first write a file to a local directory from the database and send that using the logger command, but this is a roundabout way. Using UDP and TCP is more secure and probably also performs better (although I haven’t tested this).

TCP in contrast to UDP works with an acknowledgement of a message. This is done in order to provide the sender some confirmation the packet has been received. With UDP, it is ‘fire-and-forget’ for the sender and you do not know if the receiver has received the packet. UDP is faster as you can imagine since no confirmation is send. 

In this example I will be using UDP to send a message to the local syslog. In order to allow this, rsyslog needs to be installed. 

For Fedora this can be done with:

dnf install rsyslog

Next configure UDP access by uncommenting the below two lines in /etc/rsyslog.conf

$ModLoad imudp
$UDPServerRun 514

If the daemon is not running, start it with:

systemctl start rsyslog

If you want to start it on boot, do:

systemctl enable rsyslog

You might have to configure your firewall to allow access from localhost/127.0.0.1 to localhost/127.0.0.1 UDP port 514

Java in the Oracle Database

The Oracle database has out of the box packages to do TCP (DBMS_TCP). However there is no such functionality for UDP available. In order to provide this, I’ve written a small Java class. It can be installed using just PL/SQL code. I’ve tried this on Oracle DB 19c (using the following Vagrant box) but it is likely to work on older versions.

Create a testuser

First create a testuser and grant it the required permissions:

create user testuser identified by Welcome01;
/
grant connect,dba,resource to testuser;
/
begin
dbms_java.grant_permission( 'TESTUSER', 'SYS:java.net.SocketPermission', 'localhost:0', 'listen,resolve' );
dbms_java.grant_permission( 'TESTUSER', 'SYS:java.net.SocketPermission', '127.0.0.1:514', 'connect,resolve' );
end;
/

Register the Java code

Now create the Java code under the user TESTUSER. The below code is PL/SQL which can be executed in the database to store and compile the Java code.

SET DEFINE OFF
create or replace and compile
 java source named "SysLogger"
 as

import java.io.*;
import java.net.*;

public class Syslog {

	// Priorities.
	public static final int LOG_EMERG = 0; // system is unusable
	public static final int LOG_ALERT = 1; // action must be taken immediately
	public static final int LOG_CRIT = 2; // critical conditions
	public static final int LOG_ERR = 3; // error conditions
	public static final int LOG_WARNING = 4; // warning conditions
	public static final int LOG_NOTICE = 5; // normal but significant condition
	public static final int LOG_INFO = 6; // informational
	public static final int LOG_DEBUG = 7; // debug-level messages
	public static final int LOG_PRIMASK = 0x0007; // mask to extract priority

	// Facilities.
	public static final int LOG_KERN = (0 << 3); // kernel messages
	public static final int LOG_USER = (1 << 3); // random user-level messages
	public static final int LOG_MAIL = (2 << 3); // mail system
	public static final int LOG_DAEMON = (3 << 3); // system daemons
	public static final int LOG_AUTH = (4 << 3); // security/authorization
	public static final int LOG_SYSLOG = (5 << 3); // internal syslogd use
	public static final int LOG_LPR = (6 << 3); // line printer subsystem
	public static final int LOG_NEWS = (7 << 3); // network news subsystem
	public static final int LOG_UUCP = (8 << 3); // UUCP subsystem
	public static final int LOG_CRON = (15 << 3); // clock daemon
	// Other codes through 15 reserved for system use.
	public static final int LOG_LOCAL0 = (16 << 3); // reserved for local use
	public static final int LOG_LOCAL1 = (17 << 3); // reserved for local use
	public static final int LOG_LOCAL2 = (18 << 3); // reserved for local use
	public static final int LOG_LOCAL3 = (19 << 3); // reserved for local use
	public static final int LOG_LOCAL4 = (20 << 3); // reserved for local use
	public static final int LOG_LOCAL5 = (21 << 3); // reserved for local use
	public static final int LOG_LOCAL6 = (22 << 3); // reserved for local use
	public static final int LOG_LOCAL7 = (23 << 3); // reserved for local use

	public static final int LOG_FACMASK = 0x03F8; // mask to extract facility

	// Option flags.
	public static final int LOG_PID = 0x01; // log the pid with each message
	public static final int LOG_CONS = 0x02; // log on the console if errors
	public static final int LOG_NDELAY = 0x08; // don't delay open
	public static final int LOG_NOWAIT = 0x10; // don't wait for console forks

	private static final int DEFAULT_PORT = 514;

	/// Use this method to log your syslog messages. The facility and
	// level are the same as their Unix counterparts, and the Syslog
	// class provides constants for these fields. The msg is what is
	// actually logged.
	// @exception SyslogException if there was a problem
	@SuppressWarnings("deprecation")
	public static String syslog(String hostname, Integer port, String ident, Integer facility, Integer priority, String msg) {
		try {
			InetAddress address;
			if (hostname == null) {
				address = InetAddress.getLocalHost();
			} else {
				address = InetAddress.getByName(hostname);
			}

			if (port == null) {
				port = new Integer(DEFAULT_PORT);
			}
			if (facility == null) {
				facility = 1; // means user-level messages
			}
			if (ident == null)
				ident = new String(Thread.currentThread().getName());

			int pricode;
			int length;
			int idx;
			byte[] data;
			String strObj;

			pricode = MakePriorityCode(facility, priority);
			Integer priObj = new Integer(pricode);

			length = 4 + ident.length() + msg.length() + 1;
			length += (pricode > 99) ? 3 : ((pricode > 9) ? 2 : 1);

			data = new byte[length];

			idx = 0;
			data[idx++] = '<';

			strObj = Integer.toString(priObj.intValue());
			strObj.getBytes(0, strObj.length(), data, idx);
			idx += strObj.length();

			data[idx++] = '>';

			ident.getBytes(0, ident.length(), data, idx);
			idx += ident.length();

			data[idx++] = ':';
			data[idx++] = ' ';

			msg.getBytes(0, msg.length(), data, idx);
			idx += msg.length();

			data[idx] = 0;

			DatagramPacket packet = new DatagramPacket(data, length, address, port);
			DatagramSocket socket = new DatagramSocket();
			socket.send(packet);
			socket.close();
		} catch (IOException e) {
			return "error sending message: '" + e.getMessage() + "'";
		}
		return "";
	}

	private static int MakePriorityCode(int facility, int priority) {
		return ((facility & LOG_FACMASK) | priority);
	}
}
/

Make the Java code available from PL/SQL

create or replace
procedure SYSLOGGER(p_hostname in varchar2, p_port in number, p_ident in varchar2, p_facility in number, p_priority in number, p_msg in varchar2)
as
language java
name 'Syslog.syslog(java.lang.String,java.lang.Integer,java.lang.String,java.lang.Integer,java.lang.Integer,java.lang.String)';

Test the Java code

DECLARE
  P_HOSTNAME VARCHAR2(200);
  P_PORT NUMBER;
  P_IDENT VARCHAR2(200);
  P_FACILITY NUMBER;
  P_PRIORITY NUMBER;
  P_MSG VARCHAR2(200);
BEGIN
  P_HOSTNAME := NULL;
  P_PORT := NULL;
  P_IDENT := 'Syslogtest';
  P_FACILITY := NULL;
  P_PRIORITY := 1;
  P_MSG := 'Hi there';

  SYSLOGGER(
    P_HOSTNAME => P_HOSTNAME,
    P_PORT => P_PORT,
    P_IDENT => P_IDENT,
    P_FACILITY => P_FACILITY,
    P_PRIORITY => P_PRIORITY,
    P_MSG => P_MSG
  );
END;

Now check your local syslog (often /var/log/messages) for entries like

Oct 26 14:31:22 oracle-19c-vagrant Syslogtest: Hi there

Considerations

TCP instead of UDP

This example uses UDP. UDP does not have guaranteed delivery. You can just as well implement this with TCP. Using TCP you do not require custom Java code in the database but you do require Access Control List (ACL) configuration and have to write PL/SQL (using UTL_TCP) to do the calls to rsyslog. An example on how this can be implemented, can be found here.

Custom audit logging to syslog

Using the Oracle feature Fine Grained Auditing (FGA), you can configure a handler procedure which is called when a policy is triggered. Within this procedure you can call the PL/SQL which does syslog logging. The PL/SQL procedure has a SYS_CONTEXT available which contains information like the user, proxy user and even the SQL query and bind variables which triggered the policy (when using DB+EXTENDED logging).

If you want to store what a certain user has seen, you can use Flashback Data Archive (FDA) in addition to FGA. This feature is available for free in Oracle DB 12c and higher. In older versions this depends on the Advanced Compression option. If you combine the FDA and the FGA, you can execute the original query on the data at a certain point in time (on historic data). You can even store the SYS_CONTEXT in the FDA which allows for a more accurate reproduction of what happened in the past. When using these options, mind the performance impact and create specific tablespaces for the FDA and FGA data.

The post Oracle Database: Write arbitrary log messages to the syslog from PL/SQL appeared first on AMIS, Data Driven Blog.

Using Azure Artifacts for your own NPM modules

$
0
0

Currently I am working on a customer project in which we build a lot of Azure (serverless) functions, mostly in Javascript. Sometime ago we foresaw that we need some shared functionality which was to be used in multiple functions. So wouldn’t it be a good idea to create some shared library to put this shared functionality in?

Because the functionality is to be used in our Javascript functions, the most logical step would be to create a NPM (Node Package Manager) module. But we do not want this module to be public available, so the public NPM registry can not be used.

In comes Azure Artifacts, which is part of Azure DevOps. As we are already using Azure DevOps for our repositories and CI/CD pipelines, using Artifacts should be an easy step. And, spoiler alert, it is.

Despite the name, you might think Azure Artifacts is all about build artifacts like Artifactory, but the main purpose is a multi language package registry with support for .Net (dotnet/NuGet), Java (Maven/Gradle), Python (pip/twine) and Javascript (npm). You have also the option to publish universal packages, but I have not used that yet.

In this article I will show you how to create your own NPM module, publish it to Azure Artifacts and use it in your own node.js code. The module will be a wrapper interface for working with Azure Blob storage.

Prerequisites

To follow this tutorial you need the following:

  • An Azure account. If you do not have access to one, you can create a free account at https://azure.microsoft.com/en-us/free/
  • An Azure DevOps account. If you do not have access to one, you can create a free account at https://dev.azure.com.
  • Visual Studio Code (vscode).
  • Node.JS and NPM. We use Node.js v12 LTS as this this default version for Javascript Azure function v3.
  • In vscode add the following extentions:
    • Azure Account
    • Azure Functions
    • Optionally you can install ESLint for your coding style

Setup

Login on https://dev.azure.com.

Select the project in which you want to create your artifacts. If this your first login, you will need to create a project first.

You should see the home page of the project with in the left sidebar the different Azure DevOps modules with Artifacts at the bottom.

Go to Artifacts.

Press Create Feed.

Give the feed a name, keep the checkbox “Include package from common public sources” checked and press Create.

We will return shortly to this page, but first we need to create a folder on your local system in which to put the source code. Then start vscode and open this folder.

Start the integrated terminal (press ctrl + `).

And type:

npm init

Answer the questions. And choose a lower version number than the proposed 1.0.0. Like:

Important to note is that the version you enter here will be the version of the artifact in the Artifact repository when you first publish the artifact and you can not overwrite a version, so every time you publish an update you must increase the version. So start in the beginning for example with 0.1.0.

Next: go back to the Azure DevOps page and press the ‘Connect to feed’ button.

Choose npm as we are creating an npm module.

Press the ‘Get the tools’ button.

Because you should have already Node.js and npm installed (otherwise you could not do the npm init), run the command as mentioned in step 2:

npm install -g vsts-npm-auth --registry https://registry.npmjs.com --always-auth false
Note: if you get an error that you are not permitted to perform this operation (on Windows): open a separate Powershell window as administrator and re-run the command.

After running the command follow the steps as mentioned under Project setup. On Windows create a new file in vscode named .npmrc and set the content to whatever is mentioned in the first step, like:

registry=https://pkgs.dev.azure.com/<account>/<feedname>/_packaging/tutorial/npm/registry/
always-auth=true

Save the file and now you can authenticate with Azure DevOps artifacts by running, in the integrated terminal the following command:

vsts-npm-auth -config .npmrc

You will need to login with your Microsoft credentials again. And now you are ready to get started.

Create a new file: index.js and past in the following:

// Copyright (c) Henk Jan van Wijk. All rights reserved.
// Licensed under the MIT License.

const { BlobServiceClient, StorageSharedKeyCredential } = require('@azure/storage-blob')

/**
 * Utility class for working with Blob container in Azure storage
 *
 * @class BlobContainer
 */
class BlobContainer {
  /**
   * Creates an instance of BlobContainer.
   * Use either shared key credentials: accountName + accountKey or SAS (accountName + sasToken)
   * as authentication method.
   * @param {object} params - Inputparameters
   * @param {string} params.accountName - Storage account name
   * @param {string} [params.accountKey] - Storage account key
   * @param {string} [params.sasToken] - Shared access signatures (SAS) token
   * @memberof BlobContainer
   */
  constructor ({ accountName, accountKey = null, sasToken = null }) {
    this.accountName = accountName
    this.accountKey = accountKey
    this.sasToken = sasToken
    try {
      if (this.accountName &amp;&amp; this.accountKey) {
        this.sharedKeyCredential = new StorageSharedKeyCredential(this.accountName, this.accountKey)
        this.client = new BlobServiceClient(`https://${this.accountName}.blob.core.windows.net`,
          this.sharedKeyCredential
        )
      } else if (this.accountName &amp;&amp; this.sasToken) {
        this.client = new BlobServiceClient(`https://${this.accountName}.blob.core.windows.net?${this.sasToken}`)
      } else {
        throw new StorageError(401, 'Missing authentication')
      }
    } catch (error) {
      throw new StorageError(error.statusCode || 500, error.message)
    }
  }

  /**
   * Create a new blob container
   *
   * @param {object} params - Inputparameters
   * @param {string} params.containerName - Name of the container
   * @returns When succesfull: requestId
   * @memberof BlobContainer
   */
  async createContainer ({ containerName }) {
    try {
      const containerClient = this.client.getContainerClient(containerName)
      const createContainerResponse = await containerClient.create()
      console.log(`Create container ${containerName} successfully`, createContainerResponse.requestId)
      return createContainerResponse.requestId
    } catch (error) {
      throw new StorageError(error.statusCode || 500, error.message)
    }
  }

  /**
   * Create a new blob in a blob container
   *
   * @param {object} params - Inputparameters
   * @param {string} params.containerName - Name of the container
   * @param {string} params.blobName - Name of the blob to create
   * @param {any} params.content - Content of the blob
   * @returns When succesfull: requestId
   * @memberof BlobContainer
   */
  async createBlob ({ containerName, blobName, content }) {
    try {
      const containerClient = this.client.getContainerClient(containerName)
      const blockBlobClient = containerClient.getBlockBlobClient(blobName)
      const uploadBlobResponse = await blockBlobClient.upload(content, Buffer.byteLength(content))
      console.log(`Upload block blob ${blobName} successfully`, uploadBlobResponse.requestId)
      return uploadBlobResponse.requestId
    } catch (error) {
      throw new StorageError(error.statusCode || 500, error.message)
    }
  }

  /**
   * List all blobs in a blob container
   *
   * @param {object} params - Inputparameters
   * @param {string} params.containerName - Name of the container
   * @returns {array} - list of blobs
   * @memberof BlobContainer
   */
  async listBlobs ({ containerName }) {
    const bloblist = []
    try {
      const containerClient = this.client.getContainerClient(containerName)
      for await (const blob of containerClient.listBlobsFlat()) {
        bloblist.push(blob)
      }
      return bloblist
    } catch (error) {
      throw new StorageError(error.statusCode || 500, error.message)
    }
  }

  /**
   * Get the content of a blob
   *
   * @param {object} params - Inputparameters
   * @param {string} params.containerName - Name of the container
   * @param {string} params.blobName - Name of the blob to create
   * @returns {string} - content of blob
   * @memberof BlobContainer
   */
  async getBlobContent ({ containerName, blobName }) {
    // Get blob content from position 0 to the end
    // In Node.js, get downloaded data by accessing downloadBlockBlobResponse.readableStreamBody
    try {
      const containerClient = this.client.getContainerClient(containerName)
      const blockBlobClient = containerClient.getBlockBlobClient(blobName)
      const downloadBlockBlobResponse = await blockBlobClient.download(0)
      const content = await streamToString(downloadBlockBlobResponse.readableStreamBody)
      return content
    } catch (error) {
      throw new StorageError(error.statusCode || 500, error.message)
    }
  }

  /**
   * Delete a blob with all its snapshots
   *
   * @param {object} params - Inputparameters
   * @param {string} params.containerName - Name of the container
   * @param {string} params.blobName - Name of the blob to create
   * @returns {boolean} - Return True if succesfull, otherwise an error will be raised
   * @memberof BlobContainer
   */
  async deleteBlob ({ containerName, blobName }) {
    try {
      const containerClient = this.client.getContainerClient(containerName)
      const blockBlobClient = containerClient.getBlockBlobClient(blobName)
      await blockBlobClient.delete()
      return true
    } catch (error) {
      throw new StorageError(error.statusCode || 500, error.message)
    }
  }
}

class StorageError extends Error {
  constructor (code, message) {
    super(message)
    this.code = code
  }
}

// A helper method used to read a Node.js readable stream into string
async function streamToString (readableStream) {
  return new Promise((resolve, reject) => {
    const chunks = []
    readableStream.on('data', (data) => {
      chunks.push(data.toString())
    })
    readableStream.on('end', () => {
      resolve(chunks.join(''))
    })
    readableStream.on('error', reject)
  })
}

module.exports = {
  BlobContainer
}

This is a simplified file of a more complete version which can be found on Github. The file follows the StandardJS coding style. On Github you can also find the eslint configuration for this.

Add the dependencies by running in the integrated terminal:

npm install @azure/storage-blob --save

This will add a line to your package.json and installs all dependencies locally in node_modules.

It also creates a package-lock.json file which you always should commit to your repository.

Now publish the library to Azure Artifacts by running:

npm publish

You should get an output like:

PS C:\Projects\amis\amis-storage-lib-node> npm publish
npm notice
npm notice package: amis-storage-lib-node@0.1.0
npm notice === Tarball Contents ===
npm notice 5.7kB index.js
npm notice 303B package.json
npm notice === Tarball Details ===
npm notice name: amis-storage-lib-node
npm notice version: 0.1.0
npm notice package size: 1.6 kB
npm notice unpacked size: 6.0 kB
npm notice shasum: b6be74b45648ea7fd4f14b3e9c641a1d99d4e713
npm notice integrity: sha512-Vw1rJrFD3uK8G[…]G5Ka0Ufw/fCPw==
npm notice total files: 2
npm notice
amis-storage-lib-node@0.1.0

Now the package will be visible in Azure Artifacts. Have a look.

You will see that there a lot more libraries in the repository than just your library. That is because also all dependant node packages are installed with the versions as you have in your package-lock.json file.

When, after publishing, you want to update the code with a new version you can use the npm version commands, like npm version patch -m "Bump version to %s" to update the version patch level, e.g. from 0.1.0 to 0.1.1 and perform an git commit with the mentioned message. Or you just increase the version in package.json and commit the file yourself.

Now we can use this library in our code. You can create an Azure function in which to to do this, but for sake of this tutorial we will do a simple local testscript.

Create a new folder on your test, e.g. test-storage-lib and open this folder in vscode.

Do again an npm init and just keep the default values as we are only interested in creating a package.json file.

Next create the .npmrc file as we have done earlier.

Next install our package:

npm install amis-storage-lib-node --save
One note about the naming of the package: npm install will search first in our own Azure Artifacts package feed and then in the public npm registry. So keep in mind that the name of the library should be best globally unique. One way to do this is the follow the naming pattern: @name/package-name, for example @amis/storage-lib-node. This pattern is called scoped package. @name is effectively some kind of namespace. When you signup on the public npm registry you will get a scope assigned to make it clear that the package is made / owned by you. But you can use it also for your own packages in Azure Artifacts to mark them as your own packages.

Next create a new file index.js with the following content:

const { BlobContainer } = require('amis-storage-lib-node')

require('dotenv').config()

const config = {
  storageAccountName: process.env.STORAGE_ACCOUNT_NAME,
  storageAccountKey: process.env.STORAGE_ACCOUNT_KEY
}

const containerName = `testcontainer${new Date().getTime()}`
const container = new BlobContainer({
  accountName: config.storageAccountName,
  accountKey: config.storageAccountKey
})

const run = async (container) => {
  const resp1 = await container.createContainer({
    containerName: containerName
  })
  console.log(`Created a new blob container ${containerName}. RequestId = ${resp1}`)

  const resp2 = await container.createBlob({
    containerName: containerName,
    blobName: 'testblob.txt',
    content: 'Lorem ipsum dolor sit amet, consectetur adipiscing elit. Morbi eleifend.'
  })
  console.log(`Created blob: ${resp2}`)

  const listOfBlobs = await container.listBlobs({
    containerName: containerName
  })
  for (const blob of listOfBlobs) {
    console.log(`${blob.name} created on ${blob.properties.createdOn}`)
  }
}

run(container)
  .then(() => {
    console.log('Done.')
  })

Next create a file .env with the following content:

STORAGE_ACCOUNT_NAME=<name storage account>
STORAGE_ACCOUNT_KEY=<primary key storage account>

Fill in your storage account name and primary key which can be found on the Azure Portal on the storage account page, tab Access keys.

If you do not have created a storage account yet, create one first:

  1. Press the Create a resource icon
  2. Search for storage account
  3. Press the Create button
  4. Select your subscription and a resource group
  5. Enter a storage account name. Note the name must start with a letters, may only contain letters and numbers up to 24 characters.
  6. Select a location nearby, e.g. West Europe.
  7. Select replication: Locally-redundant storage (LRS)
  8. You can leave all other options to the default values
  9. Press Review + Create
  10. Press Create

After you have entered the account information in the .env file, you can test your script by running:

node .\index.js

You should see something like the following in your terminal window:

Create container testcontainer1590788180711 successfully 2098c0e5-901e-010f-0901-36c036000000
Created a new blob container testcontainer1590788180711. RequestId = 2098c0e5-901e-010f-0901-36c036000000
Upload block blob testblob.txt successfully 2098c101-901e-010f-2201-36c036000000
Created blob: 2098c101-901e-010f-2201-36c036000000
testblob.txt created on Fri May 29 2020 23:36:22 GMT+0200 (GMT+02:00)
Done.

Check in Azure Portal with your Storage account if the mentioned blob container is created with a blob inside.

To delete the blob or container, you need to do this manually in the Azure Portal or get the full package code from the mentioned Github page which includes these methods.

I hope that this tutorial has shown you how you can create your own Node.js NPM packages for common functionality in your projects and that is not too difficult to get started.

In a next article I will explain how you can add an Azure DevOps pipeline to publish the module code to Azure Artifacts instead of doing it by hand.

The post Using Azure Artifacts for your own NPM modules appeared first on AMIS, Data Driven Blog.

Azure Pipelines: publish to Azure Artifacts

$
0
0

This article is a follow-up to my previous article about using Azure Artifacts for own NPM modules.

In that article I showed how to create a NPM module by hand on your local system and publish it to Azure Artifacts. But now we like to integrate it into CI/CD, so in this article I will show you how you can create an Azure Pipeline in Azure DevOps for publishing NPM modules to Azure Artifacts.

Get started

To get started you need the code from the previous article.

Open Visual Studio Code with the NPM module project folder.

Git repository

If you have not done it yet, add the code to a repository on Azure DevOps (or GitHub or Bitbucket). We will use Azure Repos.

Login into your Azure Devops at https://dev.azure.com.

Navigate to Repos in the sidebar and press the + icon and choose New repository.

Repository type will be Git.

Enter a repository name, e.g. storage-lib-node.

Every repository should have a README. You can leave the checkmark or add one later.

Select to add a .gitignore of type Node.

And press Create.

create a repository

Click on the Clone button and copy the command line.

Go back to Visual Studio code and open the integrated terminal.

Type:

git init
git remote add –t master origin <copied command line>
git pull

Next open the .gitignore file and add .npmrc.

If you forget to add the .npmrc file to your .gitignore and it is added to the repository, the build step will fail when trying to install the npm modules on the build server with an authentication error!

Next run the following command in the integrated terminal:

git add .
git commit –m "Initial commit"
git push --set-upstream origin master

If you now go back to Azure Repos you will see that youre files have landed in Azure DevOps.

Azure Pipelines

Azure Pipelines are the CI/CD (continuous Integration / Continuous Deployment) part of the Azure DevOps.

You can create pipelines in the browser or by creating a yaml file directly in your project and import that file into Azure DevOps.

When creating a pipeline in the browser, you can choose between creating a yaml file (using a wizard) or the classic editor without yaml (only gui).

Using the classic editor is bit more straight forward to do, but normally you will want to use the yaml files so you have your pipeline alongside the code in your repository and have version control over it.

My collegue Joost Luijben has already written some articles about Azure DevOps, so if it is already familar to you just skip to the section about adding the steps for build and publish.

Creating the azure pipeline

When you start with Azure Pipelines I would suggest to use the browser to create your yaml file (it will be stored in your repository by the way). Later, when you have more experience and will reuse pipelines it will be easier to just create them in Visual Studio Code. You should then also install the Azure Pipeline extension then which gives you syntax highlighting and code completion.

In Azure DevOps navigate in the side bar to Pipelines.

When you have not created any pipelines yet you have the option to create the first one:

Press Create pipeline.

When you have already a pipeline, you can create a new one use the + icon in the sidebar.

Next we need to select where out code is located. So Choose Azure Repos Git.

Select your repository.

Next you need to select a starter pipeline. Choose Node.js.

Next you will see the created YAML file.

Replace it with:

# Build pipeline for publishing NPM (NodeJS) module to Azure Artifacts
# Stage 'publish' publishes the NPM module to Azure Artifacts
# Note: The current version is used as set in package.json is used. Make sure that you use a
#       version which is not yet used, other the stage will fail.

trigger:
- none

# Global variables for all stages
variables:
  vmImageNamePool: 'ubuntu-latest'

stages:
# Prepare
- stage: prepare
  displayName: Build and test artifacts
  jobs:
  - job: Build
    displayName: Build artifacts
    pool:
      vmImage: $(vmImageNamePool)
    steps:
      - task: NodeTool@0
        inputs:
          versionSpec: '12.x'
        displayName: 'Install Node.js v12'

      - script: |
          npm install
        displayName: 'Install NPM dependencies'

# Publish
- stage: publish
  displayName: Publish to Azure Artifacts
  jobs:
  - job: publish
    displayName: Publish NPM module
    pool:
      vmImage: $(vmImageNamePool)
    steps:
    - checkout: self
      persistCredentials: true
      clean: true

 We are almost finished.

First place the cursor at the end of the YAML file.

We need to add one more step (the publish step), but we need some assitance with that, so click on Show assistant on the right side.

azure_devops_show_assistant

In the search box, type: npm. And choose the npm task.

Next choose command: publish

Leave the working folder empty.

And with Registry location: select Registry I select here.

And choose as Target registry the registry you created in the previous article.

And press Add.

The task is added to the YAML file. It is probably not indended correctly, so you will need to correct this.

Move the task block to the right until the red underlining is gone.

Next press the down arrow next to Save and run and choose Save.

Enter a commit message and press Save.

If you now go back to Visuyal Studio code, you can do a git pull and you will see that an azure-pipeline.yml file is added to your repository.

Before you hit Run pipeline, note that the npm publish task will use the version number as it is stored in package.json. So if that version already exists in Azure Artifacts, the pipeline will fail.

So first update the version in your package.json file, commit the changes and push to Azure DevOps.

You can do the first 2 steps using this command:

npm version patch -m "Bump version to %s"

And run the pipeline.

Check Azure Artifacts if  the new version is published.

If you go back to the pipeline you will notice that is named (bt default) after the the repository the pipeline was created for. Change the name of the pipeline into for example “Build and publish NPM module storage-lib”. On the pipeline overview page click on the 3 dots to the right of the pipeline and choose “Rename/move”.

Enter a name and press Save. You can also place pipelines in folders, which can become useful when you have a lot of pipelines to group them in folders. Those folders can be seen on the pipeline overview page when you click on the All tab.

I would recommend that when you create a lot of pipelines, you set some naming guidelines to follow for your project otherwise it will become harder to find the pipeline you need. You could for instance choose to start the pipeline name with the type of pipeline, like “[INFRA]” for deploying infra structure components or “[LIB]” for build and publish libraries like NPM modules.

A next step to make this project better is to add unittests for both local development and incorporate it into the pipeline and publish the testresults and code coverage…

The post Azure Pipelines: publish to Azure Artifacts appeared first on AMIS, Data Driven Blog.

Quickest route to Your First Handson Experience with GraalVM – Katacoda Scenario with live environment and step by step tutorial

$
0
0

TLDR: This Katacoda Scenario has a live runtime environment with GraalVM 20.1 prepared for you including an easy to click-through step by step scenario that does a live demonstration of most aspects of GraalVM (modern Java runtime, Ahead of Time compilation to native executable, polyglot runtime platform and the platform for polyglot interoperability between many languages including Java, JavaScript, Python, Ruby, R and WebAssembly.

imageStarting a Java application as fast as any executable with a memory footprint rivaling the most lightweight runtime engines is quickly becoming a reality, through Graal VM and ahead of time compilation. This in turn is a major boost for using Java for microservice and serverless scenarios.

The second major pillar of GraalVM is its polyglot capability: it can run code in several languages – JVM and non-JVM such as JavaScript/ES, Python, Ruby, R or even your own DSL. More importantly: GraalVM enables code running in one language to interoperate with code in another language. GraalVM supports many and increasingly more forms of interoperability.

I have created a Katacoda Scenario – a live, browser based handson environment that is prepared for you for running GraalVM 20.1. The scenario comes with a step by step tutorial that allows you to explore the key features of GraalVM – simply by click on code snippets that are then executed. You will see the main capabilities and their practical applicability with hardly any effort. The scenario includes examples of ahead of time compilation and runtime interoperability of various non-JVM languages with Java.

The scenario uses the GraalVM Community Edition Docker Container Image for release 20.1. This screenshot is taken from the scenario, right after running the image and connecting into it. You can see the Java Runtime message in the screenshot – based on GraalVM and the node runtime message from the same GraalVM runtime.


image

The Katacoda environment includes an on line Visual Studio Code instance that makes it very easy to inspect and edit code.


image


The Katacoda scenario demonstrates these features:

  • JIT for Java
  • AOT for Java
  • Polyglot Runtime for Node, JS, Python, R, Ruby, …
  • Java interoperability to JavaScript, Python and more
  • Interoperability from Node/JavaScript, Python and other languages to Java
  • Multi directional polyglot interoperability

Note: the scenario environment is available for 60 minutes. You can restart the scenario as often as you like – starting from scratch with every restart.

The scenario features in the live demonstrations that I presented in the ACEs@home session that is shown in this YouTube recording:

image


Resources

YouTube recording of the ACEs@home presentation How and why GraalVM is quickly becoming relevant for you (June 2020) : https://youtu.be/UumJZGNeBiI 

Slide deck for the presentation How and why GraalVM is quickly becoming relevant for you  : https://www.slideshare.net/lucasjellema/how-and-why-graalvm-is-quickly-becoming-relevant-for-developers-aceshome-june-2020

The post Quickest route to Your First Handson Experience with GraalVM – Katacoda Scenario with live environment and step by step tutorial appeared first on AMIS, Data Driven Blog.

Quarkus – Supersonic Subatomic Java, setting up a demo environment using Vagrant and Oracle VirtualBox

$
0
0

In November 2019, I attended Devoxx Belgium together with other AMIS colleagues. The yearly gathering of over 3000 Java developers (numbers provided by Devoxx website) were Java and software development are the core themes.

At Devoxx, among other things, I learned about Quarkus and wanted to know more about it.

In this article I will share with you the steps I took, to set up a demo environment, so I could get started with Quarkus.

Quarkus

A Kubernetes Native Java stack tailored for OpenJDK HotSpot and GraalVM, crafted from the best of breed Java libraries and standards.
[https://quarkus.io/]

Container first
From the outset Quarkus has been designed around a container first philosophy. What this means in real terms is that Quarkus is optimised for low memory usage and fast startup times in the following ways:

  • First Class Support for Graal/SubstrateVM
    Substrate support has been an important part of the design for Quarkus from the beginning. When an application is compiled down to a native image it starts much faster and can run with a much smaller heap than a standard JVM. Quarkus are all tested in Substrate, and can run without the -H:+ReportUnsupportedElementsAtRuntime flag.
  • Build Time Metadata Processing
    As much processing as possible is done at build time, so your application will only contain the classes that are actually needed at runtime. In a traditional model all the classes required to perform the initial application deployment hang around for the life of the application, even though they are only used once. With Quarkus they are not even loaded into the production JVM. This results in less memory usage, and also faster startup time as all metadata processing has already been done.
  • Reduction in Reflection Usage
    As much as possible Quarkus tries to avoid reflection, reducing startup time and memory usage.
  • Native Image Pre Boot
    When running in a native image Quarkus pre-boots as much of the framework as possible during the native image build process. This means that the resulting native image has already run most of the startup code and serialized the result into the executable, resulting in even faster startup.

[https://quarkus.io/vision/container-first]

Unifies imperative and reactive
Combine both the familiar imperative code and the non-blocking reactive style when developing applications.

For years, the client-server architecture has been the de-facto standard to build applications. But a major shift happened. The one model rules them all age is over. A new range of applications and architecture styles has emerged and impacts how code is written and how applications are deployed and executed. HTTP microservices, reactive applications, message-driven microservices and serverless are now central players in modern systems.

Quarkus has been designed with this new world in mind, and provides first-class support for these different paradigms. Quarkus development model morphs to adapt itself to the type of application you are developing.
[https://quarkus.io/vision/continuum]

Developer joy
A cohesive platform for optimized developer joy:

  • Unified configuration
  • Zero config, live reload in the blink of an eye
  • Streamlined code for the 80% common usages, flexible for the 20%
  • No hassle native executable generation

Best-of-breed libraries and standards
Quarkus provides a cohesive, fun to use, full-stack framework by leveraging a growing list of over fifty best-of-breed libraries that you love and use. All wired on a standard backbone. Learn more about Quarkus Extensions.
[https://quarkus.io/vision/standards]

Quarkus is open. All dependencies of this project are available under the Apache Software License 2.0 or compatible license.
[https://quarkus.io/]

Quarkus at Devoxx Belgium 2019

Below, you can see the sessions about Quarkus at Devoxx Belgium 2019:

Birds of a Feather (Informal evening sessions of one hour, where like minded people get together and discuss technology):

  • “Quarkus Community BOF” by Georgios Andrianakis, Dimitris Andreadis, Emmanuel Bernard, Kamesh Sampath (Server Side Java)

Conference (Tech sessions of 50 minutes on a range of different technologies, practices and methodologies):

By the way, my colleague Lucas Jellema, wrote an article with the title “The state of Java [developers] – reflections on Devoxx 2019”.
[https://technology.amis.nl/2019/11/11/the-state-of-java-developers-reflections-on-devoxx-2019/]

Please see https://devoxx.com/#/ for more information about Devoxx events, also in other places in the world.

And I also wanted to mention that Devoxx Belgium 2020 is canceled.
Devoxx should be a place of joy, socialising and fun… not a place where people are afraid of getting infected. As a result we decided to cancel this years edition of Devoxx Belgium.

The next Devoxx Belgium is scheduled November 8th – 12th 2021.
[https://devoxx.be/]

GraalVM

GraalVM is a high-performance runtime that provides significant improvements in application performance and efficiency which is ideal for microservices. It is designed for applications written in Java, JavaScript, LLVM-based languages such as C and C++, and other dynamic languages. It removes the isolation between programming languages and enables interoperability in a shared runtime. It can run either standalone or in the context of OpenJDK, Node.js or Oracle Database.
[https://www.graalvm.org/getting-started/]

Quarkus – get started

In order to get started with Quarkus, there are some steps to be taken as can be seen in the picture above.
[https://quarkus.io/get-started/]

As I did before, on my Windows laptop, I wanted to use a demo environment within an Oracle VirtualBox appliance, with the help of Vagrant.

Based on the Quarkus guides I wanted to try out, I knew I also was going to need Kubernetes.
[https://quarkus.io/guides/deploying-to-kubernetes]

So, again I created a demo environment with K3s (with the Kubernetes Dashboard) on top of an Ubuntu guest Operating System within an Oracle VirtualBox appliance, in a similar way I described in a previous article.
[ https://technology.amis.nl/2020/01/15/rapidly-spinning-up-a-vm-with-ubuntu-and-k3s-with-the-kubernetes-dashboard-on-my-windows-laptop-using-vagrant-and-oracle-virtualbox/]

Once I had that up and running, I would extend it with the software mentioned in the steps above. But more about that, later on in this article.

For K3s (lightweight certified Kubernetes distribution) this time I wanted to use the Docker container runtime instead of containerd.

I had a look at the K3s documentation and found I had to do the following:

[https://rancher.com/docs/k3s/latest/en/advanced/#using-docker-as-the-container-runtime]

I also wanted to be able to use Docker as a non-root user.
[https://docs.docker.com/engine/install/linux-postinstall/#manage-docker-as-a-non-root-user]

So, based on the steps mentioned above, in the scripts directory I changed the content of the file k3s.sh to:

#!/bin/bash
echo "**** Begin installing k3s"

#Install
curl https://releases.rancher.com/install-docker/19.03.sh | sh
curl -sfL https://get.k3s.io | K3S_KUBECONFIG_MODE="644" sh -s - --docker

# Wait 2 minutes
echo "**** Waiting 2 minutes ..."
sleep 120

#List nodes
echo "**** List nodes"
kubectl get nodes
echo "**** List pods"
sudo k3s kubectl get pods --all-namespaces
echo "**** List Docker containers"
sudo docker ps

#use Docker as a non-root user
sudo usermod -aG docker vagrant

echo "**** End installing k3s"

In my existing demo environment, created when I wrote a previous article , I changed the content of the Vagrantfile to:
[https://technology.amis.nl/2020/01/15/rapidly-spinning-up-a-vm-with-ubuntu-and-k3s-with-the-kubernetes-dashboard-on-my-windows-laptop-using-vagrant-and-oracle-virtualbox/]

Vagrant.configure("2") do |config|
  config.vm.box = "ubuntu/bionic64"
  
  config.vm.define "ubuntu_k3s" do |ubuntu_k3s|
  
    config.vm.network "forwarded_port",
      guest: 8001,
      host:  8001,
      auto_correct: true
      
   config.vm.network "forwarded_port",
      guest: 8080,
      host:  8080,
      auto_correct: true
      
   config.vm.network "forwarded_port",
      guest: 8090,
      host:  8090,
      auto_correct: true
      
    config.vm.provider "virtualbox" do |vb|
        vb.name = "Ubuntu k3s"
        vb.memory = "8192"
        vb.cpus = "1"
      
      args = []
      config.vm.provision "k3s shell script", type: "shell",
          path: "scripts/k3s.sh",
          args: args
          
      args = []
      config.vm.provision "helm shell script", type: "shell",
          path: "scripts/helm.sh",
          args: args
          
      args = []
      config.vm.provision "dashboard shell script", type: "shell",
          path: "scripts/dashboard.sh",
          args: args
          
    end
    
  end

end

Here, you can see I added some ports needed for the Quarkus guided code examples, later on.

From the subdirectory named env on my Windows laptop, I opened a Windows Command Prompt (cmd) and typed: vagrant up

This command creates and configures guest machines according to your Vagrantfile.
[https://www.vagrantup.com/docs/cli/up.html]

With the following output (only showing the part about K3s):


    ubuntu_k3s: **** Begin installing k3s
    ubuntu_k3s:

    ubuntu_k3s: Processing triggers for ureadahead (0.100.0-21) …
    ubuntu_k3s: +
    ubuntu_k3s: sh
    ubuntu_k3s:  -c
    ubuntu_k3s:  docker version
    ubuntu_k3s: Client: Docker Engine – Community
    ubuntu_k3s:  Version:
    ubuntu_k3s:            19.03.12
    ubuntu_k3s:  API version:       1.40
    ubuntu_k3s:  Go version:        go1.13.10
    ubuntu_k3s:  Git commit:        48a66213fe
    ubuntu_k3s:  Built:             Mon Jun 22 15:45:36 2020
    ubuntu_k3s:  OS/Arch:           linux/amd64
    ubuntu_k3s:  Experimental:      false
    ubuntu_k3s: Server: Docker Engine – Community
    ubuntu_k3s:  Engine:
    ubuntu_k3s:   Version:          19.03.12
    ubuntu_k3s:   API version:      1.40 (minimum version 1.12)
    ubuntu_k3s:   Go version:       go1.13.10
    ubuntu_k3s:   Git commit:       48a66213fe
    ubuntu_k3s:   Built:            Mon Jun 22 15:44:07 2020
    ubuntu_k3s:   OS/Arch:          linux/amd64
    ubuntu_k3s:   Experimental:     false
    ubuntu_k3s:  containerd:
    ubuntu_k3s:   Version:          1.2.13
    ubuntu_k3s:   GitCommit:        7ad184331fa3e55e52b890ea95e65ba581ae3429
    ubuntu_k3s:  runc:
    ubuntu_k3s:   Version:          1.0.0-rc10
    ubuntu_k3s:   GitCommit:        dc9208a3303feef5b3839f4323d9beb36df0a9dd
    ubuntu_k3s:  docker-init:
    ubuntu_k3s:   Version:          0.18.0
    ubuntu_k3s:   GitCommit:        fec3683
    ubuntu_k3s:
    ubuntu_k3s: If you would like to use Docker as a non-root user, you should now consider
    ubuntu_k3s: adding your user to the “docker” group with something like:
    ubuntu_k3s:
    ubuntu_k3s:   sudo usermod -aG docker your-user
    ubuntu_k3s:
    ubuntu_k3s: Remember that you will have to log out and back in for this to take effect!
    ubuntu_k3s:
    ubuntu_k3s: WARNING: Adding a user to the “docker” group will grant the ability to run
    ubuntu_k3s:          containers which can be used to obtain root privileges on the
    ubuntu_k3s:          docker host.
    ubuntu_k3s:          Refer to https://docs.docker.com/engine/security/security/#docker-daemon-attack-surface
    ubuntu_k3s:          for more information.
    ubuntu_k3s: [INFO]  Finding release for channel stable
    ubuntu_k3s: [INFO]  Using v1.18.6+k3s1 as release
    ubuntu_k3s: [INFO]  Downloading hash https://github.com/rancher/k3s/releases/download/v1.18.6+k3s1/sha256sum-amd64.txt
    ubuntu_k3s: [INFO]  Downloading binary https://github.com/rancher/k3s/releases/download/v1.18.6+k3s1/k3s
    ubuntu_k3s: [INFO]  Verifying binary download
    ubuntu_k3s: [INFO]  Installing k3s to /usr/local/bin/k3s
    ubuntu_k3s: [INFO]  Creating /usr/local/bin/kubectl symlink to k3s
    ubuntu_k3s: [INFO]  Creating /usr/local/bin/crictl symlink to k3s
    ubuntu_k3s: [INFO]  Skipping /usr/local/bin/ctr symlink to k3s, command exists in PATH at /usr/bin/ctr
    ubuntu_k3s: [INFO]  Creating killall script /usr/local/bin/k3s-killall.sh
    ubuntu_k3s: [INFO]  Creating uninstall script /usr/local/bin/k3s-uninstall.sh
    ubuntu_k3s: [INFO]  env: Creating environment file /etc/systemd/system/k3s.service.env
    ubuntu_k3s: [INFO]  systemd: Creating service file /etc/systemd/system/k3s.service
    ubuntu_k3s: [INFO]  systemd: Enabling k3s unit
    ubuntu_k3s: Created symlink /etc/systemd/system/multi-user.target.wants/k3s.service → /etc/systemd/system/k3s.service.
    ubuntu_k3s: [INFO]  systemd: Starting k3s
    ubuntu_k3s: **** Waiting 2 minutes …
    ubuntu_k3s: **** List nodes
    ubuntu_k3s: NAME
    ubuntu_k3s:
    ubuntu_k3s:
    ubuntu_k3s: STATUS
    ubuntu_k3s:
    ubuntu_k3s: ROLES
    ubuntu_k3s:
    ubuntu_k3s: AGE
    ubuntu_k3s:
    ubuntu_k3s: VERSION
    ubuntu_k3s: ubuntu-bionic
    ubuntu_k3s:
    ubuntu_k3s: Ready
    ubuntu_k3s:     master   2m    v1.18.6+k3s1
    ubuntu_k3s: **** List pods
    ubuntu_k3s: NAMESPACE
    ubuntu_k3s:
    ubuntu_k3s: NAME
    ubuntu_k3s:
    ubuntu_k3s:
    ubuntu_k3s:
    ubuntu_k3s:
    ubuntu_k3s:
    ubuntu_k3s: READY
    ubuntu_k3s:
    ubuntu_k3s: STATUS
    ubuntu_k3s:
    ubuntu_k3s:
    ubuntu_k3s: RESTARTS   AGE
    ubuntu_k3s: kube-system   local-path-provisioner-6d59f47c7-qvdmm   1/1     Running             0          112s
    ubuntu_k3s: kube-system   coredns-8655855d6-mbgvq                  1/1     Running             0          112s
    ubuntu_k3s: kube-system   metrics-server-7566d596c8-dcf7s          1/1     Running             0          112s
    ubuntu_k3s: kube-system   svclb-traefik-kzwvv                      0/2     ContainerCreating   0          29s
    ubuntu_k3s: kube-system   helm-install-traefik-sk5fg               0/1     Completed           3          112s
    ubuntu_k3s: kube-system   traefik-758cd5fc85-z4qc6                 0/1     Running             0          29s
    ubuntu_k3s: **** List Docker containers
    ubuntu_k3s: CONTAINER ID
    ubuntu_k3s:
    ubuntu_k3s: IMAGE
    ubuntu_k3s:
    ubuntu_k3s:
    ubuntu_k3s:
    ubuntu_k3s:
    ubuntu_k3s: COMMAND
    ubuntu_k3s:
    ubuntu_k3s:
    ubuntu_k3s:
    ubuntu_k3s: CREATED
    ubuntu_k3s:
    ubuntu_k3s:
    ubuntu_k3s: STATUS
    ubuntu_k3s:
    ubuntu_k3s:
    ubuntu_k3s:   PORTS               NAMES
    ubuntu_k3s: 0333a6f0fbd2        897ce3c5fc8f                     “entry”                  1 second ago         Up Less than a second                       k8s_lb-port-443_svclb-traefik-kzwvv_kube-system_846ce2d8-50ff-4a30-88c0-ffb9327fff03_0
    ubuntu_k3s: 6d085d1fe4d8        rancher/klipper-lb               “entry”                  2 seconds ago        Up 1 second                                 k8s_lb-port-80_svclb-traefik-kzwvv_kube-system_846ce2d8-50ff-4a30-88c0-ffb9327fff03_0
    ubuntu_k3s: bae3746c5344        rancher/library-traefik          “/traefik –configfi…”   9 seconds ago        Up 7 seconds                                k8s_traefik_traefik-758cd5fc85-z4qc6_kube-system_cdcea26f-e6f5-4b08-a93f-7fa9514100d8_0
    ubuntu_k3s: 1aa8e957cf75        rancher/pause:3.1                “/pause”                 28 seconds ago       Up 26 seconds                               k8s_POD_traefik-758cd5fc85-z4qc6_kube-system_cdcea26f-e6f5-4b08-a93f-7fa9514100d8_0
    ubuntu_k3s: 4050f6c41033        rancher/pause:3.1                “/pause”                 28 seconds ago       Up 26 seconds
    ubuntu_k3s:
    ubuntu_k3s: k8s_POD_svclb-traefik-kzwvv_kube-system_846ce2d8-50ff-4a30-88c0-ffb9327fff03_0
    ubuntu_k3s: 0e5122a93a6c        rancher/metrics-server           “/metrics-server”        58 seconds ago       Up 58 seconds
    ubuntu_k3s:                                k8s_metrics-server_metrics-server-7566d596c8-dcf7s_kube-system_e889e47a-6dc2-4153-8f6d-6eb26aa26b42_0
    ubuntu_k3s: eadc6c496348        rancher/local-path-provisioner   “local-path-provisio…”   About a minute ago   Up About a minute                           k8s_local-path-provisioner_local-path-provisioner-6d59f47c7-qvdmm_kube-system_14cb4b03-9a4d-4418-9033-f44c88232b98_0
    ubuntu_k3s: 2164fc3be928        rancher/coredns-coredns          “/coredns -conf /etc…”   About a minute ago   Up About a minute                           k8s_coredns_coredns-8655855d6-mbgvq_kube-system_caf5cd7c-d511-45c7-a2d2-9852b199d1f2_0
    ubuntu_k3s: 28776d7c5bb7        rancher/pause:3.1                “/pause”                 About a minute ago   Up About a minute                           k8s_POD_metrics-server-7566d596c8-dcf7s_kube-system_e889e47a-6dc2-4153-8f6d-6eb26aa26b42_0
    ubuntu_k3s: 3e5a22d6a85a        rancher/pause:3.1                “/pause”                 About a minute ago   Up About a minute                           k8s_POD_coredns-8655855d6-mbgvq_kube-system_caf5cd7c-d511-45c7-a2d2-9852b199d1f2_0
    ubuntu_k3s: 73e925c1ddcf        rancher/pause:3.1                “/pause”                 About a minute ago   Up About a minute                           k8s_POD_local-path-provisioner-6d59f47c7-qvdmm_kube-system_14cb4b03-9a4d-4418-9033-f44c88232b98_0
    ubuntu_k3s: **** End installing k3s

I used vagrant ssh to connect into the running VM. Next, I used the following command on the Linux Command Prompt:

docker --version

With the following output:

Docker version 19.03.12, build 48a66213fe

This gave me the version of Docker, but also showed me, I could use Docker as a non-root user (being user vagrant).

Next, I continued with the steps to get started with Quarkus.

Step 1 You need an IDE

I installed IntelliJ IDEA Community Edition 2020.2 on my Windows laptop.
[https://www.jetbrains.com/idea/download/#section=windows]

Step 2a You need a JDK 8 or 11+ (any distribution)

On the “QUARKUS – GET STARTED” page, I clicked on the link “a JDK 8 or 11+” in step 2.
[https://adoptopenjdk.net/]

From there I clicked on the link “Installation”.
[https://adoptopenjdk.net/installation.html]

From here I could have downloaded the tar.gz file, suitable for my environment:

https://github.com/AdoptOpenJDK/openjdk11-binaries/releases/download/jdk-11.0.8%2B10/OpenJDK11U-jdk_x64_linux_hotspot_11.0.8_10.tar.gz

But on the “Installation” page, I navigated to the Installers, and more specific to part about the Linux DEB installer packages.

So, I used the following command on the Linux Command Prompt:

wget -qO - https://adoptopenjdk.jfrog.io/adoptopenjdk/api/gpg/key/public | sudo apt-key add -

With the following output:

OK

Next, I used the following command on the Linux Command Prompt:

sudo add-apt-repository --yes https://adoptopenjdk.jfrog.io/adoptopenjdk/deb/

With the following output:


Hit:1 http://archive.ubuntu.com/ubuntu bionic InRelease
Hit:2 http://archive.ubuntu.com/ubuntu bionic-updates InRelease
Hit:3 http://archive.ubuntu.com/ubuntu bionic-backports InRelease
Get:4 https://adoptopenjdk.jfrog.io/adoptopenjdk/deb bionic InRelease [6155 B]
Get:5 https://adoptopenjdk.jfrog.io/adoptopenjdk/deb bionic/main amd64 Packages [11.3 kB]
Hit:6 https://download.docker.com/linux/ubuntu bionic InRelease
Hit:7 http://security.ubuntu.com/ubuntu bionic-security InRelease
Fetched 17.5 kB in 5s (3273 B/s)
Reading package lists… Done

Next, I used the following command on the Linux Command Prompt:

sudo apt-get update

With the following output:


Hit:1 http://security.ubuntu.com/ubuntu bionic-security InRelease
Hit:2 https://download.docker.com/linux/ubuntu bionic InRelease
Hit:3 http://archive.ubuntu.com/ubuntu bionic InRelease
Hit:4 http://archive.ubuntu.com/ubuntu bionic-updates InRelease
Hit:5 http://archive.ubuntu.com/ubuntu bionic-backports InRelease
Hit:6 https://adoptopenjdk.jfrog.io/adoptopenjdk/deb bionic InRelease
Reading package lists… Done

Next, I used the following command on the Linux Command Prompt:

sudo apt-get install -y adoptopenjdk-11-hotspot

With the following output:


Reading package lists… Done
Building dependency tree
Reading state information… Done
The following additional packages will be installed:
  java-common libasound2 libasound2-data libxi6 libxrender1 libxtst6 x11-common
Suggested packages:
  default-jre libasound2-plugins alsa-utils
The following NEW packages will be installed:
  adoptopenjdk-11-hotspot java-common libasound2 libasound2-data libxi6 libxrender1 libxtst6 x11-common
0 upgraded, 8 newly installed, 0 to remove and 0 not upgraded.
Need to get 194 MB of archives.
After this operation, 325 MB of additional disk space will be used.
Get:1 http://archive.ubuntu.com/ubuntu bionic-updates/main amd64 java-common all 0.68ubuntu1~18.04.1 [14.5 kB]
Get:2 http://archive.ubuntu.com/ubuntu bionic-updates/main amd64 libasound2-data all 1.1.3-5ubuntu0.5 [38.7 kB]
Get:3 http://archive.ubuntu.com/ubuntu bionic-updates/main amd64 libasound2 amd64 1.1.3-5ubuntu0.5 [360 kB]
Get:4 http://archive.ubuntu.com/ubuntu bionic/main amd64 libxi6 amd64 2:1.7.9-1 [29.2 kB]
Get:5 http://archive.ubuntu.com/ubuntu bionic/main amd64 libxrender1 amd64 1:0.9.10-1 [18.7 kB]
Get:6 http://archive.ubuntu.com/ubuntu bionic-updates/main amd64 x11-common all 1:7.7+19ubuntu7.1 [22.5 kB]
Get:7 http://archive.ubuntu.com/ubuntu bionic/main amd64 libxtst6 amd64 2:1.2.3-1 [12.8 kB]
Get:8 https://adoptopenjdk.jfrog.io/adoptopenjdk/deb bionic/main amd64 adoptopenjdk-11-hotspot amd64 11.0.8+10-2 [194 MB]
Fetched 194 MB in 1min 34s (2070 kB/s)
Selecting previously unselected package java-common.
(Reading database … 65681 files and directories currently installed.)
Preparing to unpack …/0-java-common_0.68ubuntu1~18.04.1_all.deb …
Unpacking java-common (0.68ubuntu1~18.04.1) …
Selecting previously unselected package libasound2-data.
Preparing to unpack …/1-libasound2-data_1.1.3-5ubuntu0.5_all.deb …
Unpacking libasound2-data (1.1.3-5ubuntu0.5) …
Selecting previously unselected package libasound2:amd64.
Preparing to unpack …/2-libasound2_1.1.3-5ubuntu0.5_amd64.deb …
Unpacking libasound2:amd64 (1.1.3-5ubuntu0.5) …
Selecting previously unselected package libxi6:amd64.
Preparing to unpack …/3-libxi6_2%3a1.7.9-1_amd64.deb …
Unpacking libxi6:amd64 (2:1.7.9-1) …
Selecting previously unselected package libxrender1:amd64.
Preparing to unpack …/4-libxrender1_1%3a0.9.10-1_amd64.deb …
Unpacking libxrender1:amd64 (1:0.9.10-1) …
Selecting previously unselected package x11-common.
Preparing to unpack …/5-x11-common_1%3a7.7+19ubuntu7.1_all.deb …
dpkg-query: no packages found matching nux-tools
Unpacking x11-common (1:7.7+19ubuntu7.1) …
Selecting previously unselected package libxtst6:amd64.
Preparing to unpack …/6-libxtst6_2%3a1.2.3-1_amd64.deb …
Unpacking libxtst6:amd64 (2:1.2.3-1) …
Selecting previously unselected package adoptopenjdk-11-hotspot.
Preparing to unpack …/7-adoptopenjdk-11-hotspot_11.0.8+10-2_amd64.deb …
Unpacking adoptopenjdk-11-hotspot (11.0.8+10-2) …
Setting up libxi6:amd64 (2:1.7.9-1) …
Setting up libasound2-data (1.1.3-5ubuntu0.5) …
Setting up java-common (0.68ubuntu1~18.04.1) …
Setting up libasound2:amd64 (1.1.3-5ubuntu0.5) …
Setting up libxrender1:amd64 (1:0.9.10-1) …
Setting up x11-common (1:7.7+19ubuntu7.1) …
update-rc.d: warning: start and stop actions are no longer supported; falling back to defaults
Setting up libxtst6:amd64 (2:1.2.3-1) …
Setting up adoptopenjdk-11-hotspot (11.0.8+10-2) …
update-alternatives: using /usr/lib/jvm/adoptopenjdk-11-hotspot-amd64/bin/jaotc to provide /usr/bin/jaotc (jaotc) in auto mode
update-alternatives: using /usr/lib/jvm/adoptopenjdk-11-hotspot-amd64/bin/jar to provide /usr/bin/jar (jar) in auto mode
update-alternatives: using /usr/lib/jvm/adoptopenjdk-11-hotspot-amd64/bin/jarsigner to provide /usr/bin/jarsigner (jarsigner) in auto mode
update-alternatives: using /usr/lib/jvm/adoptopenjdk-11-hotspot-amd64/bin/java to provide /usr/bin/java (java) in auto mode
update-alternatives: using /usr/lib/jvm/adoptopenjdk-11-hotspot-amd64/bin/javac to provide /usr/bin/javac (javac) in auto mode
update-alternatives: using /usr/lib/jvm/adoptopenjdk-11-hotspot-amd64/bin/javadoc to provide /usr/bin/javadoc (javadoc) in auto mode
update-alternatives: using /usr/lib/jvm/adoptopenjdk-11-hotspot-amd64/bin/javap to provide /usr/bin/javap (javap) in auto mode
update-alternatives: using /usr/lib/jvm/adoptopenjdk-11-hotspot-amd64/bin/jcmd to provide /usr/bin/jcmd (jcmd) in auto mode
update-alternatives: using /usr/lib/jvm/adoptopenjdk-11-hotspot-amd64/bin/jconsole to provide /usr/bin/jconsole (jconsole) in auto mode
update-alternatives: using /usr/lib/jvm/adoptopenjdk-11-hotspot-amd64/bin/jdb to provide /usr/bin/jdb (jdb) in auto mode
update-alternatives: using /usr/lib/jvm/adoptopenjdk-11-hotspot-amd64/bin/jdeprscan to provide /usr/bin/jdeprscan (jdeprscan) in auto mode
update-alternatives: using /usr/lib/jvm/adoptopenjdk-11-hotspot-amd64/bin/jdeps to provide /usr/bin/jdeps (jdeps) in auto mode
update-alternatives: using /usr/lib/jvm/adoptopenjdk-11-hotspot-amd64/bin/jhsdb to provide /usr/bin/jhsdb (jhsdb) in auto mode
update-alternatives: using /usr/lib/jvm/adoptopenjdk-11-hotspot-amd64/bin/jimage to provide /usr/bin/jimage (jimage) in auto mode
update-alternatives: using /usr/lib/jvm/adoptopenjdk-11-hotspot-amd64/bin/jinfo to provide /usr/bin/jinfo (jinfo) in auto mode
update-alternatives: using /usr/lib/jvm/adoptopenjdk-11-hotspot-amd64/bin/jjs to provide /usr/bin/jjs (jjs) in auto mode
update-alternatives: using /usr/lib/jvm/adoptopenjdk-11-hotspot-amd64/bin/jlink to provide /usr/bin/jlink (jlink) in auto mode
update-alternatives: using /usr/lib/jvm/adoptopenjdk-11-hotspot-amd64/bin/jmap to provide /usr/bin/jmap (jmap) in auto mode
update-alternatives: using /usr/lib/jvm/adoptopenjdk-11-hotspot-amd64/bin/jmod to provide /usr/bin/jmod (jmod) in auto mode
update-alternatives: using /usr/lib/jvm/adoptopenjdk-11-hotspot-amd64/bin/jps to provide /usr/bin/jps (jps) in auto mode
update-alternatives: using /usr/lib/jvm/adoptopenjdk-11-hotspot-amd64/bin/jrunscript to provide /usr/bin/jrunscript (jrunscript) in auto mode
update-alternatives: using /usr/lib/jvm/adoptopenjdk-11-hotspot-amd64/bin/jshell to provide /usr/bin/jshell (jshell) in auto mode
update-alternatives: using /usr/lib/jvm/adoptopenjdk-11-hotspot-amd64/bin/jstack to provide /usr/bin/jstack (jstack) in auto mode
update-alternatives: using /usr/lib/jvm/adoptopenjdk-11-hotspot-amd64/bin/jstat to provide /usr/bin/jstat (jstat) in auto mode
update-alternatives: using /usr/lib/jvm/adoptopenjdk-11-hotspot-amd64/bin/jstatd to provide /usr/bin/jstatd (jstatd) in auto mode
update-alternatives: using /usr/lib/jvm/adoptopenjdk-11-hotspot-amd64/bin/keytool to provide /usr/bin/keytool (keytool) in auto mode
update-alternatives: using /usr/lib/jvm/adoptopenjdk-11-hotspot-amd64/bin/pack200 to provide /usr/bin/pack200 (pack200) in auto mode
update-alternatives: using /usr/lib/jvm/adoptopenjdk-11-hotspot-amd64/bin/rmic to provide /usr/bin/rmic (rmic) in auto mode
update-alternatives: using /usr/lib/jvm/adoptopenjdk-11-hotspot-amd64/bin/rmid to provide /usr/bin/rmid (rmid) in auto mode
update-alternatives: using /usr/lib/jvm/adoptopenjdk-11-hotspot-amd64/bin/rmiregistry to provide /usr/bin/rmiregistry (rmiregistry) in auto mode
update-alternatives: using /usr/lib/jvm/adoptopenjdk-11-hotspot-amd64/bin/serialver to provide /usr/bin/serialver (serialver) in auto mode
update-alternatives: using /usr/lib/jvm/adoptopenjdk-11-hotspot-amd64/bin/unpack200 to provide /usr/bin/unpack200 (unpack200) in auto mode
update-alternatives: using /usr/lib/jvm/adoptopenjdk-11-hotspot-amd64/lib/jexec to provide /usr/bin/jexec (jexec) in auto mode
Processing triggers for systemd (237-3ubuntu10.42) …
Processing triggers for man-db (2.8.3-2ubuntu0.1) …
Processing triggers for ureadahead (0.100.0-21) …
Processing triggers for libc-bin (2.27-3ubuntu1.2) …

From this output I could see that for the JAVA_HOME environment variable, I will be using later on in this article, I had to use the path: /usr/lib/jvm/adoptopenjdk-11-hotspot-amd64

Step 2b Optionally get GraalVM 20.1.0 for native compilation

On the “QUARKUS – GET STARTED” page, I clicked on the link “GraalVM” in step 2.
[https://www.graalvm.org/]

From there I clicked on the links “GET STARTED”, followed by “Install GraalVM” and “Linux”.
[https://www.graalvm.org/docs/getting-started/linux#installation-on-linux-platforms]

I wanted to use the java11 variant. As you can see, the graalvm-ce-java11-linux-aarch64-20.1.0, is currently under development and is provided for evaluation and testing use. This was fine by me.

On the “Linux” page, in part “Installation on Linux Platform”, I clicked on the link “GraalVM Releases repository on GitHub”.
[https://github.com/graalvm/graalvm-ce-builds/releases]

Then, I clicked on the link “GraalVM Community Edition 20.1.0”.
[https://github.com/graalvm/graalvm-ce-builds/releases/tag/vm-20.1.0]

To download the tar.gz file, I used the following command on the Linux Command Prompt:

cd /tmp
wget https://github.com/graalvm/graalvm-ce-builds/releases/download/vm-20.1.0/graalvm-ce-java11-linux-amd64-20.1.0.tar.gz

With the following output:


–2020-08-16 15:44:28–  https://github.com/graalvm/graalvm-ce-builds/releases/download/vm-20.1.0/graalvm-ce-java11-linux-amd64-20.1.0.tar.gz
Resolving github.com (github.com)… 140.82.118.3
Connecting to github.com (github.com)|140.82.118.3|:443… connected.
HTTP request sent, awaiting response… 302 Found
Location: https://github-production-release-asset-2e65be.s3.amazonaws.com/222889977/7d7c1380-99e7-11ea-8b4c-6129a7f24477?X-Amz-Algorithm=AWS4-HMAC-SHA256&X-Amz-Credential=AKIAIWNJYAX4CSVEH53A%2F20200816%2Fus-east-1%2Fs3%2Faws4_request&X-Amz-Date=20200816T154429Z&X-Amz-Expires=300&X-Amz-Signature=616197d68308f4c0f7da55e88451e1ce3e381613d20c328c161f7995863edd0f&X-Amz-SignedHeaders=host&actor_id=0&repo_id=222889977&response-content-disposition=attachment%3B%20filename%3Dgraalvm-ce-java11-linux-amd64-20.1.0.tar.gz&response-content-type=application%2Foctet-stream [following]
–2020-08-16 15:44:36–  https://github-production-release-asset-2e65be.s3.amazonaws.com/222889977/7d7c1380-99e7-11ea-8b4c-6129a7f24477?X-Amz-Algorithm=AWS4-HMAC-SHA256&X-Amz-Credential=AKIAIWNJYAX4CSVEH53A%2F20200816%2Fus-east-1%2Fs3%2Faws4_request&X-Amz-Date=20200816T154429Z&X-Amz-Expires=300&X-Amz-Signature=616197d68308f4c0f7da55e88451e1ce3e381613d20c328c161f7995863edd0f&X-Amz-SignedHeaders=host&actor_id=0&repo_id=222889977&response-content-disposition=attachment%3B%20filename%3Dgraalvm-ce-java11-linux-amd64-20.1.0.tar.gz&response-content-type=application%2Foctet-stream
Resolving github-production-release-asset-2e65be.s3.amazonaws.com (github-production-release-asset-2e65be.s3.amazonaws.com)… 52.216.111.19
Connecting to github-production-release-asset-2e65be.s3.amazonaws.com (github-production-release-asset-2e65be.s3.amazonaws.com)|52.216.111.19|:443… connected.
HTTP request sent, awaiting response… 200 OK
Length: 442680579 (422M) [application/octet-stream]
Saving to: ‘graalvm-ce-java11-linux-amd64-20.1.0.tar.gz’

graalvm-ce-java11-linux-amd64-20.1.0.tar.g 100%[=======================================================================================>] 422.17M  4.25MB/s    in 2m 48s


2020-08-16 15:47:25 (2.51 MB/s) – ‘graalvm-ce-java11-linux-amd64-20.1.0.tar.gz’ saved [442680579/442680579]

To unzip the archive in the /opt directory, I used the following command on the Linux Command Prompt:

sudo tar -xvf graalvm-ce-java11-linux-amd64-20.1.0.tar.gz -C /opt

With the following output:


graalvm-ce-java11-20.1.0/GRAALVM-README.md
graalvm-ce-java11-20.1.0/LICENSE.txt
graalvm-ce-java11-20.1.0/THIRD_PARTY_LICENSE.txt
graalvm-ce-java11-20.1.0/bin/gu
graalvm-ce-java11-20.1.0/bin/jvisualvm
graalvm-ce-java11-20.1.0/include/trufflenfi.h
graalvm-ce-java11-20.1.0/lib/installer/installer.jar
graalvm-ce-java11-20.1.0/lib/installer/components/polyglot/.registry
graalvm-ce-java11-20.1.0/lib/installer/bin/gu
graalvm-ce-java11-20.1.0/lib/visualvm/./platform/
graalvm-ce-java11-20.1.0/lib/visualvm/./etc/

graalvm-ce-java11-20.1.0/lib/server/classes.jsa
graalvm-ce-java11-20.1.0/lib/server/libjsig.so

From this output I could see that in order to prepend the GraalVM bin directory to the PATH environment variable, later on in this article, I had to use the path: /opt/graalvm-ce-java11-20.1.0/bin

Next, I used the following command on the Linux Command Prompt:

cd /opt
ls -latr

With the following output:


total 20
drwxr-xr-x  9 root root 4096 Aug 15 17:56 VBoxGuestAdditions-6.0.20
drwx–x–x  4 root root 4096 Aug 15 17:58 containerd
drwxr-xr-x 24 root root 4096 Aug 16 08:22 ..
drwxr-xr-x  5 root root 4096 Aug 16 17:39 .
drwxr-xr-x 10 root root 4096 Aug 16 17:39 graalvm-ce-java11-20.1.0

Remark:
You can also specify GraalVM as the JRE or JDK installation in your Java IDE.
[https://www.graalvm.org/docs/getting-started/linux#installation-on-linux-platforms]

On the “Linux” page, I also had a look at part “Install Additional Components”.
[https://www.graalvm.org/docs/getting-started/linux#install-additional-components]

I knew from reading through some of the guided code examples I wanted to do, I needed to install the native-image tool using gu install.
[https://quarkus.io/guides/building-native-image]

On the “QUARKUS – BUILDING A NATIVE EXECUTABLE” page, I clicked on the link “configured appropriately”.
[https://quarkus.io/guides/building-native-image#configuring-graalvm]

From this and the earlier output I could see that for the GRAALVM_HOME environment variable, I will be using later on in this article, I had to use the path: /opt/graalvm-ce-java11-20.1.0

To install the native-image tool, I used the following command on the Linux Command Prompt:

sudo ./opt/graalvm-ce-java11-20.1.0/bin/gu install native-image

With the following output:

sudo: ./opt/graalvm-ce-java11-20.1.0/bin/gu: command not found

Then I investigated the problem.

Next, I used the following command on the Linux Command Prompt:

cd /opt/graalvm-ce-java11-20.1.0/bin
ls -latr

With the following output:


total 632
-rwxr-xr-x  1 root root   6340 Apr 27 18:49 jvisualvm
-rwxr-xr-x  1 root root 122048 May 15 12:57 unpack200
-rwxr-xr-x  1 root root  13080 May 15 12:57 rmiregistry
-rwxr-xr-x  1 root root  13072 May 15 12:57 rmid
-rwxr-xr-x  1 root root  13072 May 15 12:57 rmic
-rwxr-xr-x  1 root root  13072 May 15 12:57 pack200
-rwxr-xr-x  1 root root  13072 May 15 12:57 keytool
-rwxr-xr-x  1 root root  13072 May 15 12:57 jstat
-rwxr-xr-x  1 root root  13120 May 15 12:57 jstack
-rwxr-xr-x  1 root root  13072 May 15 12:57 jshell
-rwxr-xr-x  1 root root  13072 May 15 12:57 jps
-rwxr-xr-x  1 root root  13072 May 15 12:57 jmod
-rwxr-xr-x  1 root root  13120 May 15 12:57 jmap
-rwxr-xr-x  1 root root  13120 May 15 12:57 jlink
-rwxr-xr-x  1 root root  13120 May 15 12:57 jjs
-rwxr-xr-x  1 root root  13120 May 15 12:57 jinfo
-rwxr-xr-x  1 root root  13072 May 15 12:57 jimage
-rwxr-xr-x  1 root root  13072 May 15 12:57 jhsdb
-rwxr-xr-x  1 root root  13072 May 15 12:57 jfr
-rwxr-xr-x  1 root root  13072 May 15 12:57 jdb
-rwxr-xr-x  1 root root  13072 May 15 12:57 jcmd
-rwxr-xr-x  1 root root  13120 May 15 12:57 javadoc
-rwxr-xr-x  1 root root  13056 May 15 12:57 java
-rwxr-xr-x  1 root root  13072 May 15 12:57 jarsigner
-rwxr-xr-x  1 root root  13072 May 15 12:57 jar
-rwxr-xr-x  1 root root  13072 May 15 12:57 serialver
-rwxr-xr-x  1 root root  13072 May 15 12:57 jstatd
-rwxr-xr-x  1 root root  13128 May 15 12:57 jrunscript
-rwxr-xr-x  1 root root  13072 May 15 12:57 jdeps
-rwxr-xr-x  1 root root  13072 May 15 12:57 jdeprscan
-rwxr-xr-x  1 root root  13128 May 15 12:57 jconsole
-rwxr-xr-x  1 root root  13072 May 15 12:57 javap
-rwxr-xr-x  1 root root  13120 May 15 12:57 javac
lrwxrwxrwx  1 root root     23 May 15 13:00 gu -> ../lib/installer/bin/gu
lrwxrwxrwx  1 root root     28 May 15 13:00 polyglot -> ../lib/polyglot/bin/polyglot
lrwxrwxrwx  1 root root     23 May 15 13:00 npx -> ../languages/js/bin/npx
lrwxrwxrwx  1 root root     23 May 15 13:00 npm -> ../languages/js/bin/npm
lrwxrwxrwx  1 root root     24 May 15 13:00 node -> ../languages/js/bin/node
lrwxrwxrwx  1 root root     25 May 15 13:00 lli -> ../languages/llvm/bin/lli
lrwxrwxrwx  1 root root     22 May 15 13:00 js -> ../languages/js/bin/js
drwxr-xr-x 10 root root   4096 Aug 16 17:39 ..
drwxr-xr-x  2 root root   4096 Aug 16 17:39 .

Next, I used the following command on the Linux Command Prompt:

cd /opt/graalvm-ce-java11-20.1.0/lib/installer/bin
sudo ./gu install native-image

With the following output:


Downloading: Component catalog from www.graalvm.org
Processing Component: Native Image
Downloading: Component native-image: Native Image  from github.com
Installing new component: Native Image (org.graalvm.native-image, version 20.1.0)

Step 3 You need Apache Maven 3.6.2+ or Gradle

On the “QUARKUS – GET STARTED” page, I clicked on the link “Apache Maven 3.6.2+” in step 3.
[https://maven.apache.org/]

From there I clicked on the link “Download”.

To download the tar.gz file, I used the following command on the Linux Command Prompt:

cd /tmp
wget http://apache.cs.uu.nl/maven/maven-3/3.6.3/binaries/apache-maven-3.6.3-bin.tar.gz

With the following output:


–2020-08-17 06:47:58–  http://apache.cs.uu.nl/maven/maven-3/3.6.3/binaries/apache-maven-3.6.3-bin.tar.gz
Resolving apache.cs.uu.nl (apache.cs.uu.nl)… 131.211.31.189
Connecting to apache.cs.uu.nl (apache.cs.uu.nl)|131.211.31.189|:80… connected.
HTTP request sent, awaiting response… 200 OK
Length: 9506321 (9.1M) [application/x-gzip]
Saving to: ‘apache-maven-3.6.3-bin.tar.gz’

apache-maven-3.6.3-bin.tar.gz              100%[=======================================================================================>]   9.07M  1.50MB/s    in 7.3s


2020-08-17 06:48:06 (1.25 MB/s) – ‘apache-maven-3.6.3-bin.tar.gz’ saved [9506321/9506321]

On the “Welcome to Apache Maven” page, I clicked on the link “Install”.
[ https://maven.apache.org/install.html]

To unzip the archive in the /opt directory, I used the following command on the Linux Command Prompt:

sudo tar xzvf apache-maven-3.6.3-bin.tar.gz -C /opt

With the following output:


apache-maven-3.6.3/README.txt
apache-maven-3.6.3/LICENSE
apache-maven-3.6.3/NOTICE
apache-maven-3.6.3/lib/
apache-maven-3.6.3/lib/cdi-api.license
apache-maven-3.6.3/lib/commons-cli.license
apache-maven-3.6.3/lib/commons-io.license
apache-maven-3.6.3/lib/commons-lang3.license
apache-maven-3.6.3/lib/guava.license
apache-maven-3.6.3/lib/guice.license
apache-maven-3.6.3/lib/jansi.license
apache-maven-3.6.3/lib/javax.inject.license
apache-maven-3.6.3/lib/jcl-over-slf4j.license
apache-maven-3.6.3/lib/jsoup.license
apache-maven-3.6.3/lib/jsr250-api.license
apache-maven-3.6.3/lib/org.eclipse.sisu.inject.license
apache-maven-3.6.3/lib/org.eclipse.sisu.plexus.license
apache-maven-3.6.3/lib/plexus-cipher.license
apache-maven-3.6.3/lib/plexus-component-annotations.license
apache-maven-3.6.3/lib/plexus-interpolation.license
apache-maven-3.6.3/lib/plexus-sec-dispatcher.license
apache-maven-3.6.3/lib/plexus-utils.license
apache-maven-3.6.3/lib/slf4j-api.license
apache-maven-3.6.3/boot/
apache-maven-3.6.3/boot/plexus-classworlds.license
apache-maven-3.6.3/lib/jansi-native/
apache-maven-3.6.3/lib/jansi-native/freebsd32/
apache-maven-3.6.3/lib/jansi-native/freebsd64/
apache-maven-3.6.3/lib/jansi-native/linux32/
apache-maven-3.6.3/lib/jansi-native/linux64/
apache-maven-3.6.3/lib/jansi-native/osx/
apache-maven-3.6.3/lib/jansi-native/windows32/
apache-maven-3.6.3/lib/jansi-native/windows64/
apache-maven-3.6.3/lib/jansi-native/freebsd32/libjansi.so
apache-maven-3.6.3/lib/jansi-native/freebsd64/libjansi.so
apache-maven-3.6.3/lib/jansi-native/linux32/libjansi.so
apache-maven-3.6.3/lib/jansi-native/linux64/libjansi.so
apache-maven-3.6.3/lib/jansi-native/osx/libjansi.jnilib
apache-maven-3.6.3/lib/jansi-native/windows32/jansi.dll
apache-maven-3.6.3/lib/jansi-native/windows64/jansi.dll
apache-maven-3.6.3/bin/m2.conf
apache-maven-3.6.3/bin/mvn.cmd
apache-maven-3.6.3/bin/mvnDebug.cmd
apache-maven-3.6.3/bin/mvn
apache-maven-3.6.3/bin/mvnDebug
apache-maven-3.6.3/bin/mvnyjp
apache-maven-3.6.3/conf/
apache-maven-3.6.3/conf/logging/
apache-maven-3.6.3/conf/logging/simplelogger.properties
apache-maven-3.6.3/conf/settings.xml
apache-maven-3.6.3/conf/toolchains.xml
apache-maven-3.6.3/lib/ext/
apache-maven-3.6.3/lib/jansi-native/
apache-maven-3.6.3/lib/ext/README.txt
apache-maven-3.6.3/lib/jansi-native/README.txt
apache-maven-3.6.3/boot/plexus-classworlds-2.6.0.jar
apache-maven-3.6.3/lib/maven-embedder-3.6.3.jar
apache-maven-3.6.3/lib/maven-settings-3.6.3.jar
apache-maven-3.6.3/lib/maven-settings-builder-3.6.3.jar
apache-maven-3.6.3/lib/maven-plugin-api-3.6.3.jar
apache-maven-3.6.3/lib/maven-model-3.6.3.jar
apache-maven-3.6.3/lib/maven-model-builder-3.6.3.jar
apache-maven-3.6.3/lib/maven-builder-support-3.6.3.jar
apache-maven-3.6.3/lib/maven-resolver-api-1.4.1.jar
apache-maven-3.6.3/lib/maven-resolver-util-1.4.1.jar
apache-maven-3.6.3/lib/maven-shared-utils-3.2.1.jar
apache-maven-3.6.3/lib/commons-io-2.5.jar
apache-maven-3.6.3/lib/guice-4.2.1-no_aop.jar
apache-maven-3.6.3/lib/guava-25.1-android.jar
apache-maven-3.6.3/lib/javax.inject-1.jar
apache-maven-3.6.3/lib/jsr250-api-1.0.jar
apache-maven-3.6.3/lib/plexus-utils-3.2.1.jar
apache-maven-3.6.3/lib/plexus-sec-dispatcher-1.4.jar
apache-maven-3.6.3/lib/plexus-cipher-1.7.jar
apache-maven-3.6.3/lib/slf4j-api-1.7.29.jar
apache-maven-3.6.3/lib/commons-lang3-3.8.1.jar
apache-maven-3.6.3/lib/maven-core-3.6.3.jar
apache-maven-3.6.3/lib/maven-repository-metadata-3.6.3.jar
apache-maven-3.6.3/lib/maven-artifact-3.6.3.jar
apache-maven-3.6.3/lib/maven-resolver-provider-3.6.3.jar
apache-maven-3.6.3/lib/maven-resolver-impl-1.4.1.jar
apache-maven-3.6.3/lib/maven-resolver-spi-1.4.1.jar
apache-maven-3.6.3/lib/org.eclipse.sisu.inject-0.3.4.jar
apache-maven-3.6.3/lib/plexus-component-annotations-2.1.0.jar
apache-maven-3.6.3/lib/maven-compat-3.6.3.jar
apache-maven-3.6.3/lib/plexus-interpolation-1.25.jar
apache-maven-3.6.3/lib/wagon-provider-api-3.3.4.jar
apache-maven-3.6.3/lib/org.eclipse.sisu.plexus-0.3.4.jar
apache-maven-3.6.3/lib/cdi-api-1.0.jar
apache-maven-3.6.3/lib/commons-cli-1.4.jar
apache-maven-3.6.3/lib/wagon-http-3.3.4-shaded.jar
apache-maven-3.6.3/lib/jsoup-1.12.1.jar
apache-maven-3.6.3/lib/jcl-over-slf4j-1.7.29.jar
apache-maven-3.6.3/lib/wagon-file-3.3.4.jar
apache-maven-3.6.3/lib/maven-resolver-connector-basic-1.4.1.jar
apache-maven-3.6.3/lib/maven-resolver-transport-wagon-1.4.1.jar
apache-maven-3.6.3/lib/maven-slf4j-provider-3.6.3.jar
apache-maven-3.6.3/lib/jansi-1.17.1.jar

In order to prepend the Maven bin directory to the PATH environment variable, later on in this article, I had to use the path: /opt/apache-maven-3.6.3/bin

Next, I used the following command on the Linux Command Prompt:

cd /opt
ls -latr

With the following output:


total 24
drwxr-xr-x  9 root root 4096 Aug 15 17:56 VBoxGuestAdditions-6.0.20
drwx–x–x  4 root root 4096 Aug 15 17:58 containerd
drwxr-xr-x 24 root root 4096 Aug 16 08:22 ..
drwxr-xr-x 10 root root 4096 Aug 16 17:39 graalvm-ce-java11-20.1.0
drwxr-xr-x  6 root root 4096 Aug 17 06:49 .
drwxr-xr-x  6 root root 4096 Aug 17 06:49 apache-maven-3.6.3

Step 4 Start Coding with Quarkus 1.7.0.Final

On the “QUARKUS – GET STARTED” page, I clicked on the link “Start Coding” in step 4.
[https://www.graalvm.org/]

So apparently the “get started” steps were al done and I could now start coding with Quarkus.

You can read more about the code guides I tried out in my next article.

But, I still had to set some environment variables in order for my demo environment to work properly.

Permanently setting environment variables for all users

A suitable file for environment variable settings that affect the system as a whole (rather than just a particular user) is /etc/environment. An alternative is to create a file for the purpose in the /etc/profile.d directory.

Files with the .sh extension in the /etc/profile.d directory get executed whenever a bash login shell is entered (e.g. when logging in from the console or over ssh), as well as by the DisplayManager when the desktop session loads.
[https://help.ubuntu.com/community/EnvironmentVariables]

In order to check the content of the /etc/environment file, I used the following command on the Linux Command Prompt:

cat /etc/environment

With the following output:

PATH=”/usr/local/sbin:/usr/local/bin:/usr/sbin:/usr/bin:/sbin:/bin:/usr/games:/usr/local/games”

In order to check the content of the /etc/profile.d directory, I used the following command on the Linux Command Prompt:

cd /etc/profile.d
ls -latr

With the following output:


total 36
-rw-r–r–  1 root root 1003 Dec 29  2015 cedilla-portuguese.sh
-rw-r–r–  1 root root 1557 Dec  4  2017 Z97-byobu.sh
-rw-r–r–  1 root root  664 Apr  2  2018 bash_completion.sh
-rw-r–r–  1 root root   96 Sep 27  2019 01-locale-fix.sh
-rwxr-xr-x  1 root root  873 Jun  3 02:08 Z99-cloudinit-warnings.sh
-rwxr-xr-x  1 root root 3417 Jun  3 02:08 Z99-cloud-locale-test.sh
-rw-r–r–  1 root root  825 Jul 10 14:00 apps-bin-path.sh
drwxr-xr-x  2 root root 4096 Aug 12 15:55 .
drwxr-xr-x 95 root root 4096 Aug 17 14:26 ..

In order to set some environment variables permanently, I used the following command on the Linux Command Prompt in order to create and edit the file myenvvars.sh:

sudo vim myenvvars.sh

And I changed the content to:


export JAVA_HOME=/usr/lib/jvm/adoptopenjdk-11-hotspot-amd64
export PATH=$JAVA_HOME/bin:$PATH
export GRAALVM_HOME=/opt/graalvm-ce-java11-20.1.0
export PATH=${GRAALVM_HOME}/bin:$PATH
export PATH=/opt/apache-maven-3.6.3/bin:$PATH


Next, I used vagrant ssh to connect into the running VM and checked if the environment variables were set correctly.

In order to check the Java version, I used the following command on the Linux Command Prompt:

java --version

With the following output:


openjdk 11.0.7 2020-04-14
OpenJDK Runtime Environment GraalVM CE 20.1.0 (build 11.0.7+10-jvmci-20.1-b02)
OpenJDK 64-Bit Server VM GraalVM CE 20.1.0 (build 11.0.7+10-jvmci-20.1-b02, mixed mode, sharing)

In order to check the Maven version, I used the following command on the Linux Command Prompt:

mvn -v

With the following output:


Apache Maven 3.6.3 (cecedd343002696d0abb50b32b541b8a6ba2883f)
Maven home: /opt/apache-maven-3.6.3
Java version: 11.0.8, vendor: AdoptOpenJDK, runtime: /usr/lib/jvm/adoptopenjdk-11-hotspot-amd64
Default locale: en, platform encoding: UTF-8
OS name: “linux”, version: “4.15.0-112-generic”, arch: “amd64”, family: “unix”

With these final checks I conclude this article. I shared with you the steps I took to set up a demo environment, so I could get started with Quarkus. In a next article, you can read more about the code guides I tried out.

The post Quarkus – Supersonic Subatomic Java, setting up a demo environment using Vagrant and Oracle VirtualBox appeared first on AMIS, Data Driven Blog.


Using Vagrant and shell scripts to further automate setting up my Quarkus demo environment from scratch and trying out a Quarkus code guide

$
0
0

In my previous article, I shared with you the steps I took, to set up a demo environment, so I could get started with Quarkus.
[https://technology.amis.nl/2020/08/17/quarkus-supersonic-subatomic-java-setting-up-a-demo-environment-using-vagrant-and-oracle-virtualbox]

In this article, you can read more about the steps I took to further automate setting up my demo environment and the Quarkus code guide “Quarkus – Creating Your First Application”, I tried out, including the hot deployment with background compilation.

As you may remember, the steps I took, to get started with Quarkus were:

  • Step 1 You need an IDE
    I installed IntelliJ IDEA Community Edition 2020.2 on my Windows laptop.

The next steps I installed on my demo environment with K3s (with the Kubernetes Dashboard) on top of an Ubuntu guest Operating System within an Oracle VirtualBox appliance:

  • Step 2a You need a JDK 8 or 11+ (any distribution)
    I installed AdoptOpenJDK 11 (LTS) HotSpot
  • Step 2b Optionally get GraalVM 20.1.0 for native compilation
    I installed GraalVM Community Edition 20.1.0
    I also installed the native-image tool (org.graalvm.native-image, version 20.1.0)
  • Step 3 You need Apache Maven 3.6.2+ or Gradle
    I installed Apache Maven 3.6.3
  • Step 4 Start Coding with Quarkus 1.7.0.Final
    This step didn’t need extra software to be installed.

Further automate setting up my demo environment

To further automate setting up my demo environment, I changed the content of Vagrantfile to:
[in bold, I highlighted the changes]

Vagrant.configure("2") do |config|
  config.vm.box = "ubuntu/bionic64"
  
  config.vm.define "ubuntu_k3s_quarkus" do |ubuntu_k3s_quarkus|
  
    config.vm.network "forwarded_port",
      guest: 8001,
      host:  8001,
      auto_correct: true
      
   config.vm.network "forwarded_port",
      guest: 8080,
      host:  8080,
      auto_correct: true
      
   config.vm.network "forwarded_port",
      guest: 8090,
      host:  8090,
      auto_correct: true
      
    config.vm.provider "virtualbox" do |vb|
        vb.name = "Ubuntu K3s Quarkus"
        vb.memory = "8192"
        vb.cpus = "1"
      
      args = []
      config.vm.provision "k3s shell script", type: "shell",
          path: "scripts/k3s.sh",
          args: args
          
      args = []
      config.vm.provision "helm shell script", type: "shell",
          path: "scripts/helm.sh",
          args: args
          
      args = []
      config.vm.provision "dashboard shell script", type: "shell",
          path: "scripts/dashboard.sh",
          args: args
          
      args = []
      config.vm.provision "quarkus shell script", type: "shell",
          path: "scripts/quarkus.sh",
          args: args
          
    end
    
  end

end

So, based on the manual steps mentioned in the previous article, in the scripts directory on my Windows laptop, I created the file quarkus.sh with the following content:

#!/bin/bash
echo "**** Begin installing Quarkus"

#Install AdoptOpenJDK
wget -qO - https://adoptopenjdk.jfrog.io/adoptopenjdk/api/gpg/key/public | sudo apt-key add -
sudo add-apt-repository --yes https://adoptopenjdk.jfrog.io/adoptopenjdk/deb/
sudo apt-get update
sudo apt-get install -y adoptopenjdk-11-hotspot

#Install GraalVM
cd /tmp
wget https://github.com/graalvm/graalvm-ce-builds/releases/download/vm-20.1.0/graalvm-ce-java11-linux-amd64-20.1.0.tar.gz
sudo tar -xvf graalvm-ce-java11-linux-amd64-20.1.0.tar.gz -C /opt

cd /opt/graalvm-ce-java11-20.1.0/lib/installer/bin
sudo ./gu install native-image

#Install Maven
cd /tmp
wget http://apache.cs.uu.nl/maven/maven-3/3.6.3/binaries/apache-maven-3.6.3-bin.tar.gz
sudo tar xzvf apache-maven-3.6.3-bin.tar.gz -C /opt

#Permanently setting environment variables for all users
sudo cp /vagrant/scripts/myenvvars.sh /etc/profile.d/myenvvars.sh

#Clean up
rm /tmp/graalvm-ce-java11-linux-amd64-20.1.0.tar.gz
rm /tmp/apache-maven-3.6.3-bin.tar.gz

echo "**** End installing Quarkus"

For permanently setting environment variables for all users, in the scripts directory I created the file myenvvars.sh with the following content:

export JAVA_HOME=/usr/lib/jvm/adoptopenjdk-11-hotspot-amd64
export GRAALVM_HOME=/opt/graalvm-ce-java11-20.1.0/
export PATH=$JAVA_HOME/bin:${GRAALVM_HOME}/bin:/opt/apache-maven-3.6.3/bin:$PATH

From the subdirectory named env on my Windows laptop, I opened a Windows Command Prompt (cmd) and typed: vagrant up

This command creates and configures guest machines according to your Vagrantfile.
[https://www.vagrantup.com/docs/cli/up.html]

With the following output (only showing the part about Quarkus):

ubuntu_k3s_quarkus: **** Begin installing Quarkus
ubuntu_k3s_quarkus: Warning: apt-key output should not be parsed (stdout is not a terminal)
ubuntu_k3s_quarkus: OK
ubuntu_k3s_quarkus: Hit:1 http://archive.ubuntu.com/ubuntu bionic InRelease
ubuntu_k3s_quarkus: Hit:2 http://security.ubuntu.com/ubuntu bionic-security InRelease
ubuntu_k3s_quarkus: Hit:3 http://archive.ubuntu.com/ubuntu bionic-updates InRelease
ubuntu_k3s_quarkus: Hit:4 https://download.docker.com/linux/ubuntu bionic InRelease
ubuntu_k3s_quarkus: Hit:5 http://archive.ubuntu.com/ubuntu bionic-backports InRelease
ubuntu_k3s_quarkus: Get:6 https://adoptopenjdk.jfrog.io/adoptopenjdk/deb bionic InRelease [6155 B]
ubuntu_k3s_quarkus: Get:7 https://adoptopenjdk.jfrog.io/adoptopenjdk/deb bionic/main amd64 Packages [11.3 kB]

ubuntu_k3s_quarkus: update-alternatives:
ubuntu_k3s_quarkus: using /usr/lib/jvm/adoptopenjdk-11-hotspot-amd64/lib/jexec to provide /usr/bin/jexec (jexec) in auto mode
ubuntu_k3s_quarkus: Processing triggers for systemd (237-3ubuntu10.42) …
ubuntu_k3s_quarkus: Processing triggers for man-db (2.8.3-2ubuntu0.1) …
ubuntu_k3s_quarkus: Processing triggers for ureadahead (0.100.0-21) …
ubuntu_k3s_quarkus: Processing triggers for libc-bin (2.27-3ubuntu1.2) …
ubuntu_k3s_quarkus: –2020-08-19 05:50:42– https://github.com/graalvm/graalvm-ce-builds/releases/download/vm-20.1.0/graalvm-ce-java11-linux-amd64-20.1.0.tar.gz

ubuntu_k3s_quarkus: Saving to: ‘graalvm-ce-java11-linux-amd64-20.1.0.tar.gz’
ubuntu_k3s_quarkus:
ubuntu_k3s_quarkus: 0K

ubuntu_k3s_quarkus: 2020-08-19 05:52:28 (4.04 MB/s) – ‘graalvm-ce-java11-linux-amd64-20.1.0.tar.gz’ saved [442680579/442680579]
ubuntu_k3s_quarkus: graalvm-ce-java11-20.1.0/GRAALVM-README.md
ubuntu_k3s_quarkus: graalvm-ce-java11-20.1.0/LICENSE.txt
ubuntu_k3s_quarkus: graalvm-ce-java11-20.1.0/THIRD_PARTY_LICENSE.txt
ubuntu_k3s_quarkus: graalvm-ce-java11-20.1.0/bin/gu
ubuntu_k3s_quarkus: graalvm-ce-java11-20.1.0/bin/jvisualvm

ubuntu_k3s_quarkus: graalvm-ce-java11-20.1.0/lib/server/libjsig.so
ubuntu_k3s_quarkus: Downloading: Component catalog from www.graalvm.org
ubuntu_k3s_quarkus: Processing Component: Native Image
ubuntu_k3s_quarkus: Downloading: Component native-image: Native Image from github.com

ubuntu_k3s_quarkus: Installing new component: Native Image (org.graalvm.native-image, version 20.1.0)
ubuntu_k3s_quarkus: –2020-08-19 05:52:45– http://apache.cs.uu.nl/maven/maven-3/3.6.3/binaries/apache-maven-3.6.3-bin.tar.gz
ubuntu_k3s_quarkus: Resolving apache.cs.uu.nl (apache.cs.uu.nl)…
ubuntu_k3s_quarkus: 131.211.31.189
ubuntu_k3s_quarkus: Connecting to apache.cs.uu.nl (apache.cs.uu.nl)|131.211.31.189|:80…
ubuntu_k3s_quarkus: connected.
ubuntu_k3s_quarkus: HTTP request sent, awaiting response…
ubuntu_k3s_quarkus: 200 OK
ubuntu_k3s_quarkus: Length:
ubuntu_k3s_quarkus: 9506321
ubuntu_k3s_quarkus: (9.1M)
ubuntu_k3s_quarkus: [application/x-gzip]
ubuntu_k3s_quarkus: Saving to: ‘apache-maven-3.6.3-bin.tar.gz’

ubuntu_k3s_quarkus: 2020-08-19 05:52:48 (3.42 MB/s) – ‘apache-maven-3.6.3-bin.tar.gz’ saved [9506321/9506321]

ubuntu_k3s_quarkus: apache-maven-3.6.3/lib/jansi-1.17.1.jar
ubuntu_k3s_quarkus: **** End installing Quarkus

I used vagrant ssh to connect into the running VM. Next, I used the following command on the Linux Command Prompt:

java --version

With the following output:

openjdk 11.0.8 2020-07-14
OpenJDK Runtime Environment AdoptOpenJDK (build 11.0.8+10)
OpenJDK 64-Bit Server VM AdoptOpenJDK (build 11.0.8+10, mixed mode)

In order to check the Maven version, I used the following command on the Linux Command Prompt:

mvn -v

With the following output:


Apache Maven 3.6.3 (cecedd343002696d0abb50b32b541b8a6ba2883f)
Maven home: /opt/apache-maven-3.6.3
Java version: 11.0.8, vendor: AdoptOpenJDK, runtime: /usr/lib/jvm/adoptopenjdk-11-hotspot-amd64
Default locale: en, platform encoding: UTF-8
OS name: “linux”, version: “4.15.0-112-generic”, arch: “amd64”, family: “unix”

Step 4 Start Coding with Quarkus 1.7.0.Final

So, with all the software installation steps done, it was time to finally start coding with Quarkus.

On the “QUARKUS – GET STARTED” page, I clicked on the link “Start Coding” in step 4.
[https://www.graalvm.org/]

This page will help you bootstrap your Quarkus application and discover its extension ecosystem.

Think of Quarkus extensions as your project dependencies. Extensions configure, boot and integrate a framework or technology into your Quarkus application. They also do all of the heavy lifting of providing the right information to GraalVM for your application to compile natively.

Explore the wide breadth of technologies Quarkus applications can be made with. Generate your application!
[https://code.quarkus.io/]

This type of page looked familiar. In a previous article, for example, I used Spring Initializr to bootstrap an application.
[https://technology.amis.nl/2019/02/26/building-a-restful-web-service-with-spring-boot-using-an-h2-in-memory-database-and-also-an-external-mysql-database/]


[https://start.spring.io/]

In the “bootstrap your Quarkus application” page, I clicked on the link “CONFIGURE MORE OPTIONS” and left most as default and filled in:

• Group: nl.amis.demo.services
• Artifiact: aservice

Default, the Web extension “RESTEasy JAX-RS” is selected. This is the REST endpoint framework implementing JAX-RS and more. This will add the following dependency to the pom.xml as you will see later on:
[https://resteasy.github.io/]

    <dependency>
      <groupId>io.quarkus</groupId>
      <artifactId>quarkus-resteasy</artifactId>
    </dependency>

Remark:
With regard to REST services, as you can see, in the list of extension besides “RESTEasy JAX-RS” also the “RESTEasy JSON-B” extension (JSON-B serialization support for RESTEasy) can be selected. This will add the following dependency to the pom.xml:
[https://quarkus.io/guides/rest-json#creating-the-maven-project]
[http://json-b.net/]

    <dependency>
      <groupId>io.quarkus</groupId>
      <artifactId>quarkus-resteasy-jsonb</artifactId>
    </dependency>

Quarkus also supports Jackson so, if you prefer Jackson over JSON-B, you can create a project relying on the “RESTEasy Jackson” extension (Jackson serialization support for RESTEasy) instead. This will add the following dependency to the pom.xml:
[https://quarkus.io/guides/rest-json#creating-the-maven-project]
[https://github.com/FasterXML/jackson]

<dependency>
      <groupId>io.quarkus</groupId>
      <artifactId>quarkus-resteasy-jackson</artifactId>
    </dependency>

Then, on the “bootstrap your Quarkus application” page, I clicked the “Generate your application” button, followed by “Download as a zip” which downloaded a aservice.zip to my laptop.

I extracted the zip file in the applications directory on my Windows laptop.

Pom.xml

The pom.xml that is created, has the following content:

<?xml version="1.0"?>
<project xsi:schemaLocation="http://maven.apache.org/POM/4.0.0 https://maven.apache.org/xsd/maven-4.0.0.xsd" xmlns="http://maven.apache.org/POM/4.0.0"
    xmlns:xsi="http://www.w3.org/2001/XMLSchema-instance">
  <modelVersion>4.0.0</modelVersion>
  <groupId>nl.amis.demo.services</groupId>
  <artifactId>aservice</artifactId>
  <version>1.0.0-SNAPSHOT</version>
  <properties>
    <compiler-plugin.version>3.8.1</compiler-plugin.version>
    <maven.compiler.parameters>true</maven.compiler.parameters>
    <maven.compiler.source>11</maven.compiler.source>
    <maven.compiler.target>11</maven.compiler.target>
    <project.build.sourceEncoding>UTF-8</project.build.sourceEncoding>
    <project.reporting.outputEncoding>UTF-8</project.reporting.outputEncoding>
    <quarkus-plugin.version>1.7.0.Final</quarkus-plugin.version>
    <quarkus.platform.artifact-id>quarkus-universe-bom</quarkus.platform.artifact-id>
    <quarkus.platform.group-id>io.quarkus</quarkus.platform.group-id>
    <quarkus.platform.version>1.7.0.Final</quarkus.platform.version>
    <surefire-plugin.version>3.0.0-M5</surefire-plugin.version>
  </properties>
  <dependencyManagement>
    <dependencies>
      <dependency>
        <groupId>${quarkus.platform.group-id}</groupId>
        <artifactId>${quarkus.platform.artifact-id}</artifactId>
        <version>${quarkus.platform.version}</version>
        <type>pom</type>
        <scope>import</scope>
      </dependency>
    </dependencies>
  </dependencyManagement>
  <dependencies>
    <dependency>
      <groupId>io.quarkus</groupId>
      <artifactId>quarkus-resteasy</artifactId>
    </dependency>
    <dependency>
      <groupId>io.quarkus</groupId>
      <artifactId>quarkus-junit5</artifactId>
      <scope>test</scope>
    </dependency>
    <dependency>
      <groupId>io.rest-assured</groupId>
      <artifactId>rest-assured</artifactId>
      <scope>test</scope>
    </dependency>
  </dependencies>
  <build>
    <plugins>
      <plugin>
        <groupId>io.quarkus</groupId>
        <artifactId>quarkus-maven-plugin</artifactId>
        <version>${quarkus-plugin.version}</version>
        <executions>
          <execution>
            <goals>
              <goal>prepare</goal>
              <goal>prepare-tests</goal>
              <goal>build</goal>
            </goals>
          </execution>
        </executions>
      </plugin>
      <plugin>
        <artifactId>maven-compiler-plugin</artifactId>
        <version>${compiler-plugin.version}</version>
      </plugin>
      <plugin>
        <artifactId>maven-surefire-plugin</artifactId>
        <version>${surefire-plugin.version}</version>
        <configuration>
          <systemPropertyVariables>
            <java.util.logging.manager>org.jboss.logmanager.LogManager</java.util.logging.manager>
            <maven.home>${maven.home}</maven.home>
          </systemPropertyVariables>
        </configuration>
      </plugin>
    </plugins>
  </build>
  <profiles>
    <profile>
      <id>native</id>
      <activation>
        <property>
          <name>native</name>
        </property>
      </activation>
      <build>
        <plugins>
          <plugin>
            <artifactId>maven-failsafe-plugin</artifactId>
            <version>${surefire-plugin.version}</version>
            <executions>
              <execution>
                <goals>
                  <goal>integration-test</goal>
                  <goal>verify</goal>
                </goals>
                <configuration>
                  <systemPropertyVariables>
                    <native.image.path>${project.build.directory}/${project.build.finalName}-runner</native.image.path>
                    <java.util.logging.manager>org.jboss.logmanager.LogManager</java.util.logging.manager>
                    <maven.home>${maven.home}</maven.home>
                  </systemPropertyVariables>
                </configuration>
              </execution>
            </executions>
          </plugin>
        </plugins>
      </build>
      <properties>
        <quarkus.package.type>native</quarkus.package.type>
      </properties>
    </profile>
  </profiles>
</project>

Importing the project into IntelliJ IDEA

Within IntelliJ IDEA, I imported the project and selected directory: C:\My\AMIS\env\applications\aservice. Next, I chose “Import project from external model: Maven” and kept the rest as default.

In order to check the directory content, I used the following command on the Linux Command Prompt:

cd /vagrant/applications/aservice
ls -latr

With the following output:


total 65
drwxrwxrwx 1 vagrant vagrant     0 Aug 18 19:26 src
-rwxrwxrwx 1 vagrant vagrant  4168 Aug 18 19:26 pom.xml
-rwxrwxrwx 1 vagrant vagrant  6607 Aug 18 19:26 mvnw.cmd
-rwxrwxrwx 1 vagrant vagrant 10069 Aug 18 19:26 mvnw
-rwxrwxrwx 1 vagrant vagrant  1192 Aug 18 19:26 README.md
drwxrwxrwx 1 vagrant vagrant     0 Aug 18 19:26 .mvn
-rwxrwxrwx 1 vagrant vagrant   308 Aug 18 19:26 .gitignore
-rwxrwxrwx 1 vagrant vagrant    75 Aug 18 19:26 .dockerignore
drwxrwxrwx 1 vagrant vagrant  4096 Aug 19 19:38 ..
-rwxrwxrwx 1 vagrant vagrant 17860 Aug 19 19:42 aservice.iml
drwxrwxrwx 1 vagrant vagrant  4096 Aug 19 19:42 .
drwxrwxrwx 1 vagrant vagrant  4096 Aug 19 19:42 .idea

In order to compile the code, I used the following command on the Linux Command Prompt:

./mvnw compile quarkus:dev

With the following output:


[INFO] Scanning for projects…
Downloading from central: https://repo.maven.apache.org/maven2/io/quarkus/quarkus-universe-bom/1.7.0.Final/quarkus-universe-bom-1.7.0.Final.pom

[INFO] Changes detected – recompiling the module!
[INFO] Compiling 1 source file to /vagrant/applications/aservice/target/classes
[INFO]
[INFO] — quarkus-maven-plugin:1.7.0.Final:dev (default-cli) @ aservice —
Listening for transport dt_socket at address: 5005
__  ____  __  _____   ___  __ ____  ______
 –/ __ \/ / / / _ | / _ \/ //_/ / / / __/
 -/ /_/ / /_/ / __ |/ , _/ ,< / /_/ /\ \
–\___\_\____/_/ |_/_/|_/_/|_|\____/___/
2020-08-19 19:50:03,746 INFO  [io.quarkus] (Quarkus Main Thread) aservice 1.0.0-SNAPSHOT on JVM (powered by Quarkus 1.7.0.Final) started in 6.674s. Listening on: http://0.0.0.0:8080
2020-08-19 19:50:03,762 INFO  [io.quarkus] (Quarkus Main Thread) Profile dev activated. Live Coding activated.
2020-08-19 19:50:03,763 INFO  [io.quarkus] (Quarkus Main Thread) Installed features: [cdi, resteasy]

Then, in the Web Browser on my Windows laptop, I entered the URL: http://localhost:8080/hello

And I got the following result:

Remark:
Remember that on my Windows laptop, I could call port 8080 of my guest operating system because via port forwarding this was made possible.

Next, I wanted to try out some of the code guides.

Be Guided Through First Application

On the “QUARKUS – GET STARTED” page, I clicked on the link “Be Guided Through First Application”.
[https://quarkus.io/guides/getting-started]

In this guide, we create a straightforward application serving a hello endpoint. To demonstrate dependency injection, this endpoint uses a greeting bean.

This guide also covers the testing of the endpoint.
[https://quarkus.io/guides/getting-started]

I will leave it up to you to follow this guide also. I will only share with you some of the steps.

In order to create a new Quarkus project, I used the following command on the Linux Command Prompt:

cd /vagrant/applications
mvn io.quarkus:quarkus-maven-plugin:1.7.0.Final:create \
    -DprojectGroupId=org.acme \
    -DprojectArtifactId=getting-started \
    -DclassName="org.acme.getting.started.GreetingResource" \
    -Dpath="/hello"
cd getting-started

With the following output:


[INFO] Scanning for projects…
[INFO]
[INFO] ——————< org.apache.maven:standalone-pom >——————-
[INFO] Building Maven Stub Project (No POM) 1
[INFO] ——————————–[ pom ]———————————
[INFO]
[INFO] — quarkus-maven-plugin:1.7.0.Final:create (default-cli) @ standalone-pom —
Downloading from central: https://repo.maven.apache.org/maven2/io/quarkus/quarkus-universe-bom/maven-metadata.xml

Downloaded from central: https://repo.maven.apache.org/maven2/org/antlr/antlr4-runtime/4.5/antlr4-runtime-4.5.jar (374 kB at 94 kB/s)
[INFO]
[INFO] Maven Wrapper version 0.5.6 has been successfully set up for your project.
[INFO] Using Apache Maven: 3.6.3
[INFO] Repo URL in properties file: https://repo.maven.apache.org/maven2
[INFO]
[INFO]
[INFO] ========================================================================================
[INFO] Your new application has been created in /vagrant/applications/getting-started
[INFO] Navigate into this directory and launch your application with mvn quarkus:dev
[INFO] Your application will be accessible on http://localhost:8080
[INFO] ========================================================================================
[INFO]
[INFO] ————————————————————————
[INFO] BUILD SUCCESS
[INFO] ————————————————————————
[INFO] Total time:  25.961 s
[INFO] Finished at: 2020-08-20T16:58:23Z
[INFO] ————————————————————————
vagrant@ubuntu-bionic:/vagrant/applications$ cd getting-started
vagrant@ubuntu-bionic:/vagrant/applications/getting-started$

So, this is another way to create a Quarkus project instead of using the “bootstrap your Quarkus application” page.

Pom.xml

The pom.xml that is created, has the following content:

<?xml version="1.0"?>
<project xsi:schemaLocation="http://maven.apache.org/POM/4.0.0 https://maven.apache.org/xsd/maven-4.0.0.xsd" xmlns="http://maven.apache.org/POM/4.0.0"
    xmlns:xsi="http://www.w3.org/2001/XMLSchema-instance">
  <modelVersion>4.0.0</modelVersion>
  <groupId>org.acme</groupId>
  <artifactId>getting-started</artifactId>
  <version>1.0-SNAPSHOT</version>
  <properties>
    <compiler-plugin.version>3.8.1</compiler-plugin.version>
    <maven.compiler.parameters>true</maven.compiler.parameters>
    <maven.compiler.source>11</maven.compiler.source>
    <maven.compiler.target>11</maven.compiler.target>
    <project.build.sourceEncoding>UTF-8</project.build.sourceEncoding>
    <project.reporting.outputEncoding>UTF-8</project.reporting.outputEncoding>
    <quarkus-plugin.version>1.7.0.Final</quarkus-plugin.version>
    <quarkus.platform.artifact-id>quarkus-universe-bom</quarkus.platform.artifact-id>
    <quarkus.platform.group-id>io.quarkus</quarkus.platform.group-id>
    <quarkus.platform.version>1.7.0.Final</quarkus.platform.version>
    <surefire-plugin.version>3.0.0-M5</surefire-plugin.version>
  </properties>
  <dependencyManagement>
    <dependencies>
      <dependency>
        <groupId>${quarkus.platform.group-id}</groupId>
        <artifactId>${quarkus.platform.artifact-id}</artifactId>
        <version>${quarkus.platform.version}</version>
        <type>pom</type>
        <scope>import</scope>
      </dependency>
    </dependencies>
  </dependencyManagement>
  <dependencies>
    <dependency>
      <groupId>io.quarkus</groupId>
      <artifactId>quarkus-resteasy</artifactId>
    </dependency>
    <dependency>
      <groupId>io.quarkus</groupId>
      <artifactId>quarkus-junit5</artifactId>
      <scope>test</scope>
    </dependency>
    <dependency>
      <groupId>io.rest-assured</groupId>
      <artifactId>rest-assured</artifactId>
      <scope>test</scope>
    </dependency>
  </dependencies>
  <build>
    <plugins>
      <plugin>
        <groupId>io.quarkus</groupId>
        <artifactId>quarkus-maven-plugin</artifactId>
        <version>${quarkus-plugin.version}</version>
        <executions>
          <execution>
            <goals>
              <goal>prepare</goal>
              <goal>prepare-tests</goal>
              <goal>build</goal>
            </goals>
          </execution>
        </executions>
      </plugin>
      <plugin>
        <artifactId>maven-compiler-plugin</artifactId>
        <version>${compiler-plugin.version}</version>
      </plugin>
      <plugin>
        <artifactId>maven-surefire-plugin</artifactId>
        <version>${surefire-plugin.version}</version>
        <configuration>
          <systemPropertyVariables>
            <java.util.logging.manager>org.jboss.logmanager.LogManager</java.util.logging.manager>
            <maven.home>${maven.home}</maven.home>
          </systemPropertyVariables>
        </configuration>
      </plugin>
    </plugins>
  </build>
  <profiles>
    <profile>
      <id>native</id>
      <activation>
        <property>
          <name>native</name>
        </property>
      </activation>
      <build>
        <plugins>
          <plugin>
            <artifactId>maven-failsafe-plugin</artifactId>
            <version>${surefire-plugin.version}</version>
            <executions>
              <execution>
                <goals>
                  <goal>integration-test</goal>
                  <goal>verify</goal>
                </goals>
                <configuration>
                  <systemPropertyVariables>
                    <native.image.path>${project.build.directory}/${project.build.finalName}-runner</native.image.path>
                    <java.util.logging.manager>org.jboss.logmanager.LogManager</java.util.logging.manager>
                    <maven.home>${maven.home}</maven.home>
                  </systemPropertyVariables>
                </configuration>
              </execution>
            </executions>
          </plugin>
        </plugins>
      </build>
      <properties>
        <quarkus.package.type>native</quarkus.package.type>
      </properties>
    </profile>
  </profiles>
</project>

Remark:
You will find the import of the Quarkus BOM, allowing you to omit the version on the different Quarkus dependencies. In addition, you can see the quarkus-maven-plugin responsible of the packaging of the application and also providing the development mode.
[ https://quarkus.io/guides/getting-started#bootstrapping-the-project]

As mentioned before with regard to the dependencies, the quarkus-resteasy dependency (the REST endpoint framework implementing JAX-RS and more) is used.

With regard to testing you can see 2 test dependencies are used, quarkus-junit5 and rest-assured.

quarkus-junit5 is required for testing, as it provides the @QuarkusTest annotation that controls the testing framework. rest-assured is not required but is a convenient way to test HTTP endpoints, we also provide integration that automatically sets the correct URL so no configuration is required.
[https://quarkus.io/guides/getting-started-testing]

Quarkus supports Junit 5 tests. Because of this, the version of the Surefire Maven Plugin must be set, as the default version does not support Junit 5.
[https://quarkus.io/guides/getting-started]

For more information about this and the content of the pom.xml please see the Quarkus documentation.
[https://quarkus.io/support/]

Importing the project into IntelliJ IDEA

Within IntelliJ IDEA, I imported the project (in the same way as before) by selecting directory: C:\My\AMIS\env\applications\getting-started.

Then I followed the guide and made changes to the generated code.

I also added a custom banner as mentioned in the guide.
Users can supply a custom banner by placing the banner file in src/main/resources and configuring quarkus.banner.path=name-of-file in application.properties.
[https://quarkus.io/guides/getting-started#banner]

In order to compile the code, (as before) I used the following command on the Linux Command Prompt:

./mvnw compile quarkus:dev

With the following output:

Remark:
quarkus:dev runs Quarkus in development mode. This enables hot deployment with background compilation, which means that when you modify your Java files and/or your resource files and refresh your browser, these changes will automatically take effect. This works too for resource files like the configuration property file. Refreshing the browser triggers a scan of the workspace, and if any changes are detected, the Java files are recompiled and the application is redeployed; your request is then serviced by the redeployed application. If there are any issues with compilation or deployment an error page will let you know.

This will also listen for a debugger on port 5005. If you want to wait for the debugger to attach before running you can pass -Dsuspend on the command line. If you don’t want the debugger at all you can use -Ddebug=false.
[https://quarkus.io/guides/getting-started#development-mode]

Then, in the Web Browser on my Windows laptop, I entered the URL: http://localhost:8080/greeting/quarkus

And I got the following result:

Hot deployment with background compilation

So, with Quarkus running in development mode, I wanted to try out the hot deployment with background compilation and therefor I changed the code of the greeting method to the following:
[in bold, I highlighted the changes]

@ApplicationScoped
public class GreetingService {

    public String greeting(String name) {
        return "hello " + name + ", a warm welcome from AMIS";
    }

}

Then, in the Web Browser on my Windows laptop, I refreshed the page with URL: http://localhost:8080/greeting/quarkus

As you can see, the changes automatically took effect.
I then reverted this change, in order for the unit test to pass.

Testing the Quarkus project

In order to test the Quarkus project, I used the following command on the Linux Command Prompt:

./mvnw test

With the following output:

[INFO] Scanning for projects…
[INFO]
[INFO] ———————-< org.acme:getting-started >———————-
[INFO] Building getting-started 1.0-SNAPSHOT
[INFO] ——————————–[ jar ]———————————
[INFO]
[INFO] — quarkus-maven-plugin:1.7.0.Final:prepare (default) @ getting-started —
[INFO]
[INFO] — maven-resources-plugin:2.6:resources (default-resources) @ getting-started —
[INFO] Using ‘UTF-8’ encoding to copy filtered resources.
[INFO] Copying 3 resources
[INFO]
[INFO] — maven-compiler-plugin:3.8.1:compile (default-compile) @ getting-started —
[INFO] Nothing to compile – all classes are up to date
[INFO]
[INFO] — quarkus-maven-plugin:1.7.0.Final:prepare-tests (default) @ getting-started —
[INFO]
[INFO] — maven-resources-plugin:2.6:testResources (default-testResources) @ getting-started —
[INFO] Using ‘UTF-8’ encoding to copy filtered resources.
[INFO] skip non existing resourceDirectory /vagrant/applications/getting-started/src/test/resources
[INFO]
[INFO] — maven-compiler-plugin:3.8.1:testCompile (default-testCompile) @ getting-started —
[INFO] Nothing to compile – all classes are up to date
[INFO]
[INFO] — maven-surefire-plugin:3.0.0-M5:test (default-test) @ getting-started —
[INFO]
[INFO] ——————————————————-
[INFO] T E S T S
[INFO] ——————————————————-
[INFO] Running org.acme.getting.started.GreetingResourceTest
2020-08-20 17:52:11,030 INFO [io.quarkus] (main) Quarkus 1.7.0.Final on JVM started in 11.711s. Listening on: http://0.0.0.0:8081
2020-08-20 17:52:11,241 INFO [io.quarkus] (main) Profile test activated.
2020-08-20 17:52:11,243 INFO [io.quarkus] (main) Installed features: [cdi, resteasy]
[INFO] Tests run: 2, Failures: 0, Errors: 0, Skipped: 0, Time elapsed: 23.173 s – in org.acme.getting.started.GreetingResourceTest
2020-08-20 17:52:20,297 INFO [io.quarkus] (main) Quarkus stopped in 0.101s
[INFO]
[INFO] Results:
[INFO]
[INFO] Tests run: 2, Failures: 0, Errors: 0, Skipped: 0
[INFO]
[INFO] ————————————————————————
[INFO] BUILD SUCCESS
[INFO] ————————————————————————
[INFO] Total time: 47.032 s
[INFO] Finished at: 2020-08-20T17:52:21Z
[INFO] ————————————————————————
vagrant@ubuntu-bionic:/vagrant/applications/getting-started$

Remark:
By default, tests will run on port 8081 so as not to conflict with the running application. Quarkus automatically configures RestAssured to use this port.
[https://quarkus.io/guides/getting-started#testing]

Packaging the Quarkus project

In order to package the Quarkus project, I used the following command on the Linux Command Prompt:

./mvnw package

With the following output:


[INFO] Scanning for projects…
[INFO]
[INFO] ———————-< org.acme:getting-started >———————-
[INFO] Building getting-started 1.0-SNAPSHOT
[INFO] ——————————–[ jar ]———————————
[INFO]
[INFO] — quarkus-maven-plugin:1.7.0.Final:prepare (default) @ getting-started —
[INFO]
[INFO] — maven-resources-plugin:2.6:resources (default-resources) @ getting-started —
[INFO] Using ‘UTF-8’ encoding to copy filtered resources.
[INFO] Copying 3 resources
[INFO]
[INFO] — maven-compiler-plugin:3.8.1:compile (default-compile) @ getting-started —
[INFO] Nothing to compile – all classes are up to date
[INFO]
[INFO] — quarkus-maven-plugin:1.7.0.Final:prepare-tests (default) @ getting-started —
[INFO]
[INFO] — maven-resources-plugin:2.6:testResources (default-testResources) @ getting-started —
[INFO] Using ‘UTF-8’ encoding to copy filtered resources.
[INFO] skip non existing resourceDirectory /vagrant/applications/getting-started/src/test/resources
[INFO]
[INFO] — maven-compiler-plugin:3.8.1:testCompile (default-testCompile) @ getting-started —
[INFO] Nothing to compile – all classes are up to date
[INFO]
[INFO] — maven-surefire-plugin:3.0.0-M5:test (default-test) @ getting-started —
[INFO]
[INFO] ——————————————————-
[INFO]  T E S T S
[INFO] ——————————————————-
[INFO] Running org.acme.getting.started.GreetingResourceTest
2020-08-20 18:01:38,133 INFO  [io.quarkus] (main) Quarkus 1.7.0.Final on JVM started in 12.317s. Listening on: http://0.0.0.0:8081
2020-08-20 18:01:38,333 INFO  [io.quarkus] (main) Profile test activated.
2020-08-20 18:01:38,334 INFO  [io.quarkus] (main) Installed features: [cdi, resteasy]
[INFO] Tests run: 2, Failures: 0, Errors: 0, Skipped: 0, Time elapsed: 23.838 s – in org.acme.getting.started.GreetingResourceTest
2020-08-20 18:01:47,622 INFO  [io.quarkus] (main) Quarkus stopped in 0.117s
[INFO]
[INFO] Results:
[INFO]
[INFO] Tests run: 2, Failures: 0, Errors: 0, Skipped: 0
[INFO]
[INFO]
[INFO] — maven-jar-plugin:2.4:jar (default-jar) @ getting-started —
[INFO]
[INFO] — quarkus-maven-plugin:1.7.0.Final:build (default) @ getting-started —
[INFO] [org.jboss.threads] JBoss Threads version 3.1.1.Final
[INFO] [io.quarkus.deployment.pkg.steps.JarResultBuildStep] Building thin jar: /vagrant/applications/getting-started/target/getting-started-1.0-SNAPSHOT-runner.jar
[INFO] [io.quarkus.deployment.QuarkusAugmentor] Quarkus augmentation completed in 12083ms
[INFO] ————————————————————————
[INFO] BUILD SUCCESS
[INFO] ————————————————————————
[INFO] Total time:  01:02 min
[INFO] Finished at: 2020-08-20T18:02:02Z
[INFO] ————————————————————————
vagrant@ubuntu-bionic:/vagrant/applications/getting-started$

Remark:
It produces 2 jar files in /target:

You can run the application using: java -jar target/getting-started-1.0-SNAPSHOT-runner.jar
[https://quarkus.io/guides/getting-started#packaging-and-run-the-application]

So now I conclude this article. I shared with you the steps I took to further automate setting up my demo environment and the Quarkus code guide “Quarkus – Creating Your First Application” I tried out, including the hot deployment with background compilation.

In a next article, you can read more about other Quarkus code guides I tried out, related to the following topics:

  • Compiling the application to a native executable
  • Packaging the native executable in a container
  • The ability to automatically generate Kubernetes resources by Quarkus

The post Using Vagrant and shell scripts to further automate setting up my Quarkus demo environment from scratch and trying out a Quarkus code guide appeared first on AMIS, Data Driven Blog.

Quarkus – Supersonic Subatomic Java, trying out some Quarkus code guides (part1)

$
0
0

In my previous article, I already shared with you the Quarkus code guide “Quarkus – Creating Your First Application”, I tried out, including the hot deployment with background compilation.
[ https://technology.amis.nl/2020/08/21/using-vagrant-and-shell-scripts-to-further-automate-setting-up-my-quarkus-demo-environment-from-scratch-and-trying-out-a-quarkus-code-guide/]

In this article, you can read more about other Quarkus code guides I tried out, related to the following topics:

  • Configuring Your Application
  • Compiling the application to a native executable by using a local GraalVM installation or by leveraging a container runtime such as Docker and using a Docker container that embeds GraalVM

In a next article, you can read more about other Quarkus code guides I tried out, related to the following topics:

  • Packaging the native executable in a container
  • The ability to automatically generate Kubernetes resources by Quarkus

Quarkus Guides

On the “QUARKUS – GET STARTED” page, I clicked on the link “Get More Guides”.
[https://quarkus.io/guides/]

On this page, you can find lots of guides in several categories.

I will leave it up to you to follow these guides. I will only share with you some of the steps of some of the guides I followed.

Quarkus guide “Configuring Your Application”

On the “QUARKUS – GUIDES” page, I clicked on the link “Configuring Your Application”. But instead of creating a new Maven project, I applied some of the steps in my existing “getting-started” Maven project, described in my previous article.
[https://technology.amis.nl/2020/08/21/using-vagrant-and-shell-scripts-to-further-automate-setting-up-my-quarkus-demo-environment-from-scratch-and-trying-out-a-quarkus-code-guide/]

Injecting configuration value

Quarkus uses MicroProfile Config to inject the configuration in the application. The injection uses the @ConfigProperty annotation.
[https://quarkus.io/guides/config#injecting-configuration-value]

I wanted to try out configuring my application and therefor I changed the code of the hello method to the following:
[in bold, I highlighted the changes]

package org.acme.getting.started;

import javax.inject.Inject;
import javax.ws.rs.GET;
import javax.ws.rs.Path;
import javax.ws.rs.Produces;
import javax.ws.rs.core.MediaType;

import org.eclipse.microprofile.config.inject.ConfigProperty;
import org.jboss.resteasy.annotations.jaxrs.PathParam;

import java.util.Optional;

@Path("/hello")
public class GreetingResource {

    @Inject
    GreetingService service;

    @ConfigProperty(name = "greeting.message")
    String message;

    @ConfigProperty(name = "greeting.suffix", defaultValue = "!")
    String suffix;

    @ConfigProperty(name = "greeting.name")
    Optional<String> name;

    @GET
    @Produces(MediaType.TEXT_PLAIN)
    @Path("/greeting/{name}")
    public String greeting(@PathParam String name) {
        return service.greeting(name);
    }

    @GET
    @Produces(MediaType.TEXT_PLAIN)
    public String hello() {
        return message + " " + name.orElse("world") + suffix;
    }
}

Remark:
The default value is injected if the configuration does not provide a value for greeting.suffix.

By default, Quarkus reads application.properties. Following, the guide, I changed the code of src/main/resources/application.properties to the following:
[in bold, I highlighted the changes]

# Configuration file
# key = value

# Your configuration properties
greeting.message = hello
greeting.name = quarkus

# The path of the banner (path relative to root of classpath)
# which could be provided by user
#
#quarkus.banner.path=default_banner.txt
quarkus.banner.path=my_banner.txt

I used vagrant ssh to connect into the running VM. Next, in order to compile the code , I used the following command on the Linux Command Prompt:

cd /vagrant/applications/getting-started
./mvnw compile quarkus:dev

Then, in the Web Browser on my Windows laptop, I entered the URL: http://localhost:8080/hello

And I got the following result:

So, using the configuration properties worked.

I also updated the functional test to reflect the changes made to the endpoint.

In order to test the Quarkus project, I used the following command on the Linux Command Prompt:

./mvnw test

Configuring Quarkus

Quarkus itself is configured via the same mechanism as your application. Quarkus reserves the quarkus. namespace for its own configuration. For example, to configure the HTTP server port you can set quarkus.http.port in application.properties.

Remark:
As mentioned above, properties prefixed with quarkus. are effectively reserved for configuring Quarkus itself and therefore quarkus. should never be used as prefix for application specific properties.
[https://quarkus.io/guides/config#configuring-quarkus]

List of all configuration properties

All the Quarkus configuration properties are documented and searcheable.
[https://quarkus.io/guides/config#list-of-all-configuration-properties]

Generating configuration for your application

It is also possible to generate an example application.properties with all known configuration properties, to make it easy to see what Quarkus configuration options are available.
[https://quarkus.io/guides/config#generating-configuration-for-your-application]

In order to generate an example application.properties, I used the following command on the Linux Command Prompt:

./mvnw quarkus:generate-config

With the following output:


[INFO] Scanning for projects…
[INFO]
[INFO] ———————-< org.acme:getting-started >———————-
[INFO] Building getting-started 1.0-SNAPSHOT
[INFO] ——————————–[ jar ]———————————
[INFO]
[INFO] — quarkus-maven-plugin:1.7.0.Final:generate-config (default-cli) @ getting-started —
[INFO] [org.jboss.threads] JBoss Threads version 3.1.1.Final
[INFO] ————————————————————————
[INFO] BUILD SUCCESS
[INFO] ————————————————————————
[INFO] Total time:  16.017 s
[INFO] Finished at: 2020-08-23T17:18:30Z
[INFO] ————————————————————————
vagrant@ubuntu-bionic:/vagrant/applications/getting-started$

This will create a src/main/resources/application.properties.example file that contains all the config options exposed via the extensions you currently have installed. These options are commented out, and have their default value when applicable.
[https://quarkus.io/guides/config#generating-configuration-for-your-application]

Following, the guide, in order to change the HTTP port, I changed the code of src/main/resources/application.properties to the following:
[in bold, I highlighted the changes]

# Configuration file
# key = value

# Your configuration properties
greeting.message = hello
greeting.name = quarkus

#
# The HTTP port
#
#quarkus.http.port=8080
quarkus.http.port=8090

# The path of the banner (path relative to root of classpath)
# which could be provided by user
#
#quarkus.banner.path=default_banner.txt
quarkus.banner.path=my_banner.txt

Next, in order to compile the code , I used the following command on the Linux Command Prompt:

./mvnw compile quarkus:dev

With the following output (only showing the part about the port):


2020-08-23 17:30:47,170 INFO  [io.quarkus] (Quarkus Main Thread) getting-started 1.0-SNAPSHOT on JVM (powered by Quarkus 1.7.0.Final) started in 7.610s. Listening on: http://0.0.0.0:8090

Then, in the Web Browser on my Windows laptop, I entered the URL: http://localhost:8080/hello

And I got the following result:

Then, in the Web Browser on my Windows laptop, I entered the URL: http://localhost:8090/hello

And I got the following result:

Remark:
Remember that on my Windows laptop, I could call port 8090 of my guest operating system because via port forwarding this was made possible.

I advise you to have a look at this code guide if you want to learn more with regard to configuration.

In my previous article, I shared with you the Quarkus guide “Quarkus – Creating Your First Application”.
[https://technology.amis.nl/2020/08/21/using-vagrant-and-shell-scripts-to-further-automate-setting-up-my-quarkus-demo-environment-from-scratch-and-trying-out-a-quarkus-code-guide/]

At the end of that guide, it was recommend continuing the journey with the building a native executable guide, where you learn about creating a native executable and packaging it in a container.
[https://quarkus.io/guides/getting-started#whats-next]

So, I continued with that guide.

Quarkus guide “Building a Native Executable”

From the Quarkus guide “Creating Your First Application, part “What’s next?”, I clicked on the link “building a native executable guide”.
[https://quarkus.io/guides/getting-started#whats-next]

Building a native executable requires using a distribution of GraalVM.

Because of the way I setup my demo environment, almost all the prerequisites for this guide were already met, except the “Supporting native compilation in C” part.
[https://quarkus.io/guides/building-native-image#prerequisites]

On Linux, I needed GCC, and the glibc and zlib headers.

I used the following command on the Linux Command Prompt:

cd /home/vagrant
sudo apt-get install -y build-essential libz-dev zlib1g-dev

With the following output:


Reading package lists… Done
Building dependency tree
Reading state information… Done
Note, selecting ‘zlib1g-dev’ instead of ‘libz-dev’
build-essential is already the newest version (12.4ubuntu1).
build-essential set to manually installed.
The following NEW packages will be installed:
  zlib1g-dev
0 upgraded, 1 newly installed, 0 to remove and 1 not upgraded.
Need to get 176 kB of archives.
After this operation, 457 kB of additional disk space will be used.
Get:1 http://archive.ubuntu.com/ubuntu bionic/main amd64 zlib1g-dev amd64 1:1.2.11.dfsg-0ubuntu2 [176 kB]
Fetched 176 kB in 5s (32.1 kB/s)
Selecting previously unselected package zlib1g-dev:amd64.
(Reading database … 66534 files and directories currently installed.)
Preparing to unpack …/zlib1g-dev_1%3a1.2.11.dfsg-0ubuntu2_amd64.deb …
Unpacking zlib1g-dev:amd64 (1:1.2.11.dfsg-0ubuntu2) …
Setting up zlib1g-dev:amd64 (1:1.2.11.dfsg-0ubuntu2) …
Processing triggers for man-db (2.8.3-2ubuntu0.1) …
vagrant@ubuntu-bionic:~$

By the way, I also added this step in the file quarkus.sh (mentioned in my previous article), in the scripts directory on my Windows laptop.
[https://technology.amis.nl/2020/08/21/using-vagrant-and-shell-scripts-to-further-automate-setting-up-my-quarkus-demo-environment-from-scratch-and-trying-out-a-quarkus-code-guide/]

This guide continues with the code in the existing “getting-started” Maven project.

Creating a native executable with GraalVM installed locally

In order to produce a native executable, I used the following command on the Linux Command Prompt:

cd /vagrant/applications/getting-started
./mvnw package -Pnative

With the following output:


vagrant@ubuntu-bionic:/vagrant/applications/getting-started$ ./mvnw package -Pnative
[INFO] Scanning for projects…
[INFO]
[INFO] ———————-< org.acme:getting-started >———————-
[INFO] Building getting-started 1.0-SNAPSHOT
[INFO] ——————————–[ jar ]———————————
[INFO]
[INFO] — quarkus-maven-plugin:1.7.0.Final:prepare (default) @ getting-started —
[INFO]
[INFO] — maven-resources-plugin:2.6:resources (default-resources) @ getting-started —
[INFO] Using ‘UTF-8’ encoding to copy filtered resources.
[INFO] Copying 4 resources
[INFO]
[INFO] — maven-compiler-plugin:3.8.1:compile (default-compile) @ getting-started —
[INFO] Nothing to compile – all classes are up to date
[INFO]
[INFO] — quarkus-maven-plugin:1.7.0.Final:prepare-tests (default) @ getting-started —
[INFO]
[INFO] — maven-resources-plugin:2.6:testResources (default-testResources) @ getting-started —
[INFO] Using ‘UTF-8’ encoding to copy filtered resources.
[INFO] skip non existing resourceDirectory /vagrant/applications/getting-started/src/test/resources
[INFO]
[INFO] — maven-compiler-plugin:3.8.1:testCompile (default-testCompile) @ getting-started —
[INFO] Nothing to compile – all classes are up to date
[INFO]
[INFO] — maven-surefire-plugin:3.0.0-M5:test (default-test) @ getting-started —
[INFO]
[INFO] ——————————————————-
[INFO]  T E S T S
[INFO] ——————————————————-
[INFO] Running org.acme.getting.started.GreetingResourceTest
2020-08-23 18:46:16,198 INFO  [io.quarkus] (main) Quarkus 1.7.0.Final on JVM started in 12.220s. Listening on: http://0.0.0.0:8081
2020-08-23 18:46:16,375 INFO  [io.quarkus] (main) Profile test activated.
2020-08-23 18:46:16,376 INFO  [io.quarkus] (main) Installed features: [cdi, resteasy]
[INFO] Tests run: 2, Failures: 0, Errors: 0, Skipped: 0, Time elapsed: 23.815 s – in org.acme.getting.started.GreetingResourceTest
2020-08-23 18:46:25,516 INFO  [io.quarkus] (main) Quarkus stopped in 0.112s
[INFO]
[INFO] Results:
[INFO]
[INFO] Tests run: 2, Failures: 0, Errors: 0, Skipped: 0
[INFO]
[INFO]
[INFO] — maven-jar-plugin:2.4:jar (default-jar) @ getting-started —
[INFO]
[INFO] — quarkus-maven-plugin:1.7.0.Final:build (default) @ getting-started —
[INFO] [org.jboss.threads] JBoss Threads version 3.1.1.Final
[INFO] [io.quarkus.deployment.pkg.steps.JarResultBuildStep] Building native image source jar: /vagrant/applications/getting-started/target/getting-started-1.0-SNAPSHOT-native-image-source-jar/getting-started-1.0-SNAPSHOT-runner.jar
[INFO] [io.quarkus.deployment.pkg.steps.NativeImageBuildStep] Building native image from /vagrant/applications/getting-started/target/getting-started-1.0-SNAPSHOT-native-image-source-jar/getting-started-1.0-SNAPSHOT-runner.jar
[INFO] [io.quarkus.deployment.pkg.steps.NativeImageBuildStep] Running Quarkus native-image plugin on GraalVM Version 20.1.0 (Java Version 11.0.7)
[INFO] [io.quarkus.deployment.pkg.steps.NativeImageBuildStep] /opt/graalvm-ce-java11-20.1.0/bin/native-image -J-Dsun.nio.ch.maxUpdateArraySize=100 -J-Djava.util.logging.manager=org.jboss.logmanager.LogManager -J-Dvertx.logger-delegate-factory-class-name=io.quarkus.vertx.core.runtime.VertxLogDelegateFactory -J-Dvertx.disableDnsResolver=true -J-Dio.netty.leakDetection.level=DISABLED -J-Dio.netty.allocator.maxOrder=1 -J-Duser.language=en -J-Dfile.encoding=UTF-8 –initialize-at-build-time= -H:InitialCollectionPolicy=com.oracle.svm.core.genscavenge.CollectionPolicy$BySpaceAndTime -H:+JNI -jar getting-started-1.0-SNAPSHOT-runner.jar -H:FallbackThreshold=0 -H:+ReportExceptionStackTraces -H:-AddAllCharsets -H:EnableURLProtocols=http -H:NativeLinkerOption=-no-pie –no-server -H:-UseServiceLoaderFeature -H:+StackTrace getting-started-1.0-SNAPSHOT-runner
[getting-started-1.0-SNAPSHOT-runner:12893]    classlist:  34,723.00 ms,  0.96 GB
[getting-started-1.0-SNAPSHOT-runner:12893]        (cap):   4,778.24 ms,  0.94 GB
[getting-started-1.0-SNAPSHOT-runner:12893]        setup:  18,105.54 ms,  0.94 GB
18:50:33,508 INFO  [org.jbo.threads] JBoss Threads version 3.1.1.Final
[getting-started-1.0-SNAPSHOT-runner:12893]     (clinit):   3,235.27 ms,  2.69 GB
[getting-started-1.0-SNAPSHOT-runner:12893]   (typeflow): 145,004.01 ms,  2.69 GB
[getting-started-1.0-SNAPSHOT-runner:12893]    (objects): 265,715.47 ms,  2.69 GB
[getting-started-1.0-SNAPSHOT-runner:12893]   (features):   3,582.22 ms,  2.69 GB
[getting-started-1.0-SNAPSHOT-runner:12893]     analysis: 422,646.79 ms,  2.69 GB
[getting-started-1.0-SNAPSHOT-runner:12893]     universe:   9,135.39 ms,  2.69 GB
[getting-started-1.0-SNAPSHOT-runner:12893]      (parse):  62,059.00 ms,  2.75 GB
[getting-started-1.0-SNAPSHOT-runner:12893]     (inline):  28,026.29 ms,  2.53 GB
[getting-started-1.0-SNAPSHOT-runner:12893]    (compile): 271,676.91 ms,  3.28 GB
[getting-started-1.0-SNAPSHOT-runner:12893]      compile: 371,979.59 ms,  3.27 GB
[getting-started-1.0-SNAPSHOT-runner:12893]        image:  20,944.50 ms,  3.27 GB
[getting-started-1.0-SNAPSHOT-runner:12893]        write:   3,051.83 ms,  3.27 GB
[getting-started-1.0-SNAPSHOT-runner:12893]      [total]: 882,942.44 ms,  3.27 GB
[INFO] [io.quarkus.deployment.pkg.steps.NativeImageBuildStep] Execute [objcopy, –strip-debug, /vagrant/applications/getting-started/target/getting-started-1.0-SNAPSHOT-runner]
[INFO] [io.quarkus.deployment.QuarkusAugmentor] Quarkus augmentation completed in 903901ms
[INFO] ————————————————————————
[INFO] BUILD SUCCESS
[INFO] ————————————————————————
[INFO] Total time:  15:54 min
[INFO] Finished at: 2020-08-23T19:01:31Z
[INFO] ————————————————————————
vagrant@ubuntu-bionic:/vagrant/applications/getting-started$

Remark:
It produces 2 jar files in /target:

You can run the application using: java -jar target/getting-started-1.0-SNAPSHOT-runner.jar

In addition to the regular files, the build also produces target/getting-started-1.0-SNAPSHOT-runner. You can run this native executable using: ./target/getting-started-1.0-SNAPSHOT-runner.
[https://quarkus.io/guides/building-native-image#producing-a-native-executable]

The native executable for this application will contain the application code, required libraries, Java APIs, and a reduced version of a VM. The smaller VM base improves the startup time of the application and produces a minimal disk footprint.
[https://quarkus.io/guides/building-native-image#producing-a-native-executable]

For your and my convenience, in the table below I summarized the Quarkus deployment steps (io.quarkus.deployment.pkg.steps) from the output above:

Step Output
io.quarkus.deployment.pkg.steps.JarResultBuildStep Building native image source jar: /vagrant/applications/getting-started/target/getting-started-1.0-SNAPSHOT-native-image-source-jar/getting-started-1.0-SNAPSHOT-runner.jar
io.quarkus.deployment.pkg.steps.NativeImageBuildStep Building native image from /vagrant/applications/getting-started/target/getting-started-1.0-SNAPSHOT-native-image-source-jar/getting-started-1.0-SNAPSHOT-runner.jar
Running Quarkus native-image plugin on GraalVM Version 20.1.0 (Java Version 11.0.7)
/opt/graalvm-ce-java11-20.1.0/bin/native-image -J-Dsun.nio.ch.maxUpdateArraySize=100 -J-Djava.util.logging.manager=org.jboss.logmanager.LogManager -J-Dvertx.logger-delegate-factory-class-name=io.quarkus.vertx.core.runtime.VertxLogDelegateFactory -J-Dvertx.disableDnsResolver=true -J-Dio.netty.leakDetection.level=DISABLED -J-Dio.netty.allocator.maxOrder=1 -J-Duser.language=en -J-Dfile.encoding=UTF-8 --initialize-at-build-time= -H:InitialCollectionPolicy=com.oracle.svm.core.genscavenge.CollectionPolicy$BySpaceAndTime -H:+JNI -jar getting-started-1.0-SNAPSHOT-runner.jar -H:FallbackThreshold=0 -H:+ReportExceptionStackTraces -H:-AddAllCharsets -H:EnableURLProtocols=http -H:NativeLinkerOption=-no-pie --no-server -H:-UseServiceLoaderFeature -H:+StackTrace getting-started-1.0-SNAPSHOT-runner
Execute [objcopy, --strip-debug, /vagrant/applications/getting-started/target/getting-started-1.0-SNAPSHOT-runner]

As you can see in the output above, for creating the native executable, the locally installed GraalVM (/opt/graalvm-ce-java11-20.1.0/bin/native-image) is used.

Remark:

As you may have noticed, the command I used, contains a profile named native.

In the pom.xml you can find that profile:

    <profile>
      <id>native</id>
      <activation>
        <property>
          <name>native</name>
        </property>
      </activation>
      <build>
        <plugins>
          <plugin>
            <artifactId>maven-failsafe-plugin</artifactId>
            <version>${surefire-plugin.version}</version>
            <executions>
              <execution>
                <goals>
                  <goal>integration-test</goal>
                  <goal>verify</goal>
                </goals>
                <configuration>
                  <systemPropertyVariables>
                    <native.image.path>${project.build.directory}/${project.build.finalName}-runner</native.image.path>
                    <java.util.logging.manager>org.jboss.logmanager.LogManager</java.util.logging.manager>
                    <maven.home>${maven.home}</maven.home>
                  </systemPropertyVariables>
                </configuration>
              </execution>
            </executions>
          </plugin>
        </plugins>
      </build>
      <properties>
        <quarkus.package.type>native</quarkus.package.type>
      </properties>
    </profile>

Remark:
In the pom.xml you can find the location of the produced native executable:

<native.image.path>${project.build.directory}/${project.build.finalName}-runner</native.image.path>

As is mentioned in the guide, the use of a profile is recommended because, as you could see in the output shown above, packaging the native executable takes a few minutes. You could just pass -Dquarkus.package.type=native as a property on the command line, however it is better to use a profile as this allows native image tests to also be run.

You can provide custom options for the native-image command using the <quarkus.native.additional-build-args> property. Multiple options may be separated by a comma.

Another possibility is to include the quarkus.native.additional-build-args configuration property in your application.properties.

You can find more information about how to configure the native image building process in the Configuring the Native Executable section of the code guide.
[https://quarkus.io/guides/building-native-image#producing-a-native-executable]

Testing the native executable

Producing a native executable can lead to a few issues, and so it’s also a good idea to run some tests against the application running in the native file.
[https://quarkus.io/guides/building-native-image#testing-the-native-executable]

In order to test the native executable, I used the following command on the Linux Command Prompt:

./mvnw verify -Pnative

With the following output:


[INFO] Scanning for projects…
[INFO]
[INFO] ———————-< org.acme:getting-started >———————-
[INFO] Building getting-started 1.0-SNAPSHOT
[INFO] ——————————–[ jar ]———————————
[INFO]
[INFO] — quarkus-maven-plugin:1.7.0.Final:prepare (default) @ getting-started —
[INFO]
[INFO] — maven-resources-plugin:2.6:resources (default-resources) @ getting-started —
[INFO] Using ‘UTF-8’ encoding to copy filtered resources.
[INFO] Copying 4 resources
[INFO]
[INFO] — maven-compiler-plugin:3.8.1:compile (default-compile) @ getting-started —
[INFO] Nothing to compile – all classes are up to date
[INFO]
[INFO] — quarkus-maven-plugin:1.7.0.Final:prepare-tests (default) @ getting-started —
[INFO]
[INFO] — maven-resources-plugin:2.6:testResources (default-testResources) @ getting-started —
[INFO] Using ‘UTF-8’ encoding to copy filtered resources.
[INFO] skip non existing resourceDirectory /vagrant/applications/getting-started/src/test/resources
[INFO]
[INFO] — maven-compiler-plugin:3.8.1:testCompile (default-testCompile) @ getting-started —
[INFO] Nothing to compile – all classes are up to date
[INFO]
[INFO] — maven-surefire-plugin:3.0.0-M5:test (default-test) @ getting-started —
[INFO]
[INFO] ——————————————————-
[INFO]  T E S T S
[INFO] ——————————————————-
[INFO] Running org.acme.getting.started.GreetingResourceTest
2020-08-28 18:30:30,484 INFO  [io.quarkus] (main) Quarkus 1.7.0.Final on JVM started in 11.837s. Listening on: http://0.0.0.0:8081
2020-08-28 18:30:30,658 INFO  [io.quarkus] (main) Profile test activated.
2020-08-28 18:30:30,659 INFO  [io.quarkus] (main) Installed features: [cdi, resteasy]
[INFO] Tests run: 2, Failures: 0, Errors: 0, Skipped: 0, Time elapsed: 23.508 s – in org.acme.getting.started.GreetingResourceTest
2020-08-28 18:30:39,982 INFO  [io.quarkus] (main) Quarkus stopped in 0.099s
[INFO]
[INFO] Results:
[INFO]
[INFO] Tests run: 2, Failures: 0, Errors: 0, Skipped: 0
[INFO]
[INFO]
[INFO] — maven-jar-plugin:2.4:jar (default-jar) @ getting-started —
[INFO]
[INFO] — quarkus-maven-plugin:1.7.0.Final:build (default) @ getting-started —
[INFO] [org.jboss.threads] JBoss Threads version 3.1.1.Final
[INFO] [io.quarkus.deployment.pkg.steps.JarResultBuildStep] Building native image source jar: /vagrant/applications/getting-started/target/getting-started-1.0-SNAPSHOT-native-image-source-jar/getting-started-1.0-SNAPSHOT-runner.jar
[INFO] [io.quarkus.deployment.pkg.steps.NativeImageBuildStep] Building native image from /vagrant/applications/getting-started/target/getting-started-1.0-SNAPSHOT-native-image-source-jar/getting-started-1.0-SNAPSHOT-runner.jar
[INFO] [io.quarkus.deployment.pkg.steps.NativeImageBuildStep] Running Quarkus native-image plugin on GraalVM Version 20.1.0 (Java Version 11.0.7)
[INFO] [io.quarkus.deployment.pkg.steps.NativeImageBuildStep] /opt/graalvm-ce-java11-20.1.0/bin/native-image -J-Dsun.nio.ch.maxUpdateArraySize=100 -J-Djava.util.logging.manager=org.jboss.logmanager.LogManager -J-Dvertx.logger-delegate-factory-class-name=io.quarkus.vertx.core.runtime.VertxLogDelegateFactory -J-Dvertx.disableDnsResolver=true -J-Dio.netty.leakDetection.level=DISABLED -J-Dio.netty.allocator.maxOrder=1 -J-Duser.language=en -J-Dfile.encoding=UTF-8 –initialize-at-build-time= -H:InitialCollectionPolicy=com.oracle.svm.core.genscavenge.CollectionPolicy$BySpaceAndTime -H:+JNI -jar getting-started-1.0-SNAPSHOT-runner.jar -H:FallbackThreshold=0 -H:+ReportExceptionStackTraces -H:-AddAllCharsets -H:EnableURLProtocols=http -H:NativeLinkerOption=-no-pie –no-server -H:-UseServiceLoaderFeature -H:+StackTrace getting-started-1.0-SNAPSHOT-runner
[getting-started-1.0-SNAPSHOT-runner:25626]    classlist:  30,254.24 ms,  0.96 GB
[getting-started-1.0-SNAPSHOT-runner:25626]        (cap):   4,655.15 ms,  0.94 GB
[getting-started-1.0-SNAPSHOT-runner:25626]        setup:  17,233.53 ms,  0.94 GB
18:34:42,643 INFO  [org.jbo.threads] JBoss Threads version 3.1.1.Final
[getting-started-1.0-SNAPSHOT-runner:25626]     (clinit):   3,177.69 ms,  2.69 GB
[getting-started-1.0-SNAPSHOT-runner:25626]   (typeflow): 141,500.85 ms,  2.69 GB
[getting-started-1.0-SNAPSHOT-runner:25626]    (objects): 246,163.33 ms,  2.69 GB
[getting-started-1.0-SNAPSHOT-runner:25626]   (features):   3,666.14 ms,  2.69 GB
[getting-started-1.0-SNAPSHOT-runner:25626]     analysis: 399,595.91 ms,  2.69 GB
[getting-started-1.0-SNAPSHOT-runner:25626]     universe:   9,180.69 ms,  2.69 GB
[getting-started-1.0-SNAPSHOT-runner:25626]      (parse):  51,668.67 ms,  2.69 GB
[getting-started-1.0-SNAPSHOT-runner:25626]     (inline):  42,712.69 ms,  2.99 GB
[getting-started-1.0-SNAPSHOT-runner:25626]    (compile): 256,520.90 ms,  2.83 GB
[getting-started-1.0-SNAPSHOT-runner:25626]      compile: 360,053.30 ms,  2.83 GB
[getting-started-1.0-SNAPSHOT-runner:25626]        image:  20,236.10 ms,  2.83 GB
[getting-started-1.0-SNAPSHOT-runner:25626]        write:   3,058.62 ms,  2.83 GB
[getting-started-1.0-SNAPSHOT-runner:25626]      [total]: 841,992.78 ms,  2.83 GB
[INFO] [io.quarkus.deployment.pkg.steps.NativeImageBuildStep] Execute [objcopy, –strip-debug, /vagrant/applications/getting-started/target/getting-started-1.0-SNAPSHOT-runner]
[INFO] [io.quarkus.deployment.QuarkusAugmentor] Quarkus augmentation completed in 863284ms
[INFO]
[INFO] — maven-failsafe-plugin:3.0.0-M5:integration-test (default) @ getting-started —
[INFO]
[INFO] ——————————————————-
[INFO]  T E S T S
[INFO] ——————————————————-
[INFO] Running org.acme.getting.started.NativeGreetingResourceIT
Executing [/vagrant/applications/getting-started/target/getting-started-1.0-SNAPSHOT-runner, -Dquarkus.http.port=8081, -Dquarkus.http.ssl-port=8444, -Dtest.url=http://localhost:8081, -Dquarkus.log.file.path=target/target/quarkus.log]

Powered by Quarkus 1.7.0.Final
2020-08-28 18:45:17,012 INFO  [io.quarkus] (main) getting-started 1.0-SNAPSHOT native (powered by Quarkus 1.7.0.Final) started in 0.205s. Listening on: http://0.0.0.0:8081
2020-08-28 18:45:17,020 INFO  [io.quarkus] (main) Profile prod activated.
2020-08-28 18:45:17,020 INFO  [io.quarkus] (main) Installed features: [cdi, resteasy]
[INFO] Tests run: 2, Failures: 0, Errors: 0, Skipped: 0, Time elapsed: 11.452 s – in org.acme.getting.started.NativeGreetingResourceIT
[INFO]
[INFO] Results:
[INFO]
[INFO] Tests run: 2, Failures: 0, Errors: 0, Skipped: 0
[INFO]
[INFO]
[INFO] — maven-failsafe-plugin:3.0.0-M5:verify (default) @ getting-started —
[INFO] ————————————————————————
[INFO] BUILD SUCCESS
[INFO] ————————————————————————
[INFO] Total time:  15:34 min
[INFO] Finished at: 2020-08-28T18:45:28Z
[INFO] ————————————————————————
vagrant@ubuntu-bionic:/vagrant/applications/getting-started$

NativeGreetingResourceIT.java

Below, you can see the test file that runs against the native executable. The executable is retrieved using the native.image.path system property configured in the Failsafe Maven Plugin (see pom.xml).

For more information about testing, debugging and configuring the native executable please see the Quarkus documentation and the code guide.
[https://quarkus.io/guides/building-native-image#testing-the-native-executable]

Creating a Linux native executable without GraalVM installed locally

Quite often one only needs to create a native Linux executable for their Quarkus application (for example in order to run in a containerized environment) and would like to avoid the trouble of installing the proper GraalVM version in order to accomplish this task (for example, in CI environments it’s common practice to install as little software as possible).

To this end, Quarkus provides a very convenient way of creating a native Linux executable by leveraging a container runtime such as Docker or podman.
[https://quarkus.io/guides/building-native-image#container-runtime]

So, if you don’t have GraalVM installed locally or your local operating system is not Linux, you can still create a Linux native executable.

In order to try this out, I used the following command on the Linux Command Prompt, being the easiest way of accomplishing this task:

./mvnw package -Pnative -Dquarkus.native.container-build=true

Remark:
The build is done using a container runtime. If the Quarkus config property quarkus.native.container-build is set, Docker will be used by default, unless container-runtime (by using property quarkus.native.container-runtime) is also set. In my demo environment I had Docker installed, so this is fine by me.

For more information, please see the code guide.
[https://quarkus.io/guides/building-native-image#container-runtime]

With the following output:


[INFO] Scanning for projects…
[INFO]
[INFO] ———————-< org.acme:getting-started >———————-
[INFO] Building getting-started 1.0-SNAPSHOT
[INFO] ——————————–[ jar ]———————————
[INFO]
[INFO] — quarkus-maven-plugin:1.7.0.Final:prepare (default) @ getting-started —
[INFO]
[INFO] — maven-resources-plugin:2.6:resources (default-resources) @ getting-started —
[INFO] Using ‘UTF-8’ encoding to copy filtered resources.
[INFO] Copying 4 resources
[INFO]
[INFO] — maven-compiler-plugin:3.8.1:compile (default-compile) @ getting-started —
[INFO] Nothing to compile – all classes are up to date
[INFO]
[INFO] — quarkus-maven-plugin:1.7.0.Final:prepare-tests (default) @ getting-started —
[INFO]
[INFO] — maven-resources-plugin:2.6:testResources (default-testResources) @ getting-started —
[INFO] Using ‘UTF-8’ encoding to copy filtered resources.
[INFO] skip non existing resourceDirectory /vagrant/applications/getting-started/src/test/resources
[INFO]
[INFO] — maven-compiler-plugin:3.8.1:testCompile (default-testCompile) @ getting-started —
[INFO] Nothing to compile – all classes are up to date
[INFO]
[INFO] — maven-surefire-plugin:3.0.0-M5:test (default-test) @ getting-started —
[INFO]
[INFO] ——————————————————-
[INFO]  T E S T S
[INFO] ——————————————————-
[INFO] Running org.acme.getting.started.GreetingResourceTest
2020-08-29 09:37:00,943 INFO  [io.quarkus] (main) Quarkus 1.7.0.Final on JVM started in 12.027s. Listening on: http://0.0.0.0:8081
2020-08-29 09:37:01,129 INFO  [io.quarkus] (main) Profile test activated.
2020-08-29 09:37:01,131 INFO  [io.quarkus] (main) Installed features: [cdi, resteasy]
[INFO] Tests run: 2, Failures: 0, Errors: 0, Skipped: 0, Time elapsed: 23.853 s – in org.acme.getting.started.GreetingResourceTest
2020-08-29 09:37:10,804 INFO  [io.quarkus] (main) Quarkus stopped in 0.126s
[INFO]
[INFO] Results:
[INFO]
[INFO] Tests run: 2, Failures: 0, Errors: 0, Skipped: 0
[INFO]
[INFO]
[INFO] — maven-jar-plugin:2.4:jar (default-jar) @ getting-started —
[INFO]
[INFO] — quarkus-maven-plugin:1.7.0.Final:build (default) @ getting-started —
[INFO] [org.jboss.threads] JBoss Threads version 3.1.1.Final
[INFO] [io.quarkus.deployment.pkg.steps.JarResultBuildStep] Building native image source jar: /vagrant/applications/getting-started/target/getting-started-1.0-SNAPSHOT-native-image-source-jar/getting-started-1.0-SNAPSHOT-runner.jar
[INFO] [io.quarkus.deployment.pkg.steps.NativeImageBuildStep] Building native image from /vagrant/applications/getting-started/target/getting-started-1.0-SNAPSHOT-native-image-source-jar/getting-started-1.0-SNAPSHOT-runner.jar
[INFO] [io.quarkus.deployment.pkg.steps.NativeImageBuildStep] Checking image status quay.io/quarkus/ubi-quarkus-native-image:20.1.0-java11
20.1.0-java11: Pulling from quarkus/ubi-quarkus-native-image
57de4da701b5: Pull complete
Digest: sha256:ebdd479c0cb465ef513a645dd055999aee5a59d6828f9e57495c4d5d3882c56d
Status: Downloaded newer image for quay.io/quarkus/ubi-quarkus-native-image:20.1.0-java11
quay.io/quarkus/ubi-quarkus-native-image:20.1.0-java11
[INFO] [io.quarkus.deployment.pkg.steps.NativeImageBuildStep] Running Quarkus native-image plugin on GraalVM Version 20.1.0 (Java Version 11.0.7)
[INFO] [io.quarkus.deployment.pkg.steps.NativeImageBuildStep] docker run -v /vagrant/applications/getting-started/target/getting-started-1.0-SNAPSHOT-native-image-source-jar:/project:z –env LANG=C –user 1000:1000 –rm quay.io/quarkus/ubi-quarkus-native-image:20.1.0-java11 -J-Dsun.nio.ch.maxUpdateArraySize=100 -J-Djava.util.logging.manager=org.jboss.logmanager.LogManager -J-Dvertx.logger-delegate-factory-class-name=io.quarkus.vertx.core.runtime.VertxLogDelegateFactory -J-Dvertx.disableDnsResolver=true -J-Dio.netty.leakDetection.level=DISABLED -J-Dio.netty.allocator.maxOrder=1 -J-Duser.language=en -J-Dfile.encoding=UTF-8 –initialize-at-build-time= -H:InitialCollectionPolicy=com.oracle.svm.core.genscavenge.CollectionPolicy$BySpaceAndTime -H:+JNI -jar getting-started-1.0-SNAPSHOT-runner.jar -H:FallbackThreshold=0 -H:+ReportExceptionStackTraces -H:-AddAllCharsets -H:EnableURLProtocols=http –no-server -H:-UseServiceLoaderFeature -H:+StackTrace getting-started-1.0-SNAPSHOT-runner
[getting-started-1.0-SNAPSHOT-runner:19]    classlist:  12,790.08 ms,  0.96 GB
[getting-started-1.0-SNAPSHOT-runner:19]        (cap):   1,831.81 ms,  0.96 GB
[getting-started-1.0-SNAPSHOT-runner:19]        setup:   6,935.07 ms,  0.96 GB
09:49:46,882 INFO  [org.jbo.threads] JBoss Threads version 3.1.1.Final
[getting-started-1.0-SNAPSHOT-runner:19]     (clinit):   1,181.84 ms,  2.68 GB
[getting-started-1.0-SNAPSHOT-runner:19]   (typeflow):  57,891.48 ms,  2.68 GB
[getting-started-1.0-SNAPSHOT-runner:19]    (objects):  90,120.46 ms,  2.68 GB
[getting-started-1.0-SNAPSHOT-runner:19]   (features):   1,482.72 ms,  2.68 GB
[getting-started-1.0-SNAPSHOT-runner:19]     analysis: 152,945.06 ms,  2.68 GB
[getting-started-1.0-SNAPSHOT-runner:19]     universe:   3,639.09 ms,  2.68 GB
[getting-started-1.0-SNAPSHOT-runner:19]      (parse):  24,118.92 ms,  2.79 GB
[getting-started-1.0-SNAPSHOT-runner:19]     (inline):  11,436.18 ms,  2.58 GB
[getting-started-1.0-SNAPSHOT-runner:19]    (compile): 108,086.55 ms,  3.29 GB
[getting-started-1.0-SNAPSHOT-runner:19]      compile: 147,548.59 ms,  3.29 GB
[getting-started-1.0-SNAPSHOT-runner:19]        image:   7,754.27 ms,  3.29 GB
[getting-started-1.0-SNAPSHOT-runner:19]        write:   1,359.51 ms,  3.29 GB
[getting-started-1.0-SNAPSHOT-runner:19]      [total]: 333,980.04 ms,  3.29 GB
[INFO] [io.quarkus.deployment.pkg.steps.NativeImageBuildStep] Execute [objcopy, –strip-debug, /vagrant/applications/getting-started/target/getting-started-1.0-SNAPSHOT-runner]
[INFO] [io.quarkus.deployment.QuarkusAugmentor] Quarkus augmentation completed in 1010110ms
[INFO] ————————————————————————
[INFO] BUILD SUCCESS
[INFO] ————————————————————————
[INFO] Total time:  17:39 min
[INFO] Finished at: 2020-08-29T09:54:03Z
[INFO] ————————————————————————
vagrant@ubuntu-bionic:/vagrant/applications/getting-started$

For your and my convenience, in the table below I summarized the Quarkus deployment steps (io.quarkus.deployment.pkg.steps) from the output above:
[in bold, I highlighted the changes against the previous summarization]

Step Output
io.quarkus.deployment.pkg.steps.JarResultBuildStep Building native image source jar: /vagrant/applications/getting-started/target/getting-started-1.0-SNAPSHOT-native-image-source-jar/getting-started-1.0-SNAPSHOT-runner.jar
io.quarkus.deployment.pkg.steps.NativeImageBuildStep Building native image from /vagrant/applications/getting-started/target/getting-started-1.0-SNAPSHOT-native-image-source-jar/getting-started-1.0-SNAPSHOT-runner.jar
Checking image status quay.io/quarkus/ubi-quarkus-native-image:20.1.0-java11 20.1.0-java11: Pulling from quarkus/ubi-quarkus-native-image 57de4da701b5: Pull complete cf0f3ebe9f53: Pull complete 4c48107dcc7b: Pull complete Digest: sha256:ebdd479c0cb465ef513a645dd055999aee5a59d6828f9e57495c4d5d3882c56d Status: Downloaded newer image for quay.io/quarkus/ubi-quarkus-native-image:20.1.0-java11 quay.io/quarkus/ubi-quarkus-native-image:20.1.0-java11
Running Quarkus native-image plugin on GraalVM Version 20.1.0 (Java Version 11.0.7)
docker run -v /vagrant/applications/getting-started/target/getting-started-1.0-SNAPSHOT-native-image-source-jar:/project:z --env LANG=C --user 1000:1000 --rm quay.io/quarkus/ubi-quarkus-native-image:20.1.0-java11 -J-Dsun.nio.ch.maxUpdateArraySize=100 -J-Djava.util.logging.manager=org.jboss.logmanager.LogManager -J-Dvertx.logger-delegate-factory-class-name=io.quarkus.vertx.core.runtime.VertxLogDelegateFactory -J-Dvertx.disableDnsResolver=true -J-Dio.netty.leakDetection.level=DISABLED -J-Dio.netty.allocator.maxOrder=1 -J-Duser.language=en -J-Dfile.encoding=UTF-8 --initialize-at-build-time= -H:InitialCollectionPolicy=com.oracle.svm.core.genscavenge.CollectionPolicy$BySpaceAndTime -H:+JNI -jar getting-started-1.0-SNAPSHOT-runner.jar -H:FallbackThreshold=0 -H:+ReportExceptionStackTraces -H:-AddAllCharsets -H:EnableURLProtocols=http --no-server -H:-UseServiceLoaderFeature -H:+StackTrace getting-started-1.0-SNAPSHOT-runner
Execute [objcopy, --strip-debug, /vagrant/applications/getting-started/target/getting-started-1.0-SNAPSHOT-runner]

As you can see in the output above, for creating the native executable, the following docker image is used:

quay.io/quarkus/ubi-quarkus-native-image:20.1.0-java11

If you want to use a different one, you can set Quarkus config property quarkus.native.builder-image.
[https://quarkus.io/guides/building-native-image#configuration-reference]

Remark:
When using the docker run –rm flag, Docker automatically cleans up the container and removes the file system when the container exits.
[https://docs.docker.com/engine/reference/run/]

In order to get a list of all the docker images, I used the following command on the Linux Command Prompt:

docker image ls

With the following output:

Here you can see the quay.io/quarkus/ubi-quarkus-native-image docker image that was used. Although the code guide has some more topics, for now I will stop and continue later on writing about them.

So, I conclude this article. I shared with you the steps I took trying out the Quarkus code guides, related to the following topics:

  • Configuring Your Application
  • Compiling the application to a native executable by using a local GraalVM installation or by leveraging a container runtime such as Docker and using a Docker container that embeds GraalVM

In a next article, you can read more about other Quarkus code guides I tried out, related to the following topics:

  • Packaging the native executable in a container
  • The ability to automatically generate Kubernetes resources by Quarkus

The post Quarkus – Supersonic Subatomic Java, trying out some Quarkus code guides (part1) appeared first on AMIS, Data Driven Blog.

Quarkus – Supersonic Subatomic Java, trying out some Quarkus code guides (part2)

$
0
0

In this article, you can read more about a Quarkus code guide I tried out, related to the following topic:

  • Packaging the native executable in a container

In a next article, you can read more about another Quarkus code guide I tried out, related to the following topic:

  • The ability to automatically generate Kubernetes resources by Quarkus

Quarkus guide “Building a Native Executable”

From the Quarkus guide “Creating Your First Application, part “What’s next?”, I clicked on the link “building a native executable guide”.
[https://quarkus.io/guides/getting-started#whats-next]

Building a native executable requires using a distribution of GraalVM.

In my previous article I already covered some of the topics in this code guide. So, I will now continue with the topic related to “Creating a container”.
[https://quarkus.io/guides/building-native-image#creating-a-container]

Remember, for compiling the application to a native executable, I described the following two ways:

  • By using a local GraalVM installation
  • By leveraging a container runtime such as Docker and using a Docker container that embeds GraalVM

[https://technology.amis.nl/2020/09/01/quarkus-supersonic-subatomic-java-trying-out-some-quarkus-code-guides-part1/]

This guide continues with the code in the existing “getting-started” Maven project.

Creating a container manually

You can run the application in a container using the JAR produced by the Quarkus Maven Plugin or by using the produced native executable.

Quarkus provides Dockerfile’s for both options. In this article I will explore these options further.

Remark:
The difference between the Dockerfile.fast-jar and Dockerfile.jvm (both used to build a container that runs the Quarkus application in JVM mode) is the use of four distinct layers in the fast variant:

# We make four distinct layers so if there are application changes the library layers can be re-used
COPY --chown=1001 target/quarkus-app/lib/ /deployments/lib/
COPY --chown=1001 target/quarkus-app/*.jar /deployments/
COPY --chown=1001 target/quarkus-app/app/ /deployments/app/
COPY --chown=1001 target/quarkus-app/quarkus/ /deployments/quarkus/

If you need more information about Docker, you can have a look at the “Dockerfile reference” and the “Docker Cheat Sheet”.
[https://www.docker.com/]

The provided Dockerfiles use UBI (Universal Base Image) as parent image. This base image has been tailored to work perfectly in containers. The Dockerfiles use the minimal version of the base image to reduce the size of the produced image.
[https://quarkus.io/guides/building-native-image#manually]

For more information please see: https://www.redhat.com/en/blog/introducing-red-hat-universal-base-image

Build a container that runs the Quarkus application in JVM mode

Below, you can see the content of the src/main/docker/Dockerfile.jvm Dockerfile, provided by the Quarkus project generation:

####
# This Dockerfile is used in order to build a container that runs the Quarkus application in JVM mode
#
# Before building the docker image run:
#
# mvn package
#
# Then, build the image with:
#
# docker build -f src/main/docker/Dockerfile.jvm -t quarkus/getting-started-jvm .
#
# Then run the container using:
#
# docker run -i --rm -p 8080:8080 quarkus/getting-started-jvm
#
# If you want to include the debug port into your docker image
# you will have to expose the debug port (default 5005) like this :  EXPOSE 8080 5050
# 
# Then run the container using : 
#
# docker run -i --rm -p 8080:8080 -p 5005:5005 -e JAVA_ENABLE_DEBUG="true" quarkus/getting-started-jvm
#
###
FROM registry.access.redhat.com/ubi8/ubi-minimal:8.1

ARG JAVA_PACKAGE=java-11-openjdk-headless
ARG RUN_JAVA_VERSION=1.3.8

ENV LANG='en_US.UTF-8' LANGUAGE='en_US:en'

# Install java and the run-java script
# Also set up permissions for user `1001`
RUN microdnf install curl ca-certificates ${JAVA_PACKAGE} \
    && microdnf update \
    && microdnf clean all \
    && mkdir /deployments \
    && chown 1001 /deployments \
    && chmod "g+rwX" /deployments \
    && chown 1001:root /deployments \
    && curl https://repo1.maven.org/maven2/io/fabric8/run-java-sh/${RUN_JAVA_VERSION}/run-java-sh-${RUN_JAVA_VERSION}-sh.sh -o /deployments/run-java.sh \
    && chown 1001 /deployments/run-java.sh \
    && chmod 540 /deployments/run-java.sh \
    && echo "securerandom.source=file:/dev/urandom" >> /etc/alternatives/jre/lib/security/java.security

# Configure the JAVA_OPTIONS, you can add -XshowSettings:vm to also display the heap size.
ENV JAVA_OPTIONS="-Dquarkus.http.host=0.0.0.0 -Djava.util.logging.manager=org.jboss.logmanager.LogManager"

COPY target/lib/* /deployments/lib/
COPY target/*-runner.jar /deployments/app.jar

EXPOSE 8080
USER 1001

ENTRYPOINT [ "/deployments/run-java.sh" ]

As you can see, this Dockerfile uses the following application resources:

Next, I followed the instructions in the Dockerfile.

I used vagrant ssh to connect into the running VM. Next, in order to build the image, I used the following command on the Linux Command Prompt:

cd /vagrant/applications/getting-started
mvn package
docker build -f src/main/docker/Dockerfile.jvm -t quarkus/getting-started-jvm .

With the following output (only showing the part about the image build):


Sending build context to Docker daemon  49.57MB
Step 1/11 : FROM registry.access.redhat.com/ubi8/ubi-minimal:8.1
8.1: Pulling from ubi8/ubi-minimal
b26afdf22be4: Pull complete
218f593046ab: Pull complete
Digest: sha256:df6f9e5d689e4a0b295ff12abc6e2ae2932a1f3e479ae1124ab76cf40c3a8cdd
Status: Downloaded newer image for registry.access.redhat.com/ubi8/ubi-minimal:8.1
 —> 91d23a64fdf2
Step 2/11 : ARG JAVA_PACKAGE=java-11-openjdk-headless
 —> Running in 24697477d296
Removing intermediate container 24697477d296
 —> 3818465cc8fa
Step 3/11 : ARG RUN_JAVA_VERSION=1.3.8
 —> Running in e1f40a97995f
Removing intermediate container e1f40a97995f
 —> c45c7ada9216
Step 4/11 : ENV LANG=’en_US.UTF-8′ LANGUAGE=’en_US:en’
 —> Running in 40779cf018dd
Removing intermediate container 40779cf018dd
 —> eea2c4e04c6c
Step 5/11 : RUN microdnf install curl ca-certificates ${JAVA_PACKAGE}     && microdnf update     && microdnf clean all     && mkdir /deployments     && chown 1001 /deployments     && chmod “g+rwX” /deployments     && chown 1001:root /deployments     && curl https://repo1.maven.org/maven2/io/fabric8/run-java-sh/${RUN_JAVA_VERSION}/run-java-sh-${RUN_JAVA_VERSION}-sh.sh -o /deployments/run-java.sh     && chown 1001 /deployments/run-java.sh     && chmod 540 /deployments/run-java.sh     && echo “securerandom.source=file:/dev/urandom” >> /etc/alternatives/jre/lib/security/java.security
 —> Running in adfa712e3908

(process:6): librhsm-WARNING **: 09:38:48.162: Found 0 entitlement certificates

(process:6): librhsm-WARNING **: 09:38:48.170: Found 0 entitlement certificates

(process:6): libdnf-WARNING **: 09:38:48.176: Loading “/etc/dnf/dnf.conf”: IniParser: Can’t open file
Downloading metadata…
Package                                                          Repository          Size
Installing:
 alsa-lib-1.2.1.2-3.el8.x86_64                                   ubi-8-appstream 451.2 kB
 avahi-libs-0.7-19.el8.x86_64                                    ubi-8-baseos     64.6 kB
 copy-jdk-configs-3.7-1.el8.noarch                               ubi-8-appstream  27.3 kB
 cups-libs-1:2.2.6-33.el8.x86_64                                 ubi-8-baseos    442.0 kB
 dbus-libs-1:1.12.8-10.el8_2.x86_64                              ubi-8-baseos    187.6 kB
 freetype-2.9.1-4.el8.x86_64                                     ubi-8-baseos    402.7 kB
 java-11-openjdk-headless-1:11.0.8.10-0.el8_2.x86_64             ubi-8-appstream  41.6 MB
 javapackages-filesystem-5.3.0-1.module+el8+2447+6f56d9a6.noarch ubi-8-appstream  31.1 kB
 lcms2-2.9-2.el8.x86_64                                          ubi-8-appstream 168.6 kB
 libjpeg-turbo-1.5.3-10.el8.x86_64                               ubi-8-appstream 159.2 kB
 libpng-2:1.6.34-5.el8.x86_64                                    ubi-8-baseos    129.0 kB
 lksctp-tools-1.0.18-3.el8.x86_64                                ubi-8-baseos    101.9 kB
 lua-5.3.4-11.el8.x86_64                                         ubi-8-appstream 197.4 kB
 tzdata-java-2020a-1.el8.noarch                                  ubi-8-appstream 193.4 kB
Transaction Summary:
 Installing:       14 packages
 Reinstalling:      0 packages
 Upgrading:         0 packages
 Removing:          0 packages
 Downgrading:       0 packages
Downloading packages…
Running transaction test…
Installing: tzdata-java;2020a-1.el8;noarch;ubi-8-appstream
Installing: alsa-lib;1.2.1.2-3.el8;x86_64;ubi-8-appstream
Installing: lcms2;2.9-2.el8;x86_64;ubi-8-appstream
Installing: lua;5.3.4-11.el8;x86_64;ubi-8-appstream
Installing: copy-jdk-configs;3.7-1.el8;noarch;ubi-8-appstream
Installing: libjpeg-turbo;1.5.3-10.el8;x86_64;ubi-8-appstream
Installing: javapackages-filesystem;5.3.0-1.module+el8+2447+6f56d9a6;noarch;ubi-8-appstream
Installing: lksctp-tools;1.0.18-3.el8;x86_64;ubi-8-baseos
Installing: (null)
Installing: libpng;2:1.6.34-5.el8;x86_64;ubi-8-baseos
Installing: (null)
Installing: freetype;2.9.1-4.el8;x86_64;ubi-8-baseos
Installing: (null)
Installing: dbus-libs;1:1.12.8-10.el8_2;x86_64;ubi-8-baseos
Installing: (null)
Installing: avahi-libs;0.7-19.el8;x86_64;ubi-8-baseos
Installing: (null)
Installing: cups-libs;1:2.2.6-33.el8;x86_64;ubi-8-baseos
Installing: (null)
Installing: java-11-openjdk-headless;1:11.0.8.10-0.el8_2;x86_64;ubi-8-appstream
Installing: (null)
Installing: (null)
Complete.

(process:88): librhsm-WARNING **: 09:39:48.421: Found 0 entitlement certificates

(process:88): librhsm-WARNING **: 09:39:48.436: Found 0 entitlement certificates

(process:88): libdnf-WARNING **: 09:39:48.439: Loading “/etc/dnf/dnf.conf”: IniParser: Can’t open file
Downloading metadata…
Package                                            Repository          Size
Installing:
 acl-2.2.53-1.el8.x86_64                           ubi-8-baseos     83.0 kB
 cracklib-2.9.6-15.el8.x86_64                      ubi-8-baseos     95.5 kB
 cracklib-dicts-2.9.6-15.el8.x86_64                ubi-8-baseos      4.1 MB
 cryptsetup-libs-2.2.2-1.el8.x86_64                ubi-8-baseos    438.7 kB

Cleanup: tzdata;2019c-1.el8;noarch;installed
Updating: (null)
Cleanup: libgcc;8.3.1-4.5.el8;x86_64;installed
Updating: (null)
Updating: (null)
Complete.

(microdnf:428): librhsm-WARNING **: 09:41:07.115: Found 0 entitlement certificates

(microdnf:428): librhsm-WARNING **: 09:41:07.121: Found 0 entitlement certificates

(microdnf:428): libdnf-WARNING **: 09:41:07.124: Loading “/etc/dnf/dnf.conf”: IniParser: Can’t open file
Complete.
  % Total    % Received % Xferd  Average Speed   Time    Time     Time  Current
                                 Dload  Upload   Total   Spent    Left  Speed
100 20218  100 20218    0     0  44047      0 –:–:– –:–:– –:–:– 43952
Removing intermediate container adfa712e3908
 —> eedc98908837
Step 6/11 : ENV JAVA_OPTIONS=”-Dquarkus.http.host=0.0.0.0 -Djava.util.logging.manager=org.jboss.logmanager.LogManager”
 —> Running in b6ca56407d27
Removing intermediate container b6ca56407d27
 —> ef0d7a761730
Step 7/11 : COPY target/lib/* /deployments/lib/
 —> 05b7920f320e
Step 8/11 : COPY target/*-runner.jar /deployments/app.jar
 —> 91c87499f38b
Step 9/11 : EXPOSE 8080
 —> Running in 59a65a8d0320
Removing intermediate container 59a65a8d0320
 —> ff0941ccfcbd
Step 10/11 : USER 1001
 —> Running in f0a9e7464e88
Removing intermediate container f0a9e7464e88
 —> 5a06df536e73
Step 11/11 : ENTRYPOINT [ “/deployments/run-java.sh” ]
 —> Running in 799381d98a8b
Removing intermediate container 799381d98a8b
 —> b41bf47f82ac
Successfully built b41bf47f82ac
Successfully tagged quarkus/getting-started-jvm:latest
vagrant@ubuntu-bionic:/vagrant/applications/getting-started$

In order to get a list of all the docker images, I used the following command on the Linux Command Prompt:

docker image ls

With the following output:

Here you can see that image quarkus/getting-started-jvm:latest is created.

Remark:
See the Dockerfile and the option -t used in the docker build command (docker build -f src/main/docker/Dockerfile.jvm -t quarkus/getting-started-jvm .).
–tag , -t: Name and optionally a tag in the ‘name:tag’ format
[https://docs.docker.com/engine/reference/commandline/build/]

Next, in order to run the container, I used the following command on the Linux Command Prompt:

docker run -i --rm -p 8090:8090 quarkus/getting-started-jvm

Remark:
In my previous article I described how I changed the application HTTP port from 8080 to 8090, via src/main/resources/application.properties.
[https://technology.amis.nl/2020/09/01/quarkus-supersonic-subatomic-java-trying-out-some-quarkus-code-guides-part1/]

So, I needed to expose port 8090 externally (instead of 8080), mapped to port 8090 inside the container.
See the Dockerfile and the option -p used in the docker run command (docker run -i –rm -p 8080:8080 quarkus/ quarkus/getting-started-jvm .).
–publish , -p: Publish a container’s port(s) to the host
[https://docs.docker.com/engine/reference/commandline/run/]

With the following output:


exec java -Dquarkus.http.host=0.0.0.0 -Djava.util.logging.manager=org.jboss.logmanager.LogManager -XX:+ExitOnOutOfMemoryError -cp . -jar /deployments/app.jar


Powered by Quarkus 1.7.0.Final
2020-08-30 10:22:11,001 INFO  [io.quarkus] (main) getting-started 1.0-SNAPSHOT on JVM (powered by Quarkus 1.7.0.Final) started in 6.542s. Listening on: http://0.0.0.0:8090
2020-08-30 10:22:11,382 INFO  [io.quarkus] (main) Profile prod activated.
2020-08-30 10:22:11,384 INFO  [io.quarkus] (main) Installed features: [cdi, resteasy]

Then, in the Web Browser on my Windows laptop, I entered the URL: http://localhost:8090/hello

And I got the following result:

So, running the application in a container using the JAR produced by the Quarkus Maven Plugin worked.

Remark:
Remember that on my Windows laptop, I could call port 8090 of my guest operating system because via port forwarding this was made possible.
[https://technology.amis.nl/2020/08/17/quarkus-supersonic-subatomic-java-setting-up-a-demo-environment-using-vagrant-and-oracle-virtualbox/]

Build a container that runs the Quarkus application in native (no JVM) mode

When using a local GraalVM installation, the native executable targets your local operating system (Linux, macOS, Windows etc). However, as a container may not use the same executable format as the one produced by your operating system, you can instruct the Maven build to produce an executable by leveraging a container runtime (as I described in my previous article).
[https://technology.amis.nl/2020/09/01/quarkus-supersonic-subatomic-java-trying-out-some-quarkus-code-guides-part1/]

The produced executable will be a 64 bit Linux executable, so depending on your operating system it may no longer be runnable. However, it’s not an issue as we are going to copy it to a container.
[https://quarkus.io/guides/building-native-image#manually]

Below, you can see the content of the src/main/docker/Dockerfile.native Dockerfile, provided by the Quarkus project generation:

####
# This Dockerfile is used in order to build a container that runs the Quarkus application in native (no JVM) mode
#
# Before building the docker image run:
#
# mvn package -Pnative -Dquarkus.native.container-build=true
#
# Then, build the image with:
#
# docker build -f src/main/docker/Dockerfile.native -t quarkus/getting-started .
#
# Then run the container using:
#
# docker run -i --rm -p 8080:8080 quarkus/getting-started
#
###
FROM registry.access.redhat.com/ubi8/ubi-minimal:8.1
WORKDIR /work/
RUN chown 1001 /work \
    && chmod "g+rwX" /work \
    && chown 1001:root /work
COPY --chown=1001:root target/*-runner /work/application

EXPOSE 8080
USER 1001

CMD ["./application", "-Dquarkus.http.host=0.0.0.0"]

As you can see, this Dockerfile uses the following application resources:

Next, I followed the instructions in the Dockerfile. By the way, the same steps are also described in the code guide.
[https://quarkus.io/guides/building-native-image#manually]

In order to build the native executable, I used the following command on the Linux Command Prompt:

mvn package -Pnative -Dquarkus.native.container-build=true

With the following output:

[INFO] Scanning for projects…
[INFO]
[INFO] ———————-< org.acme:getting-started >———————-
[INFO] Building getting-started 1.0-SNAPSHOT
[INFO] ——————————–[ jar ]———————————
[INFO]
[INFO] — quarkus-maven-plugin:1.7.0.Final:prepare (default) @ getting-started —
[INFO]
[INFO] — maven-resources-plugin:2.6:resources (default-resources) @ getting-started —
[INFO] Using ‘UTF-8’ encoding to copy filtered resources.
[INFO] Copying 4 resources
[INFO]
[INFO] — maven-compiler-plugin:3.8.1:compile (default-compile) @ getting-started —
[INFO] Nothing to compile – all classes are up to date
[INFO]
[INFO] — quarkus-maven-plugin:1.7.0.Final:prepare-tests (default) @ getting-started —
[INFO]
[INFO] — maven-resources-plugin:2.6:testResources (default-testResources) @ getting-started —
[INFO] Using ‘UTF-8’ encoding to copy filtered resources.
[INFO] skip non existing resourceDirectory /vagrant/applications/getting-started/src/test/resources
[INFO]
[INFO] — maven-compiler-plugin:3.8.1:testCompile (default-testCompile) @ getting-started —
[INFO] Nothing to compile – all classes are up to date
[INFO]
[INFO] — maven-surefire-plugin:3.0.0-M5:test (default-test) @ getting-started —
[INFO]
[INFO] ——————————————————-
[INFO] T E S T S
[INFO] ——————————————————-
[INFO] Running org.acme.getting.started.GreetingResourceTest
2020-08-30 10:49:52,067 INFO [io.quarkus] (main) Quarkus 1.7.0.Final on JVM started in 11.922s. Listening on: http://0.0.0.0:8081
2020-08-30 10:49:52,265 INFO [io.quarkus] (main) Profile test activated.
2020-08-30 10:49:52,266 INFO [io.quarkus] (main) Installed features: [cdi, resteasy]
[INFO] Tests run: 2, Failures: 0, Errors: 0, Skipped: 0, Time elapsed: 23.889 s – in org.acme.getting.started.GreetingResourceTest
2020-08-30 10:50:01,782 INFO [io.quarkus] (main) Quarkus stopped in 0.109s
[INFO]
[INFO] Results:
[INFO]
[INFO] Tests run: 2, Failures: 0, Errors: 0, Skipped: 0
[INFO]
[INFO]
[INFO] — maven-jar-plugin:2.4:jar (default-jar) @ getting-started —
[INFO]
[INFO] — quarkus-maven-plugin:1.7.0.Final:build (default) @ getting-started —
[INFO] [org.jboss.threads] JBoss Threads version 3.1.1.Final
[INFO] [io.quarkus.deployment.pkg.steps.JarResultBuildStep] Building native image source jar: /vagrant/applications/getting-started/target/getting-started-1.0-SNAPSHOT-native-image-source-jar/getting-started-1.0-SNAPSHOT-runner.jar
[INFO] [io.quarkus.deployment.pkg.steps.NativeImageBuildStep] Building native image from /vagrant/applications/getting-started/target/getting-started-1.0-SNAPSHOT-native-image-source-jar/getting-started-1.0-SNAPSHOT-runner.jar
[INFO] [io.quarkus.deployment.pkg.steps.NativeImageBuildStep] Checking image status quay.io/quarkus/ubi-quarkus-native-image:20.1.0-java11
20.1.0-java11: Pulling from quarkus/ubi-quarkus-native-image
57de4da701b5: Already exists
cf0f3ebe9f53: Already exists
78512332cf2d: Pull complete
Digest: sha256:0b5f515bd2ac0a5d42534bc3332820d0226b0eae8b8f35d87fd225abd9a3ab23
Status: Downloaded newer image for quay.io/quarkus/ubi-quarkus-native-image:20.1.0-java11
quay.io/quarkus/ubi-quarkus-native-image:20.1.0-java11
[INFO] [io.quarkus.deployment.pkg.steps.NativeImageBuildStep] Running Quarkus native-image plugin on GraalVM Version 20.1.0 (Java Version 11.0.7)
[INFO] [io.quarkus.deployment.pkg.steps.NativeImageBuildStep] docker run -v /vagrant/applications/getting-started/target/getting-started-1.0-SNAPSHOT-native-image-source-jar:/project:z –env LANG=C –user 1000:1000 –rm quay.io/quarkus/ubi-quarkus-native-image:20.1.0-java11 -J-Dsun.nio.ch.maxUpdateArraySize=100 -J-Djava.util.logging.manager=org.jboss.logmanager.LogManager -J-Dvertx.logger-delegate-factory-class-name=io.quarkus.vertx.core.runtime.VertxLogDelegateFactory -J-Dvertx.disableDnsResolver=true -J-Dio.netty.leakDetection.level=DISABLED -J-Dio.netty.allocator.maxOrder=1 -J-Duser.language=en -J-Dfile.encoding=UTF-8 –initialize-at-build-time= -H:InitialCollectionPolicy=com.oracle.svm.core.genscavenge.CollectionPolicy$BySpaceAndTime -H:+JNI -jar getting-started-1.0-SNAPSHOT-runner.jar -H:FallbackThreshold=0 -H:+ReportExceptionStackTraces -H:-AddAllCharsets -H:EnableURLProtocols=http –no-server -H:-UseServiceLoaderFeature -H:+StackTrace getting-started-1.0-SNAPSHOT-runner
[getting-started-1.0-SNAPSHOT-runner:19] classlist: 11,794.35 ms, 0.96 GB
[getting-started-1.0-SNAPSHOT-runner:19] (cap): 1,753.72 ms, 0.94 GB
[getting-started-1.0-SNAPSHOT-runner:19] setup: 6,447.66 ms, 0.94 GB
10:54:14,423 INFO [org.jbo.threads] JBoss Threads version 3.1.1.Final
[getting-started-1.0-SNAPSHOT-runner:19] (clinit): 1,676.22 ms, 2.69 GB
[getting-started-1.0-SNAPSHOT-runner:19] (typeflow): 53,897.19 ms, 2.69 GB
[getting-started-1.0-SNAPSHOT-runner:19] (objects): 92,484.87 ms, 2.69 GB
[getting-started-1.0-SNAPSHOT-runner:19] (features): 1,433.55 ms, 2.69 GB
[getting-started-1.0-SNAPSHOT-runner:19] analysis: 152,230.05 ms, 2.69 GB
[getting-started-1.0-SNAPSHOT-runner:19] universe: 4,297.09 ms, 2.69 GB
[getting-started-1.0-SNAPSHOT-runner:19] (parse): 18,281.48 ms, 2.69 GB
[getting-started-1.0-SNAPSHOT-runner:19] (inline): 17,095.20 ms, 2.85 GB
[getting-started-1.0-SNAPSHOT-runner:19] (compile): 98,601.71 ms, 2.64 GB
[getting-started-1.0-SNAPSHOT-runner:19] compile: 137,707.60 ms, 2.64 GB
[getting-started-1.0-SNAPSHOT-runner:19] image: 7,393.06 ms, 2.87 GB
[getting-started-1.0-SNAPSHOT-runner:19] write: 1,300.51 ms, 2.87 GB
[getting-started-1.0-SNAPSHOT-runner:19] [total]: 322,056.71 ms, 2.87 GB
[INFO] [io.quarkus.deployment.pkg.steps.NativeImageBuildStep] Execute [objcopy, –strip-debug, /vagrant/applications/getting-started/target/getting-started-1.0-SNAPSHOT-runner]
[INFO] [io.quarkus.deployment.QuarkusAugmentor] Quarkus augmentation completed in 499945ms
[INFO] ————————————————————————
[INFO] BUILD SUCCESS
[INFO] ————————————————————————
[INFO] Total time: 09:09 min
[INFO] Finished at: 2020-08-30T10:58:24Z
[INFO] ————————————————————————
vagrant@ubuntu-bionic:/vagrant/applications/getting-started$

In order to build the image, I used the following command on the Linux Command Prompt:

docker build -f src/main/docker/Dockerfile.native -t quarkus/getting-started .

With the following output:


Sending build context to Docker daemon  49.56MB
Step 1/7 : FROM registry.access.redhat.com/ubi8/ubi-minimal:8.1
 —> 91d23a64fdf2
Step 2/7 : WORKDIR /work/
 —> Running in 5b16a3ec287a
Removing intermediate container 5b16a3ec287a
 —> 9798e17519ed
Step 3/7 : RUN chown 1001 /work     && chmod “g+rwX” /work     && chown 1001:root /work
 —> Running in c8e6d0d90e80
Removing intermediate container c8e6d0d90e80
 —> d044aa8c49c1
Step 4/7 : COPY –chown=1001:root target/*-runner /work/application
 —> d01372ad5bce
Step 5/7 : EXPOSE 8080
 —> Running in 0ab79da4d9d6
Removing intermediate container 0ab79da4d9d6
 —> 17d0a05e924f
Step 6/7 : USER 1001
 —> Running in 735b1fcd6f2f
Removing intermediate container 735b1fcd6f2f
 —> 5a4c711603b1
Step 7/7 : CMD [“./application”, “-Dquarkus.http.host=0.0.0.0”]
 —> Running in 13c2ce17e6f0
Removing intermediate container 13c2ce17e6f0
 —> 7f29ba864d85
Successfully built 7f29ba864d85
Successfully tagged quarkus/getting-started:latest
vagrant@ubuntu-bionic:/vagrant/applications/getting-started$

In order to get a list of all the docker images, I used the following command on the Linux Command Prompt:

docker image ls

With the following output:

Here you can see that image quarkus/getting-started:latest is created.

Remark:
See the Dockerfile and the option -t used in the docker build command (docker build -f src/main/docker/Dockerfile.native -t quarkus/getting-started .).
–tag , -t: Name and optionally a tag in the ‘name:tag’ format
[https://docs.docker.com/engine/reference/commandline/build/]

Next, in order to run the container, I used the following command on the Linux Command Prompt:

docker run -i --rm -p 8090:8090 quarkus/getting-started

Remark:
See the remark about using application HTTP port 8090 earlier in this article.

With the following output:


Powered by Quarkus 1.7.0.Final
2020-08-30 11:22:10,527 INFO  [io.quarkus] (main) getting-started 1.0-SNAPSHOT native (powered by Quarkus 1.7.0.Final) started in 0.015s. Listening on: http://0.0.0.0:8090
2020-08-30 11:22:10,527 INFO  [io.quarkus] (main) Profile prod activated.
2020-08-30 11:22:10,528 INFO  [io.quarkus] (main) Installed features: [cdi, resteasy]

Then, in the Web Browser on my Windows laptop, I entered the URL: http://localhost:8090/hello

And I got the following result:

So, running the application in a container using the produced native executable worked.

Creating a container using the container-image extensions

By far the easiest way to create a container-image from your Quarkus application is to leverage one of the container-image extensions.

If one of those extensions is present, then creating a container image for the native executable is essentially a matter of executing a single command:

./mvnw package -Pnative -Dquarkus.native.container-build=true -Dquarkus.container-image.build=true

Remark:

  • quarkus.native.container-build=true allows for creating a Linux executable without GraalVM being installed (and is only necessary if you don’t have GraalVM installed locally or your local operating system is not Linux)
  • quarkus.container-image.build=true instructs Quarkus to create a container-image using the final application artifact (which is the native executable in this case)

[https://quarkus.io/guides/building-native-image#using-the-container-image-extensions]

Remember from my previous article, the build is done using a container runtime. If the Quarkus config property quarkus.native.container-build is set, Docker will be used by default, unless container-runtime (by using property quarkus.native.container-runtime) is also set. In my demo environment I had Docker installed, so this is fine by me.
[https://technology.amis.nl/2020/09/01/quarkus-supersonic-subatomic-java-trying-out-some-quarkus-code-guides-part1/]

Quarkus provides extensions for building (and pushing) container images. Currently it supports:

  • Jib
  • Docker
  • S2I

Please see the documentation for more information about these different extensions.
[https://quarkus.io/guides/container-image]

Using the Docker container-image extension

Because in my demo environment I had Docker installed, I focused on the Docker container-image extension.

The extension quarkus-container-image-docker is using the Docker binary and the generated Dockerfiles under src/main/docker in order to perform Docker builds.
[https://quarkus.io/guides/container-image]

To use this feature, add the extension to your project. So, in order to add it, I used the following command on the Linux Command Prompt:

./mvnw quarkus:add-extension -Dextensions="container-image-docker"

With the following output:


[INFO] Scanning for projects…
[INFO]
[INFO] ———————-< org.acme:getting-started >———————-
[INFO] Building getting-started 1.0-SNAPSHOT
[INFO] ——————————–[ jar ]———————————
[INFO]
[INFO] — quarkus-maven-plugin:1.7.0.Final:add-extension (default-cli) @ getting-started —
✅ Extension io.quarkus:quarkus-container-image-docker has been installed
[INFO] ————————————————————————
[INFO] BUILD SUCCESS
[INFO] ————————————————————————
[INFO] Total time:  4.194 s
[INFO] Finished at: 2020-08-30T15:03:44Z
[INFO] ————————————————————————
vagrant@ubuntu-bionic:/vagrant/applications/getting-started$

In the pom.xml this added the following dependency:

    <dependency>
      <groupId>io.quarkus</groupId>
      <artifactId>quarkus-container-image-docker</artifactId>
    </dependency>

In order to get a list of all the docker images, I used the following command on the Linux Command Prompt:

docker image ls

With the following output:

In order to build the Docker image, I used the following command (mentioned earlier) on the Linux Command Prompt:

./mvnw package -Pnative -Dquarkus.native.container-build=true -Dquarkus.container-image.build=true

With the following output:


[INFO] Scanning for projects…
[INFO]
[INFO] ———————-< org.acme:getting-started >———————-
[INFO] Building getting-started 1.0-SNAPSHOT
[INFO] ——————————–[ jar ]———————————
Downloading from central: https://repo.maven.apache.org/maven2/io/quarkus/quarkus-container-image-docker/1.7.0.Final/quarkus-container-image-docker-1.7.0.Final.pom
Downloaded from central: https://repo.maven.apache.org/maven2/io/quarkus/quarkus-container-image-docker/1.7.0.Final/quarkus-container-image-docker-1.7.0.Final.pom (1.4 kB at 701 B/s)
Downloading from central: https://repo.maven.apache.org/maven2/io/quarkus/quarkus-container-image-docker-parent/1.7.0.Final/quarkus-container-image-docker-parent-1.7.0.Final.pom
Downloaded from central: https://repo.maven.apache.org/maven2/io/quarkus/quarkus-container-image-docker-parent/1.7.0.Final/quarkus-container-image-docker-parent-1.7.0.Final.pom (741 B at 6.6 kB/s)
Downloading from central: https://repo.maven.apache.org/maven2/io/quarkus/quarkus-container-image-parent/1.7.0.Final/quarkus-container-image-parent-1.7.0.Final.pom
Downloaded from central: https://repo.maven.apache.org/maven2/io/quarkus/quarkus-container-image-parent/1.7.0.Final/quarkus-container-image-parent-1.7.0.Final.pom (933 B at 6.3 kB/s)
Downloading from central: https://repo.maven.apache.org/maven2/io/quarkus/quarkus-container-image-docker/1.7.0.Final/quarkus-container-image-docker-1.7.0.Final.jar
Downloaded from central: https://repo.maven.apache.org/maven2/io/quarkus/quarkus-container-image-docker/1.7.0.Final/quarkus-container-image-docker-1.7.0.Final.jar (3.0 kB at 23 kB/s)
[INFO]
[INFO] — quarkus-maven-plugin:1.7.0.Final:prepare (default) @ getting-started —
Downloading from central: https://repo.maven.apache.org/maven2/io/quarkus/quarkus-container-image-docker-deployment/1.7.0.Final/quarkus-container-image-docker-deployment-1.7.0.Final.pom
Downloaded from central: https://repo.maven.apache.org/maven2/io/quarkus/quarkus-container-image-docker-deployment/1.7.0.Final/quarkus-container-image-docker-deployment-1.7.0.Final.pom (1.6 kB at 2.7 kB/s)
Downloading from central: https://repo.maven.apache.org/maven2/io/quarkus/quarkus-container-image-deployment/1.7.0.Final/quarkus-container-image-deployment-1.7.0.Final.pom
Downloaded from central: https://repo.maven.apache.org/maven2/io/quarkus/quarkus-container-image-deployment/1.7.0.Final/quarkus-container-image-deployment-1.7.0.Final.pom (1.9 kB at 17 kB/s)
Downloading from central: https://repo.maven.apache.org/maven2/io/quarkus/quarkus-container-image-spi/1.7.0.Final/quarkus-container-image-spi-1.7.0.Final.pom
Downloaded from central: https://repo.maven.apache.org/maven2/io/quarkus/quarkus-container-image-spi/1.7.0.Final/quarkus-container-image-spi-1.7.0.Final.pom (871 B at 7.4 kB/s)
Downloading from central: https://repo.maven.apache.org/maven2/io/quarkus/quarkus-container-image-util/1.7.0.Final/quarkus-container-image-util-1.7.0.Final.pom
Downloaded from central: https://repo.maven.apache.org/maven2/io/quarkus/quarkus-container-image-util/1.7.0.Final/quarkus-container-image-util-1.7.0.Final.pom (642 B at 6.1 kB/s)
Downloading from central: https://repo.maven.apache.org/maven2/io/quarkus/quarkus-container-image-spi/1.7.0.Final/quarkus-container-image-spi-1.7.0.Final.jar
Downloading from central: https://repo.maven.apache.org/maven2/io/quarkus/quarkus-container-image-util/1.7.0.Final/quarkus-container-image-util-1.7.0.Final.jar
Downloading from central: https://repo.maven.apache.org/maven2/io/quarkus/quarkus-container-image-deployment/1.7.0.Final/quarkus-container-image-deployment-1.7.0.Final.jar
Downloading from central: https://repo.maven.apache.org/maven2/io/quarkus/quarkus-container-image-docker-deployment/1.7.0.Final/quarkus-container-image-docker-deployment-1.7.0.Final.jar
Downloaded from central: https://repo.maven.apache.org/maven2/io/quarkus/quarkus-container-image-util/1.7.0.Final/quarkus-container-image-util-1.7.0.Final.jar (3.6 kB at 7.7 kB/s)
Downloaded from central: https://repo.maven.apache.org/maven2/io/quarkus/quarkus-container-image-spi/1.7.0.Final/quarkus-container-image-spi-1.7.0.Final.jar (6.5 kB at 8.9 kB/s)
Downloaded from central: https://repo.maven.apache.org/maven2/io/quarkus/quarkus-container-image-deployment/1.7.0.Final/quarkus-container-image-deployment-1.7.0.Final.jar (11 kB at 15 kB/s)
Downloaded from central: https://repo.maven.apache.org/maven2/io/quarkus/quarkus-container-image-docker-deployment/1.7.0.Final/quarkus-container-image-docker-deployment-1.7.0.Final.jar (21 kB at 27 kB/s)
[INFO]
[INFO] — maven-resources-plugin:2.6:resources (default-resources) @ getting-started —
[INFO] Using ‘UTF-8’ encoding to copy filtered resources.
[INFO] Copying 4 resources
[INFO]
[INFO] — maven-compiler-plugin:3.8.1:compile (default-compile) @ getting-started —
[INFO] Nothing to compile – all classes are up to date
[INFO]
[INFO] — quarkus-maven-plugin:1.7.0.Final:prepare-tests (default) @ getting-started —
[INFO]
[INFO] — maven-resources-plugin:2.6:testResources (default-testResources) @ getting-started —
[INFO] Using ‘UTF-8′ encoding to copy filtered resources.
[INFO] skip non existing resourceDirectory /vagrant/applications/getting-started/src/test/resources
[INFO]
[INFO] — maven-compiler-plugin:3.8.1:testCompile (default-testCompile) @ getting-started —
[INFO] Nothing to compile – all classes are up to date
[INFO]
[INFO] — maven-surefire-plugin:3.0.0-M5:test (default-test) @ getting-started —
[INFO]
[INFO] ——————————————————-
[INFO]  T E S T S
[INFO] ——————————————————-
[INFO] Running org.acme.getting.started.GreetingResourceTest
2020-09-01 18:50:03,249 INFO  [io.quarkus] (main) Quarkus 1.7.0.Final on JVM started in 11.691s. Listening on: http://0.0.0.0:8081
2020-09-01 18:50:03,261 INFO  [io.quarkus] (main) Profile test activated.
2020-09-01 18:50:03,262 INFO  [io.quarkus] (main) Installed features: [cdi, resteasy]
[INFO] Tests run: 2, Failures: 0, Errors: 0, Skipped: 0, Time elapsed: 33.676 s – in org.acme.getting.started.GreetingResourceTest
2020-09-01 18:50:13,067 INFO  [io.quarkus] (main) Quarkus stopped in 0.103s
[INFO]
[INFO] Results:
[INFO]
[INFO] Tests run: 2, Failures: 0, Errors: 0, Skipped: 0
[INFO]
[INFO]
[INFO] — maven-jar-plugin:2.4:jar (default-jar) @ getting-started —
[INFO] Building jar: /vagrant/applications/getting-started/target/getting-started-1.0-SNAPSHOT.jar
[INFO]
[INFO] — quarkus-maven-plugin:1.7.0.Final:build (default) @ getting-started —
[INFO] [org.jboss.threads] JBoss Threads version 3.1.1.Final
[INFO] [io.quarkus.deployment.pkg.steps.JarResultBuildStep] Building native image source jar: /vagrant/applications/getting-started/target/getting-started-1.0-SNAPSHOT-native-image-source-jar/getting-started-1.0-SNAPSHOT-runner.jar
[INFO] [io.quarkus.deployment.pkg.steps.NativeImageBuildStep] Building native image from /vagrant/applications/getting-started/target/getting-started-1.0-SNAPSHOT-native-image-source-jar/getting-started-1.0-SNAPSHOT-runner.jar
[INFO] [io.quarkus.deployment.pkg.steps.NativeImageBuildStep] Checking image status quay.io/quarkus/ubi-quarkus-native-image:20.1.0-java11
20.1.0-java11: Pulling from quarkus/ubi-quarkus-native-image
Digest: sha256:0b5f515bd2ac0a5d42534bc3332820d0226b0eae8b8f35d87fd225abd9a3ab23
Status: Image is up to date for quay.io/quarkus/ubi-quarkus-native-image:20.1.0-java11
quay.io/quarkus/ubi-quarkus-native-image:20.1.0-java11
[INFO] [io.quarkus.deployment.pkg.steps.NativeImageBuildStep] Running Quarkus native-image plugin on GraalVM Version 20.1.0 (Java Version 11.0.7)
[INFO] [io.quarkus.deployment.pkg.steps.NativeImageBuildStep] docker run -v /vagrant/applications/getting-started/target/getting-started-1.0-SNAPSHOT-native-image-source-jar:/project:z –env LANG=C –user 1000:1000 –rm quay.io/quarkus/ubi-quarkus-native-image:20.1.0-java11 -J-Djava.util.logging.manager=org.jboss.logmanager.LogManager -J-Dsun.nio.ch.maxUpdateArraySize=100 -J-Dvertx.logger-delegate-factory-class-name=io.quarkus.vertx.core.runtime.VertxLogDelegateFactory -J-Dvertx.disableDnsResolver=true -J-Dio.netty.leakDetection.level=DISABLED -J-Dio.netty.allocator.maxOrder=1 -J-Duser.language=en -J-Dfile.encoding=UTF-8 –initialize-at-build-time= -H:InitialCollectionPolicy=com.oracle.svm.core.genscavenge.CollectionPolicy$BySpaceAndTime -H:+JNI -jar getting-started-1.0-SNAPSHOT-runner.jar -H:FallbackThreshold=0 -H:+ReportExceptionStackTraces -H:-AddAllCharsets -H:EnableURLProtocols=http –no-server -H:-UseServiceLoaderFeature -H:+StackTrace getting-started-1.0-SNAPSHOT-runner
[getting-started-1.0-SNAPSHOT-runner:19]    classlist:  29,007.23 ms,  0.96 GB
[getting-started-1.0-SNAPSHOT-runner:19]        (cap):   4,912.59 ms,  0.94 GB
[getting-started-1.0-SNAPSHOT-runner:19]        setup:  18,197.04 ms,  0.94 GB
18:54:16,535 INFO  [org.jbo.threads] JBoss Threads version 3.1.1.Final
[getting-started-1.0-SNAPSHOT-runner:19]     (clinit):   3,579.00 ms,  2.69 GB
[getting-started-1.0-SNAPSHOT-runner:19]   (typeflow): 150,265.81 ms,  2.69 GB
[getting-started-1.0-SNAPSHOT-runner:19]    (objects): 249,250.13 ms,  2.69 GB
[getting-started-1.0-SNAPSHOT-runner:19]   (features):   3,833.43 ms,  2.69 GB
[getting-started-1.0-SNAPSHOT-runner:19]     analysis: 413,141.58 ms,  2.69 GB
[getting-started-1.0-SNAPSHOT-runner:19]     universe:  10,326.31 ms,  2.69 GB
[getting-started-1.0-SNAPSHOT-runner:19]      (parse):  61,713.93 ms,  2.71 GB
[getting-started-1.0-SNAPSHOT-runner:19]     (inline):  26,986.36 ms,  2.78 GB
[getting-started-1.0-SNAPSHOT-runner:19]    (compile): 284,875.97 ms,  3.25 GB
[getting-started-1.0-SNAPSHOT-runner:19]      compile: 382,876.95 ms,  3.25 GB
[getting-started-1.0-SNAPSHOT-runner:19]        image:  20,813.61 ms,  3.25 GB
[getting-started-1.0-SNAPSHOT-runner:19]        write:   2,789.28 ms,  3.25 GB
[getting-started-1.0-SNAPSHOT-runner:19]      [total]: 879,723.32 ms,  3.25 GB
[INFO] [io.quarkus.deployment.pkg.steps.NativeImageBuildStep] Execute [objcopy, –strip-debug, /vagrant/applications/getting-started/target/getting-started-1.0-SNAPSHOT-runner]
[INFO] [io.quarkus.container.image.docker.deployment.DockerWorking] Docker daemon found. Version:’19.03.12’
[INFO] [io.quarkus.container.image.docker.deployment.DockerProcessor] Starting docker image build
[INFO] [io.quarkus.container.image.docker.deployment.DockerProcessor] Executing the following command to build docker image: ‘docker build -f /vagrant/applications/getting-started/src/main/docker/Dockerfile.native -t vagrant/getting-started:1.0-SNAPSHOT /vagrant/applications/getting-started’
[INFO] [io.quarkus.container.image.docker.deployment.DockerProcessor] Sending build context to Docker daemon  50.82MB
[INFO] [io.quarkus.container.image.docker.deployment.DockerProcessor]
[INFO] [io.quarkus.container.image.docker.deployment.DockerProcessor] Step 1/7 : FROM registry.access.redhat.com/ubi8/ubi-minimal:8.1
[INFO] [io.quarkus.container.image.docker.deployment.DockerProcessor]  —> 91d23a64fdf2
[INFO] [io.quarkus.container.image.docker.deployment.DockerProcessor] Step 2/7 : WORKDIR /work/
[INFO] [io.quarkus.container.image.docker.deployment.DockerProcessor]  —> Using cache
[INFO] [io.quarkus.container.image.docker.deployment.DockerProcessor]  —> 9798e17519ed
[INFO] [io.quarkus.container.image.docker.deployment.DockerProcessor] Step 3/7 : RUN chown 1001 /work     && chmod “g+rwX” /work     && chown 1001:root /work
[INFO] [io.quarkus.container.image.docker.deployment.DockerProcessor]  —> Using cache
[INFO] [io.quarkus.container.image.docker.deployment.DockerProcessor]  —> d044aa8c49c1
[INFO] [io.quarkus.container.image.docker.deployment.DockerProcessor] Step 4/7 : COPY –chown=1001:root target/*-runner /work/application
[INFO] [io.quarkus.container.image.docker.deployment.DockerProcessor]  —> 9051879c623f
[INFO] [io.quarkus.container.image.docker.deployment.DockerProcessor] Step 5/7 : EXPOSE 8080
[INFO] [io.quarkus.container.image.docker.deployment.DockerProcessor]  —> Running in b80af8776a44
[INFO] [io.quarkus.container.image.docker.deployment.DockerProcessor] Removing intermediate container b80af8776a44
[INFO] [io.quarkus.container.image.docker.deployment.DockerProcessor]  —> ff10cb14076e
[INFO] [io.quarkus.container.image.docker.deployment.DockerProcessor] Step 6/7 : USER 1001
[INFO] [io.quarkus.container.image.docker.deployment.DockerProcessor]  —> Running in 9f6ff323e89c
[INFO] [io.quarkus.container.image.docker.deployment.DockerProcessor] Removing intermediate container 9f6ff323e89c
[INFO] [io.quarkus.container.image.docker.deployment.DockerProcessor]  —> 44d8ed57f354
[INFO] [io.quarkus.container.image.docker.deployment.DockerProcessor] Step 7/7 : CMD [“./application”, “-Dquarkus.http.host=0.0.0.0”]
[INFO] [io.quarkus.container.image.docker.deployment.DockerProcessor]  —> Running in 30e6130446d4
[INFO] [io.quarkus.container.image.docker.deployment.DockerProcessor] Removing intermediate container 30e6130446d4
[INFO] [io.quarkus.container.image.docker.deployment.DockerProcessor]  —> 9b131cd3181c
[INFO] [io.quarkus.container.image.docker.deployment.DockerProcessor] Successfully built 9b131cd3181c
[INFO] [io.quarkus.container.image.docker.deployment.DockerProcessor] Successfully tagged vagrant/getting-started:1.0-SNAPSHOT
[INFO] [io.quarkus.container.image.docker.deployment.DockerProcessor] Built container image vagrant/getting-started:1.0-SNAPSHOT (9b131cd3181c)


[INFO] [io.quarkus.deployment.QuarkusAugmentor] Quarkus augmentation completed in 917108ms
[INFO] ————————————————————————
[INFO] BUILD SUCCESS
[INFO] ————————————————————————
[INFO] Total time:  16:23 min
[INFO] Finished at: 2020-09-01T19:05:32Z
[INFO] ————————————————————————
vagrant@ubuntu-bionic:/vagrant/applications/getting-started$

For your and my convenience, in the table below I summarized the Quarkus deployment steps (io.quarkus.deployment.pkg.steps) from the output above:
[in bold, I highlighted the changes against the previous summarization]

Step Output
io.quarkus.deployment.pkg.steps.JarResultBuildStep Building native image source jar: /vagrant/applications/getting-started/target/getting-started-1.0-SNAPSHOT-native-image-source-jar/getting-started-1.0-SNAPSHOT-runner.jar
io.quarkus.deployment.pkg.steps.NativeImageBuildStep Building native image from /vagrant/applications/getting-started/target/getting-started-1.0-SNAPSHOT-native-image-source-jar/getting-started-1.0-SNAPSHOT-runner.jar
Checking image status quay.io/quarkus/ubi-quarkus-native-image:20.1.0-java11 20.1.0-java11: Pulling from quarkus/ubi-quarkus-native-image Digest: sha256:0b5f515bd2ac0a5d42534bc3332820d0226b0eae8b8f35d87fd225abd9a3ab23 Status: Image is up to date for quay.io/quarkus/ubi-quarkus-native-image:20.1.0-java11 quay.io/quarkus/ubi-quarkus-native-image:20.1.0-java11
Running Quarkus native-image plugin on GraalVM Version 20.1.0 (Java Version 11.0.7)
docker run -v /vagrant/applications/getting-started/target/getting-started-1.0-SNAPSHOT-native-image-source-jar:/project:z --env LANG=C --user 1000:1000 --rm quay.io/quarkus/ubi-quarkus-native-image:20.1.0-java11 -J-Djava.util.logging.manager=org.jboss.logmanager.LogManager -J-Dsun.nio.ch.maxUpdateArraySize=100 -J-Dvertx.logger-delegate-factory-class-name=io.quarkus.vertx.core.runtime.VertxLogDelegateFactory -J-Dvertx.disableDnsResolver=true -J-Dio.netty.leakDetection.level=DISABLED -J-Dio.netty.allocator.maxOrder=1 -J-Duser.language=en -J-Dfile.encoding=UTF-8 --initialize-at-build-time= -H:InitialCollectionPolicy=com.oracle.svm.core.genscavenge.CollectionPolicy$BySpaceAndTime -H:+JNI -jar getting-started-1.0-SNAPSHOT-runner.jar -H:FallbackThreshold=0 -H:+ReportExceptionStackTraces -H:-AddAllCharsets -H:EnableURLProtocols=http --no-server -H:-UseServiceLoaderFeature -H:+StackTrace getting-started-1.0-SNAPSHOT-runner
Execute [objcopy, --strip-debug, /vagrant/applications/getting-started/target/getting-started-1.0-SNAPSHOT-runner]

As you can see in the output above, for creating the native executable, the following docker image is used:

quay.io/quarkus/ubi-quarkus-native-image:20.1.0-java11

In order to get a list of all the docker images, I used the following command on the Linux Command Prompt:

docker image ls

With the following output:

Here you can see that image vagrant/getting-started:1.0-SNAPSHOT is created.

Remark:
This name is different from the one we got before, while executing these steps manually (via: docker build -f src/main/docker/Dockerfile.native -t quarkus/getting-started .).

You can see, from the output above that the following command was used to build the docker image:

Executing the following command to build docker image: ‘docker build -f /vagrant/applications/getting-started/src/main/docker/Dockerfile.native -t vagrant/getting-started:1.0-SNAPSHOT /vagrant/applications/getting-started’

So, let’s figure out why this image name and tag was used.

If you want to customize the container image build process, you can use several properties. Please see the documentation.
[https://quarkus.io/guides/container-image#customizing]

With regard to the image name and tag, the following properties are used:

Remark:
In addition to the generic container image options, the container-image-docker also provides some options. Please see the documentation.
[https://quarkus.io/guides/container-image#customizing]

In the example application.properties, I created earlier (described in my previous article), I could see that the image name defaults to the name of the project and the version defaults to the version of the project.
[https://technology.amis.nl/2020/09/01/quarkus-supersonic-subatomic-java-trying-out-some-quarkus-code-guides-part1/]

#
# The name of the application.
# If not set, defaults to the name of the project (except for tests where it is not set at all).
#
#quarkus.application.name=

#
# The version of the application.
# If not set, defaults to the version of the project (except for tests where it is not set at all).
#
#quarkus.application.version=

Remember the contents of pom.xml is:

<?xml version="1.0"?>
<project xsi:schemaLocation="http://maven.apache.org/POM/4.0.0 https://maven.apache.org/xsd/maven-4.0.0.xsd" xmlns="http://maven.apache.org/POM/4.0.0"
    xmlns:xsi="http://www.w3.org/2001/XMLSchema-instance">
  <modelVersion>4.0.0</modelVersion>
  <groupId>org.acme</groupId>
  <artifactId>getting-started</artifactId>
  <version>1.0-SNAPSHOT</version>
...
</project>

So, putting it all together: <user>/<name of the project>:<version of the project >

This explains the image name and tag: vagrant/getting-started:1.0-SNAPSHOT

Remark:
A Docker image name can be made up of slash-separated name components.

So, I conclude this article. I shared with you the steps I took trying out the Quarkus code guide “Building a Native Executable”, and more specific the steps related to the topic “Creating a container”. I described how you can create a container manually, using the JAR produced by the Quarkus Maven Plugin or by using a produced native executable.

By far the easiest way to create a container-image from your Quarkus application is to leverage one of the container-image extensions, like the one I used, the Docker container-image extension.

In a next article, you can read more about another Quarkus code guide I tried out, related to the following topic:

  • The ability to automatically generate Kubernetes resources by Quarkus

The post Quarkus – Supersonic Subatomic Java, trying out some Quarkus code guides (part2) appeared first on AMIS, Data Driven Blog.

My Steps for Getting Started with Java Development on Windows

$
0
0

In this article a brief overview of my steps to set up an environment on my Windows 10 laptop for doing Java programming. If you follow these steps, you should be up and running with coding, building, testing and packaging Java applications on your laptop in some 20 minutes.

The elements used in this environment are

  • Visual Studio Code
  • VS Code Java Extension Pack
  • JDK 14 (OpenJDK)
  • Maven
  • JUnit

The screenshots are taken from a setup process in a Windows Sandbox (see this article for an introduction) –  but the description equally applies to your Windows environment outside the sandbox.

The steps:

  1. Install VS Code
  2. Install VS Code Java Extension Pack
  3. Install JDK
  4. Configure JDK in VS Code
  5. Install Maven
  6. Configure Maven executable path in VS Code
  7. Install JUnit 5
  8. Configure JUnit 5 in VS Code
  9. Test and Run generated Java application

In detail:

Install VS Code

Download VS Code from https://code.visualstudio.com/download and run the installer, However, I am sort of assuming you will probably have VS Code set up and running already.

image

After download and install is complete, run VS Code.

image

Install VS Code Java Extension Pack

Open the Extension tab. Type “java ext” and click on the Install link for the Java Extension Pack item. This will download and install the curated pack of extensions for Java development in VS Code .

image

image


Install JDK

Open the command palette – by pressing CTRL + Shift + P – type “java run”. Then select Java Configure Java Runtime from the dropdown.

image

I have selected the OpenJDK 14, then pressed the download button.

image

The download process is started. An installer is downloaded and I ran it once the download was complete.

image

The installer guides me through the very simple installation process:

image

Once the installer has completed its task, it informs me. Next step is to tell VS Code where to find the JDK.

Configure JDK in VS Code

First, find the location where the JDK has been installed.  In my case, this is C:\Program Files\AdoptOpenJDK\jdk-14.0.2.12-hotspot – the default location.

image

Open settings.json, with CTRL+SHIFT+P and type “sett”

image

Add a new entry to settings.json called java.home and define the location of the JDK as its value. Note: on Windows, the backslashes in the directory path need to be escaped – by using double backslash characters:

“java.home”: “C:\\Program Files\\AdoptOpenJDK\\jdk-14.0.2.12-hotspot”

image

Now also define the (Windows) Environment Variable JAVA_HOME:

image

and make it refer the directory that contains the bin directory with java.exe and javac.exe.

Install Maven

Download Maven from https://maven.apache.org/download.cgi ,. Specifically, I downloaded Maven 3.6.3 Binary Zip Archive File.

image

Install Maven: unzip the zipfile to for example c:\Program Files\Maven:

image

Configure Maven executable path in VS Code

The Maven Extension in VS Code needs to know how it can run Maven. Therefore, the Maven runtime command must be configured. Open settings.json (again) and add a settings called “maven.executable.path” and set as its value the full path for the mvn.cmd file

image

“maven.executable.path”: “C:\\Program Files\\Maven\\apache-maven-3.6.3\\bin\\mvn.cmd”

image

Alternatively, add Maven bin directory to system PATH variable.

Install JUnit 5

Download the JUnit 5 all inclusive downloads (junit-platform-console-standalone) – from https://repo1.maven.org/maven2/org/junit/platform/junit-platform-console-standalone/

SNAGHTML1063f2b8

I have downloaded release 1.7.0 (from directory https://repo1.maven.org/maven2/org/junit/platform/junit-platform-console-standalone/1.7.0/) in the form of file junit-platform-console-standalone-1.7.0-all.jar. I have copied this file to c:\Program Files\JUnit.  

Configure JUnit 5 in VS Code

Configure JUnit in Java Project preferences in settings.json. Open this file in VS Code with CTRL+SHIFT+P and type “sett”

image

“java.project.referencedLibraries”: [

“lib/**/*.jar”,

“C:\\Program Files\\JUnit\\junit-platform-console-standalone-1.7.0-all.jar”

    ],

image

Create a New Java Application

From the command palette (CTRL+Shift+P), type “java pr” and click on Create Java Project

image

Click on Maven

image

Click on archetype-quickstart-jdk8:

image

After selecting the desired version of the archetype – just pick the latest one – you will be asked for the folder in which the Java application should be created. In my case:”c:\MyProject”.

When you perform these steps for the first time after installing Maven, many downloads will be performed by Maven to populate the local repository. After several minutes of downloading (only this first time), the interactive Maven artifact creation dialog is started in the terminal. Provide names for groupId, artifactId and version:

image

and confirm those. Maven will next create the Java application layout specified by the archetype.

Open the folder that Maven created for the Java application – in my case c:\MyProject\myapp – into the VS Code workspace.

image

Before we can run anything in this Java project, we need to switch the Java Language Server to Standard Mode:

Switch the Java Language Server to Standard mode

(from light weight) in order to be able to build and run the application.

The Status bar indicates which mode the current workspace is in using different icons.

image

Clicking the lightweight mode icon switches to standard mode.

Run the generated Java Application

At this point we can run and debug the Java application. Open Class App (file App,.java).

Click on the little Run link hovering over the main method in the class:

image

The class is run and the outcome is visible in the terminal:

image

Testing the generated Java Application (or rather: Running the Generated Test)

The generated application in the Maven archetype is configured for testing with JUnit and it creates a Test Case of class App when initializing the application. You can run class AppTest – which amounts to the same thing as executing the Test Case for class App, which you can do from the Test Explorer:

image

The Test outcome is visible in the bar

image

and the report can be opened by clicking on the bar:

image

Note: You can use java.test.report.showAfterExecution to configure whether to automatically show the test report after execution. By default, it will be shown when there are failed tests.

Configure Maven Compiler Plugin for every Java Project

The Maven pom.xml file in each Java Project needs to be configured with the Maven Compiler Plugin set to use the JDK of choice – in my case (JDK) 14 with preview features enabled. Open the pom.xml for the Java project and add the plugin like this:

<plugin>

<!– https://mvnrepository.com/artifact/org.apache.maven.plugins/maven-compiler-plugin –>

<groupId>org.apache.maven.plugins</groupId>

<artifactId>maven-compiler-plugin</artifactId>

<version>3.8.1</version>

<configuration>

<release>14</release>

<compilerArgs>–enable-preview</compilerArgs>

</configuration>

</plugin>

Maven Docs, details on compiler plugin: https://maven.apache.org/plugins/maven-compiler-plugin/ .

Remove or disable the properties maven.compiler.source and maven.compiler.target (see this tutorial on Maven compiler plugin)

image

Run Maven commands

VS Code through the Maven extension knows how to run Maven commands. It interprets the pom.xml, to learn about the phases, the plugins to use, the JDK and JRE to use etc.

Maven commands can be run off the Java project or from the Maven navigator.

image

The first time you can a Maven command, you will probably have to sit through a great many downloads. Only after several minutes of downloads will the command complete. On subsequent occasions, the same command will be much, much faster.

Maven typically runs unit tests and code quality checks before packaging the application – as a fat jar file for example. When the checks or tests fail, the process is interrupted.

The outcome of the Maven operations are written to the target directory tree – see for example the screenshot with the resulting (fat) jar, the test reports and the (empty) checkstyle report:

image

And now… the Fun Starts

Up until this point, I have not written a single line of code. I have edited configuration files and processed the code created from the Maven archetype. Now that the environment is all set up – it is time for some of my (or your) own coding. Simply create new classes – using the features offered by VS Code and the Java extension pack. Such as IntelliSense code completion & snippet pasting:

image

Debugging, code navigation, semantic highlighting, code folding/unfolding, refactoring,

image

Also: integration with Tomcat, Jetty and other app servers, Spring Boot support, Azure integration,

Resources

Download VS Code – https://code.visualstudio.com/download

VS Code Java Extension Pack – https://code.visualstudio.com/docs/java/java-tutorial#_installing-extensions

VS Code Tutorial Getting Started with Java in VS Code – https://code.visualstudio.com/docs/java/java-tutorial

VS Code Java Refactoring – https://code.visualstudio.com/docs/java/java-refactoring

VS Code Java Language Server Lightweight mode: https://code.visualstudio.com/docs/java/java-project#_lightweight-mode 

Configure JDK in VS Code Java Extension Pack: https://code.visualstudio.com/docs/java/java-tutorial#_settings-for-the-jdk 

VS Code FAQ – How can I use Visual Studio Code with new Java versions? – https://code.visualstudio.com/docs/java/java-faq#_how-can-i-use-visual-studio-code-with-new-java-versions

Checkstyle for Java Extension for VS Code – https://marketplace.visualstudio.com/items?itemName=shengchen.vscode-checkstyle

SonarLint Extension for VS Code – https://marketplace.visualstudio.com/items?itemName=SonarSource.sonarlint-vscode that checks Java code against 550+ rules (https://rules.sonarsource.com/java)

Maven Docs: Maven on Windows – https://maven.apache.org/guides/getting-started/windows-prerequisites.html

Download Site for Maven: https://maven.apache.org/download.cgi

JUnit 5 – Homepage – https://junit.org/junit5/docs/current/user-guide/#overview

JUnit 5 – all inclusive downloads (junit-platform-console-standalone) – https://repo1.maven.org/maven2/org/junit/platform/junit-platform-console-standalone/

The post My Steps for Getting Started with Java Development on Windows appeared first on AMIS, Data Driven Blog.

Jenkins: Building Java and deploying to Kubernetes

$
0
0

Kubernetes is a popular platform to run and manage containerized applications. A CI/CD solution is often needed but not always provided. You might need to set this up for yourself. In this blog post I’ll provide a minimal end-to-end solution for Java applications. This starts with a commit in source control and ends with deployment to Kubernetes.

Tools used:

  • Jenkins as CI/CD platform
  • Kubernetes deployed with Kubespray on KVM (here)
  • MetalLB as Kubernetes loadbalancer
  • GitHub as version control system
  • Smee to forward Webhook calls from GitHub to Jenkins
  • Maven to build the Java code
  • Google Jib to wrap my compiled Java in a container
  • DockerHub as container registry

The Java application

I’ve created a simple Spring Boot service. You can find the code here. I hosted it on GitHub since it was easy to use as source for Jenkins.

I needed something to wrap my Java application inside a container. There are various plug-ins available like for example the Spotify dockerfile-maven plug-in (here) and the fabric8 docker-maven-plugin (here). They both require access to a Docker daemon though. This can be complicated, especially when running Jenkins slaves within Kubernetes. There are workarounds but I did not find any that seemed both easy and secure. I decided to go for Google’s Jib to build my containers since it didn’t have that requirement. 

Docker build flow:

Jib build flow:

The benefits of reducing dependencies for the build process are obvious. In addition Jib also does some smart things splitting the Java application in different container layers. See here. This reduces the amount of storage required for building and deploying new versions as often some of the layers, such as the dependencies layer, don’t change and can be cached. This can reduce build time. As you can see, Jib does not use a Dockerfile so the logic usually in the Dockerfile can be found in the plugin configuration inside the pom.xml file.

Since I did not have a private registry available at the time of writing, I decided to use DockerHub for this. You can find the configuration for using DockerHub inside the pom.xml. It uses environment variables set by the Jenkins build for the credentials (and only in the Jenkins slave which is destroyed after usage). This seemed more secure than passing them in the Maven command-line.

Note that Spring buildpacks could provide similar functionality. I have not looked into them yet though. 

Installing Jenkins

For my Kubernetes environment I have used the setup described here. You also need a persistent storage solution as prerequisite for Jenkins. In a PaaS environment, this is usually provided, but if it is not or you are running your own installation, you can consider using OpenEBS. How to install OpenEBS is described here. kubectl (+ Kubernetes configuration .kube/config) and helm need to be installed on the machine from which you are going to perform the Jenkins deployment.

After you have and a storage class, you can continue with the installation of Jenkins.

First create a PersistentVolumeClaim to store the Jenkins master persistent data. Again, this is based on the storage class solution described above.

 kubectl create ns jenkins  
   
 kubectl create -n jenkins -f - <<END  
 apiVersion: v1  
 kind: PersistentVolumeClaim  
 metadata:  
  name: jenkins-pv-claim  
 spec:  
  storageClassName: openebs-sc-statefulset  
  accessModes:  
   - ReadWriteOnce  
  resources:  
   requests:  
    storage: 8Gi  
 END  

Next install Jenkins. Mind that recently the Jenkins repository for the most up to date Helm charts has recently moved.

 cat << EOF > jenkins-config.yaml  
 persistence:  
   enabled: true  
   size: 5Gi  
   accessMode: ReadWriteOnce  
   existingClaim: jenkins-pv-claim  
   storageClass: "openebs-sc-statefulset"  
 EOF  
   
 helm repo add jenkinsci https://charts.jenkins.io  
 helm install my-jenkins-release -f jenkins-config.yaml jenkinsci/jenkins --namespace jenkins  

Get your ‘admin’ user password by running:

 printf $(kubectl get secret --namespace jenkins my-jenkins-release -o jsonpath="{.data.jenkins-admin-password}" | base64 --decode);echo

Make Jenkins available on localhost:8080 by doing the folowing:

 printf $(kubectl get secret --namespace jenkins my-jenkins-release -o jsonpath="{.data.jenkins-admin-password}" | base64 --decode);echo
 kubectl --namespace jenkins port-forward $POD_NAME 8080:8080

Now visit http://localhost:8080 in your browser and login using user admin and the previously obtained password

Configuring Jenkins

The pipeline

Since I’m doing ‘configuration as code’ I created a declarative Jenkins pipeline and also put it in GitHub next to the service I wanted to deploy. You can find it here. As you can see, the pipeline has several dependencies.

  • presence of tool configuration in Jenkins
    • Maven
    • JDK
  • the Kubernetes CLI plugin (withKubeConfig)
    This plugin makes Kubernetes configuration available within the Jenkins slaves during the build process
  • the Pipeline Maven Integration plugin (withMaven)
    This plugin archives Maven artifacts created such as test reports and JAR files

Tool configuration

JDK

The default JDK plugin can only download old Java versions from Oracle. JDK 11 for example is not available this way so I needed to add a new JDK. I specified a download location of the JDK. There are various available such as AdoptOpenJDK or the one available from Red Hat or Azul Systems. Inside the archive I checked which sub-directory the JDK was put in. I specified this sub-directory in the tool configuration.

Please note that downloading the JDK during each build can be slow and prone to errors (suppose the download URL changes). A better way is to make it available as a mount inside the Jenkins slave container. For this minimal setup I didn’t do that though.

You also need to define a JAVA_HOME variable pointing to a location like indicated below. Why? Well, you also want Maven to use the same JDK.

Maven

Making Maven available is easy and can be done without the need to configure specific files to download and environment variables.

The name of the Maven installation is referenced in the Jenkins pipeline like:

  tools {  
   jdk 'jdk-11'  
   maven 'mvn-3.6.3'  
  }  
   
  stages {  
   stage('Build') {  
    steps {  
     withMaven(maven : 'mvn-3.6.3') {  
      sh "mvn package"  
     }  
    }  
   }  

Kubectl

For kubectl there is no tool definition in the Jenkins configuration available so I did the following:

 sh 'curl -LO "https://storage.googleapis.com/kubernetes-release/release/$(curl -s https://storage.googleapis.com/kubernetes-release/release/stable.txt)/bin/linux/amd64/kubectl"'  
 sh 'chmod u+x ./kubectl'  
 sh './kubectl apply -f k8s.yaml'

Please mind this does not make the build reproducible since the latest stable kubectl can be updated remotely; it is no fixed version.

As you can see, a k8s.yaml file is required. This file can be partially generated with the commands below. I’ve added the Ingress myself though.

 kubectl create deployment spring-boot-demo --image=docker.io/maartensmeets/spring-boot-demo --dry-run=client -o=yaml > k8s.yaml
 echo --- >> k8s.yaml
 kubectl create service loadbalancer spring-boot-demo --tcp=8080:8080 --dry-run=client -o=yaml >> deployment.yaml

The k8s.yaml also depends on a load-balancer to be present. In on-premises installations, you might not have one. I can recommend MetalLB. It is easy to install and use. As indicated on the site though, it is a young product (read here).

In order to install the loadbalancer, first create some configuration. Mind the IPs; they are specific for my environment. You might need to provide your own.

 kubectl apply -f https://raw.githubusercontent.com/metallb/metallb/v0.9.3/manifests/namespace.yaml
 kubectl apply -f https://raw.githubusercontent.com/metallb/metallb/v0.9.3/manifests/metallb.yaml
 # On first install only
 kubectl create secret generic -n metallb-system memberlist --from-literal=secretkey="$(openssl rand -base64 128)"

 kubectl apply -f - <<END 
 apiVersion: v1
 kind: ConfigMap
 metadata:
   namespace: metallb-system
   name: config
 data:
   config: |
     address-pools:
     - name: default
       protocol: layer2
       addresses:
       - 192.168.122.150-192.168.122.255
 END

Credential configuration

Kubernetes

In order for Jenkins to deploy to Kubernetes, Jenkins needs credentials. An easy way to achieve this is by storing a config file (named ‘config’) in Jenkins. This file is usually used by kubectl and found in .kube/config. It allows Jenkins to apply yaml configuration to a Kubernetes instance.

The file can then be referenced from a Jenkins pipeline with the Kubernetes CLI plugin like in the snipped below.

 withKubeConfig([credentialsId: 'kubernetes-config']) {  
      sh 'curl -LO "https://storage.googleapis.com/kubernetes-release/release/$(curl -s https://storage.googleapis.com/kubernetes-release/release/stable.txt)/bin/linux/amd64/kubectl"'  
      sh 'chmod u+x ./kubectl'  
      sh './kubectl apply -f k8s.yaml'  
     }  

DockerHub

I used DockerHub as my container registry. The pom.xml file references the environment variables DOCKER_USERNAME and DOCKER_PASSWORD but how do we set them from the Jenkins configuration? By storing them as credentials of course! 

In the pipeline you can access them as followed:

 withCredentials([usernamePassword(credentialsId: 'docker-credentials', usernameVariable: 'DOCKER_USERNAME', passwordVariable: 'DOCKER_PASSWORD')]) {  
      sh "mvn jib:build"  
     }  

This sample stores credentials directly in Jenkins. You can also use the Jenkins Kubernetes Credentials Provider to store credentials in Kubernetes as secrets. This provides some benefits in management of the credentials, for example with kubectl it is easy to script changes. A challenge is giving the Jenkins user sufficient but not too much privileges on Kubernetes.

GitHub

In order to access GitHub, also some credentials are required:

Jenkins job configuration

The configuration of the Jenkins job is actually almost the least exciting. The pipeline is defined outside of Jenkins. The only thing Jenkins needs to know is where to find the sources and the pipeline.

Create a Multibranch Pipeline job. Multibranch is quite powerful since it allows you to build multiple branches with the same job configuration.

Open the job configuration and specify the Git source. 

The build is based on the Jenkinsfile which contains the pipeline definition.

After you have saved the job it will start building immediately. 

Building and running

Webhook configuration

What is lacking here is Webhook configuration. See for example here. This will cause Jenkins builds to be triggered when branches are created, pull requests are merged, commits happen, etc. Since I’m running Kubernetes locally I do not have a publicly exposed endpoint as target for the GitHub webhook. You can use a simple service like smee.io to get a public URL and forward it to your local Jenkins. Added benefit is that it generally does not care about things like firewalls (similar to ngrok but Webhook specific and doesn’t require an account).

After you have installed the smee CLI and have the Jenkins port forward running (the thing which makes Jenkins available on port 8080) you can do (of course your URL will differ):

 smee -u https://smee.io/z8AyLYwJaUBBDA5V -t http://localhost:8080/github-webhook/

This starts the Webhook proxy and forwards requests to the Jenkins webhook URL. In GitHub you can add a Webhook to call the created proxy and make it trigger Jenkins builds.

Next you can confirm it works from Smee and from GitHub

If I now create a new branch in GitHub

It will appear in Jenkins and start building

If you prefer a nicer web-interface, I can recommend Blue Ocean for Jenkins. It can easily be installed by installing the Blue Ocean plugin.

Finally

After you’ve done all the above, you can access your service running in your Kubernetes environment after a GitHub commit which fires off a webhook which is forwarded by Smee to Jenkins which triggers a Multibranch Pipeline build which builds the Java service, wraps it in a container using Jib and deploys the container to Kubernetes, provides a deployment and a service. The service can be accessed via the MetalLB load-balancer.

The post Jenkins: Building Java and deploying to Kubernetes appeared first on AMIS, Data Driven Blog.

Quarkus – Supersonic Subatomic Java, trying out Quarkus guide “Quarkus – Kubernetes extension” (part 1)

$
0
0

In this article, you can read more about the Quarkus code guide I tried out, related to the following topic:

  • The ability to automatically generate Kubernetes resources by Quarkus

The guide covers generating and deploying Kubernetes resources based on sane defaults and user supplied configuration. In this article, I will focus on using custom labels and annotations.

Quarkus guide “Quarkus – Kubernetes extension”

From the Quarkus guide “Building a Native Executable”, part “What’s next?”, I clicked on the link “deployment to Kubernetes and OpenShift”.
[https://quarkus.io/guides/building-native-image#whats-next]

Quarkus offers the ability to automatically generate Kubernetes resources based on sane defaults and user-supplied configuration using dekorate. It currently supports generating resources for vanilla Kubernetes, OpenShift and Knative.
[https://quarkus.io/guides/deploying-to-kubernetes]

One of the prerequisites is access to a Kubernetes cluster (Minikube is a viable option). In my demo environment I had K3s (lightweight certified Kubernetes distribution) installed, so this is fine by me.
[https://technology.amis.nl/2020/08/17/quarkus-supersonic-subatomic-java-setting-up-a-demo-environment-using-vagrant-and-oracle-virtualbox/]

Although this guide uses a new Quarkus project (including the Kubernetes and Jib extensions), I continued this guide with the code in my existing “getting-started” project and I used (as described in my previous article) the Docker container-image extension (quarkus-container-image-docker) instead of the Jib extension (quarkus-container-image-jib).
[https://technology.amis.nl/2020/09/07/quarkus-supersonic-subatomic-java-trying-out-some-quarkus-code-guides-part2/]

The extension quarkus-container-image-docker is using the Docker binary and the generated Dockerfiles under src/main/docker in order to perform Docker builds.
[https://quarkus.io/guides/container-image]

I did have to add the Kubernetes extension to my project. I used vagrant ssh to connect into the running VM. Next, in order to add the extension, I used the following command on the Linux Command Prompt:

cd /vagrant/applications/getting-started
./mvnw quarkus:add-extension -Dextensions="kubernetes"

With the following output:

[INFO] Scanning for projects…
[INFO]
[INFO] ———————-< org.acme:getting-started >———————-
[INFO] Building getting-started 1.0-SNAPSHOT
[INFO] ——————————–[ jar ]———————————
[INFO]
[INFO] — quarkus-maven-plugin:1.7.0.Final:add-extension (default-cli) @ getting-started —
✅ Extension io.quarkus:quarkus-kubernetes has been installed
[INFO] ————————————————————————
[INFO] BUILD SUCCESS
[INFO] ————————————————————————
[INFO] Total time: 4.190 s
[INFO] Finished at: 2020-09-05T12:54:58Z
[INFO] ————————————————————————
vagrant@ubuntu-bionic:/vagrant/applications/getting-started$

In the pom.xml this added the following dependency:

    <dependency>
      <groupId>io.quarkus</groupId>
      <artifactId>quarkus-kubernetes</artifactId>
    </dependency>

By adding this dependency, Quarkus enables the generation of Kubernetes manifests each time we perform a build while also enabling the build of a container image using Docker.

Next, I followed the instructions in the guide.

Generation of Kubernetes manifests

In order to package the Quarkus project, I used the following command on the Linux Command Prompt:

./mvnw package

With the following output:


[INFO] Scanning for projects...
[INFO]
[INFO] ----------------------< org.acme:getting-started >----------------------
[INFO] Building getting-started 1.0-SNAPSHOT
[INFO] --------------------------------[ jar ]---------------------------------
Downloading from central: https://repo.maven.apache.org/maven2/io/quarkus/quarkus-kubernetes/1.7.0.Final/quarkus-kubernetes-1.7.0.Final.pom
…
Downloaded from central: https://repo.maven.apache.org/maven2/io/dekorate/dekorate-dependencies/0.12.7/dekorate-dependencies-0.12.7.jar (20 MB at 1.0 MB/s)
[INFO]
[INFO] --- maven-resources-plugin:2.6:resources (default-resources) @ getting-started ---
[INFO] Using 'UTF-8' encoding to copy filtered resources.
[INFO] Copying 4 resources
[INFO]
[INFO] --- maven-compiler-plugin:3.8.1:compile (default-compile) @ getting-started ---
[INFO] Nothing to compile - all classes are up to date
[INFO]
[INFO] --- quarkus-maven-plugin:1.7.0.Final:prepare-tests (default) @ getting-started ---
[INFO]
[INFO] --- maven-resources-plugin:2.6:testResources (default-testResources) @ getting-started ---
[INFO] Using 'UTF-8' encoding to copy filtered resources.
[INFO] skip non existing resourceDirectory /vagrant/applications/getting-started/src/test/resources
[INFO]
[INFO] --- maven-compiler-plugin:3.8.1:testCompile (default-testCompile) @ getting-started ---
[INFO] Nothing to compile - all classes are up to date
[INFO]
[INFO] --- maven-surefire-plugin:3.0.0-M5:test (default-test) @ getting-started ---
[INFO]
[INFO] -------------------------------------------------------
[INFO]  T E S T S
[INFO] -------------------------------------------------------
[INFO] Running org.acme.getting.started.GreetingResourceTest
2020-09-05 13:02:52,719 INFO  [io.quarkus] (main) Quarkus 1.7.0.Final on JVM started in 4.424s. Listening on: http://0.0.0.0:8081
2020-09-05 13:02:52,723 INFO  [io.quarkus] (main) Profile test activated.
2020-09-05 13:02:52,723 INFO  [io.quarkus] (main) Installed features: [cdi, kubernetes, resteasy]
[INFO] Tests run: 2, Failures: 0, Errors: 0, Skipped: 0, Time elapsed: 13.024 s - in org.acme.getting.started.GreetingResourceTest
2020-09-05 13:02:56,449 INFO  [io.quarkus] (main) Quarkus stopped in 0.034s
[INFO]
[INFO] Results:
[INFO]
[INFO] Tests run: 2, Failures: 0, Errors: 0, Skipped: 0
[INFO]
[INFO]
[INFO] --- maven-jar-plugin:2.4:jar (default-jar) @ getting-started ---
[INFO] Building jar: /vagrant/applications/getting-started/target/getting-started-1.0-SNAPSHOT.jar
[INFO]
[INFO] --- quarkus-maven-plugin:1.7.0.Final:build (default) @ getting-started ---
[INFO] [org.jboss.threads] JBoss Threads version 3.1.1.Final
[WARNING] [io.quarkus.kubernetes.deployment.KubernetesDeployer] A Kubernetes deployment was requested, but the container image to be built will not be pushed to any registry because "quarkus.container-image.registry" has not been set. The Kubernetes deployment will only work properly if the cluster is using the local Docker daemon. For that reason 'ImagePullPolicy' is being force-set to 'IfNotPresent'.
[WARNING] Error reading service account token from: [/var/run/secrets/kubernetes.io/serviceaccount/token]. Ignoring.
[WARNING] Error reading service account token from: [/var/run/secrets/kubernetes.io/serviceaccount/token]. Ignoring.
[INFO] [io.quarkus.deployment.pkg.steps.JarResultBuildStep] Building thin jar: /vagrant/applications/getting-started/target/getting-started-1.0-SNAPSHOT-runner.jar
[WARNING] [io.quarkus.kubernetes.deployment.KubernetesProcessor] No registry was set for the container image, so 'ImagePullPolicy' is being force-set to 'IfNotPresent'.
[INFO] Checking for existing resources in: /vagrant/applications/getting-started/src/main/kubernetes.
[INFO] [io.quarkus.deployment.QuarkusAugmentor] Quarkus augmentation completed in 7361ms
[INFO] ------------------------------------------------------------------------
[INFO] BUILD SUCCESS
[INFO] ------------------------------------------------------------------------
[INFO] Total time:  57.983 s
[INFO] Finished at: 2020-09-05T13:03:05Z
[INFO] ------------------------------------------------------------------------
vagrant@ubuntu-bionic:/vagrant/applications/getting-started$

You will notice amongst the other files that are created, two files named kubernetes.json and kubernetes.yml in the target/kubernetes/ directory.
If you look at either file you will see that it contains a Kubernetes ServiceAccount, Service and a Deployment.

Below, you can see the content of the target/kubernetes/kubernetes.json Kubernetes manifest, provided by the Quarkus project packaging:

{
  "apiVersion" : "v1",
  "kind" : "ServiceAccount",
  "metadata" : {
    "annotations" : {
      "app.quarkus.io/build-timestamp" : "2020-09-05 - 13:03:02 +0000"
    },
    "labels" : {
      "app.kubernetes.io/name" : "getting-started",
      "app.kubernetes.io/version" : "1.0-SNAPSHOT"
    },
    "name" : "getting-started"
  }
}{
  "apiVersion" : "v1",
  "kind" : "Service",
  "metadata" : {
    "annotations" : {
      "app.quarkus.io/build-timestamp" : "2020-09-05 - 13:03:02 +0000"
    },
    "labels" : {
      "app.kubernetes.io/name" : "getting-started",
      "app.kubernetes.io/version" : "1.0-SNAPSHOT"
    },
    "name" : "getting-started"
  },
  "spec" : {
    "ports" : [ {
      "name" : "http",
      "port" : 8090,
      "targetPort" : 8090
    } ],
    "selector" : {
      "app.kubernetes.io/name" : "getting-started",
      "app.kubernetes.io/version" : "1.0-SNAPSHOT"
    },
    "type" : "ClusterIP"
  }
}{
  "apiVersion" : "apps/v1",
  "kind" : "Deployment",
  "metadata" : {
    "annotations" : {
      "app.quarkus.io/build-timestamp" : "2020-09-05 - 13:03:02 +0000"
    },
    "labels" : {
      "app.kubernetes.io/name" : "getting-started",
      "app.kubernetes.io/version" : "1.0-SNAPSHOT"
    },
    "name" : "getting-started"
  },
  "spec" : {
    "replicas" : 1,
    "selector" : {
      "matchLabels" : {
        "app.kubernetes.io/name" : "getting-started",
        "app.kubernetes.io/version" : "1.0-SNAPSHOT"
      }
    },
    "template" : {
      "metadata" : {
        "annotations" : {
          "app.quarkus.io/build-timestamp" : "2020-09-05 - 13:03:02 +0000"
        },
        "labels" : {
          "app.kubernetes.io/name" : "getting-started",
          "app.kubernetes.io/version" : "1.0-SNAPSHOT"
        }
      },
      "spec" : {
        "containers" : [ {
          "env" : [ {
            "name" : "KUBERNETES_NAMESPACE",
            "valueFrom" : {
              "fieldRef" : {
                "fieldPath" : "metadata.namespace"
              }
            }
          } ],
          "image" : "vagrant/getting-started:1.0-SNAPSHOT",
          "imagePullPolicy" : "IfNotPresent",
          "name" : "getting-started",
          "ports" : [ {
            "containerPort" : 8090,
            "name" : "http",
            "protocol" : "TCP"
          } ]
        } ],
        "serviceAccount" : "getting-started"
      }
    }
  }
}

Below, you can see the content of the target/kubernetes/kubernetes.yml Kubernetes manifest, provided by the Quarkus project packaging:

---
apiVersion: v1
kind: ServiceAccount
metadata:
  annotations:
    app.quarkus.io/build-timestamp: 2020-09-05 - 13:03:02 +0000
  labels:
    app.kubernetes.io/name: getting-started
    app.kubernetes.io/version: 1.0-SNAPSHOT
  name: getting-started
---
apiVersion: v1
kind: Service
metadata:
  annotations:
    app.quarkus.io/build-timestamp: 2020-09-05 - 13:03:02 +0000
  labels:
    app.kubernetes.io/name: getting-started
    app.kubernetes.io/version: 1.0-SNAPSHOT
  name: getting-started
spec:
  ports:
  - name: http
    port: 8090
    targetPort: 8090
  selector:
    app.kubernetes.io/name: getting-started
    app.kubernetes.io/version: 1.0-SNAPSHOT
  type: ClusterIP
---
apiVersion: apps/v1
kind: Deployment
metadata:
  annotations:
    app.quarkus.io/build-timestamp: 2020-09-05 - 13:03:02 +0000
  labels:
    app.kubernetes.io/name: getting-started
    app.kubernetes.io/version: 1.0-SNAPSHOT
  name: getting-started
spec:
  replicas: 1
  selector:
    matchLabels:
      app.kubernetes.io/name: getting-started
      app.kubernetes.io/version: 1.0-SNAPSHOT
  template:
    metadata:
      annotations:
        app.quarkus.io/build-timestamp: 2020-09-05 - 13:03:02 +0000
      labels:
        app.kubernetes.io/name: getting-started
        app.kubernetes.io/version: 1.0-SNAPSHOT
    spec:
      containers:
      - env:
        - name: KUBERNETES_NAMESPACE
          valueFrom:
            fieldRef:
              fieldPath: metadata.namespace
        image: vagrant/getting-started:1.0-SNAPSHOT
        imagePullPolicy: IfNotPresent
        name: getting-started
        ports:
        - containerPort: 8090
          name: http
          protocol: TCP
      serviceAccount: getting-started

Remark about the Deloyment, container image part:
An important thing to note about the Deployment is that vagrant/getting-started:1.0-SNAPSHOT is used as the container image of the Pod. As I explained in my previous article, the name and tag of the image are controlled by the the Docker container-image extension and can be customized using the usual application.properties.
[https://technology.amis.nl/2020/09/07/quarkus-supersonic-subatomic-java-trying-out-some-quarkus-code-guides-part2/]

Remark about the Deloyment, container port part:
You can also see that port 8090 is used instead of 8080. That’s because I changed the HTTP port in src/main/resources/application.properties as I described in a previous article:
[https://technology.amis.nl/2020/09/01/quarkus-supersonic-subatomic-java-trying-out-some-quarkus-code-guides-part1/]

#
# The HTTP port
#
#quarkus.http.port=8080
quarkus.http.port=8090

Remark about the Deloyment, service account part:
You can also see that serviceAccount is used. However, serviceAccount is a depreciated alias for serviceAccountName. Deprecated: Use serviceAccountName instead. ServiceAccountName is the name of the ServiceAccount to use to run this pod. More info: https://kubernetes.io/docs/tasks/configure-pod-container/configure-service-account/
[https://kubernetes.io/docs/reference/generated/kubernetes-api/v1.19/#podspec-v1-core]

To use a non-default service account, simply set the spec.serviceAccountName field of a pod to the name of the service account you wish to use.

The service account has to exist at the time the pod is created, or it will be rejected.
[https://kubernetes.io/docs/tasks/configure-pod-container/configure-service-account/]

Kubernetes Labels

Labels are key/value pairs that are attached to objects, such as pods. Labels are intended to be used to specify identifying attributes of objects that are meaningful and relevant to users, but do not directly imply semantics to the core system. Labels can be used to organize and to select subsets of objects.

Labels allow for efficient queries and watches and are ideal for use in UIs and CLIs. Non-identifying information should be recorded using annotations.

Keep in mind that label Key must be unique for a given object.
[https://kubernetes.io/docs/concepts/overview/working-with-objects/labels/]

Kubernetes Annotations

You can use Kubernetes annotations to attach arbitrary non-identifying metadata to objects. Clients such as tools and libraries can retrieve this metadata.

The metadata in an annotation can be small or large, structured or unstructured, and can include characters not permitted by labels.
[https://kubernetes.io/docs/concepts/overview/working-with-objects/annotations/]

Customizing the recommended labels

The generated manifests use the Kubernetes recommended labels. These labels can be customized.

You can visualize and manage Kubernetes objects with more tools than kubectl and the dashboard. A common set of labels allows tools to work interoperably, describing objects in a common manner that all tools can understand. In addition to supporting tooling, the recommended labels describe applications in a way that can be queried.
[https://kubernetes.io/docs/concepts/overview/working-with-objects/common-labels/]

In order to take full advantage of using these labels, they should be applied on every resource object.

Label key Description Example Type
app.kubernetes.io/name The name of the application mysql string
app.kubernetes.io/instance A unique name identifying the instance of an application mysql-abcxzy string
app.kubernetes.io/version The current version of the application (e.g., a semantic version, revision hash, etc.) 5.7.21 string
app.kubernetes.io/component The component within the architecture database string
app.kubernetes.io/part-of The name of a higher level application this one is part of wordpress string
app.kubernetes.io/managed-by The tool being used to manage the operation of an application helm string

[https://kubernetes.io/docs/concepts/overview/working-with-objects/common-labels/]

If you look at the Kubernetes manifest file above, you can see the following labels (and annotations) are used:

  annotations:
    app.quarkus.io/build-timestamp: 2020-09-05 - 13:03:02 +0000
  labels:
    app.kubernetes.io/name: getting-started
    app.kubernetes.io/version: 1.0-SNAPSHOT

So now it’s time to try to customize the values of these recommended labels.

The labels can be customized using quarkus.kubernetes.name, quarkus.kubernetes.version and quarkus.kubernetes.part-of.
[https://quarkus.io/guides/deploying-to-kubernetes#labels]

Label key Quarkus key Quarkus key description
app.kubernetes.io/name quarkus.kubernetes.name The name of the application. This value will be used for naming Kubernetes resources like: - Deployment - Service and so on …​
app.kubernetes.io/instance
app.kubernetes.io/version quarkus.kubernetes.version The version of the application.
app.kubernetes.io/component
app.kubernetes.io/part-of quarkus.kubernetes.part-of The name of the group this component belongs too
app.kubernetes.io/managed-by

[https://quarkus.io/guides/all-config]

Following, the guide, I changed the code of src/main/resources/application.properties to the following:
[in bold, I highlighted the changes (except app.quarkus.io/build-timestamp)]

# Configuration file
# key = value

# Your configuration properties
greeting.message = hello
greeting.name = quarkus

#
# The HTTP port
#
#quarkus.http.port=8080
quarkus.http.port=8090

# The path of the banner (path relative to root of classpath)
# which could be provided by user
#
#quarkus.banner.path=default_banner.txt
quarkus.banner.path=my_banner.txt

# Kubernetes manifest recommended labels
quarkus.kubernetes.name=my-quarkus-kubernetes-name
quarkus.kubernetes.instance=my_quarkus_kubernetes_instance
quarkus.kubernetes.version=my_quarkus_kubernetes_version
quarkus.kubernetes.component=my_quarkus_kubernetes_component
quarkus.kubernetes.part-of=my_quarkus_kubernetes_part-of
quarkus.kubernetes.managed-by=my_quarkus_kubernetes_managed-by

Remark:
As you can see, I also tried to change recommended labels there are not supported. I just wanted to try this out.

In order to recreate the Kubernetes manifests, I used the following command on the Linux Command Prompt:

./mvnw package

Remark:
The output showed the following:


2020-09-09 19:04:57,082 WARN  [io.qua.config] (main) Unrecognized configuration key "quarkus.kubernetes.instance" was provided; it will be ignored; verify that the dependency extension for this configuration is set or you did not make a typo
2020-09-09 19:04:57,083 WARN  [io.qua.config] (main) Unrecognized configuration key "quarkus.kubernetes.component" was provided; it will be ignored; verify that the dependency extension for this configuration is set or you did not make a typo
2020-09-09 19:04:57,083 WARN  [io.qua.config] (main) Unrecognized configuration key "quarkus.kubernetes.managed-by" was provided; it will be ignored; verify that the dependency extension for this configuration is set or you did not make a typo

Below, you can see the content of the target/kubernetes/kubernetes.yml Kubernetes manifest, provided by the Quarkus project packaging:
[in bold, I highlighted the changes (except app.quarkus.io/build-timestamp)]

---
apiVersion: v1
kind: ServiceAccount
metadata:
  annotations:
    app.quarkus.io/build-timestamp: 2020-09-09 - 19:05:26 +0000
  labels:
    app.kubernetes.io/name: my-quarkus-kubernetes-name
    app.kubernetes.io/part-of: my_quarkus_kubernetes_part-of
    app.kubernetes.io/version: my_quarkus_kubernetes_version
  name: my-quarkus-kubernetes-name
---
apiVersion: v1
kind: Service
metadata:
  annotations:
    app.quarkus.io/build-timestamp: 2020-09-09 - 19:05:26 +0000
  labels:
    app.kubernetes.io/name: my-quarkus-kubernetes-name
    app.kubernetes.io/part-of: my_quarkus_kubernetes_part-of
    app.kubernetes.io/version: my_quarkus_kubernetes_version
  name: my-quarkus-kubernetes-name
spec:
  ports:
  - name: http
    port: 8090
    targetPort: 8090
  selector:
    app.kubernetes.io/name: my-quarkus-kubernetes-name
    app.kubernetes.io/part-of: my_quarkus_kubernetes_part-of
    app.kubernetes.io/version: my_quarkus_kubernetes_version
  type: ClusterIP
---
apiVersion: apps/v1
kind: Deployment
metadata:
  annotations:
    app.quarkus.io/build-timestamp: 2020-09-09 - 19:05:26 +0000
  labels:
    app.kubernetes.io/name: my-quarkus-kubernetes-name
    app.kubernetes.io/part-of: my_quarkus_kubernetes_part-of
    app.kubernetes.io/version: my_quarkus_kubernetes_version
  name: my-quarkus-kubernetes-name
spec:
  replicas: 1
  selector:
    matchLabels:
      app.kubernetes.io/name: my-quarkus-kubernetes-name
      app.kubernetes.io/part-of: my_quarkus_kubernetes_part-of
      app.kubernetes.io/version: my_quarkus_kubernetes_version
  template:
    metadata:
      annotations:
        app.quarkus.io/build-timestamp: 2020-09-09 - 19:05:26 +0000
      labels:
        app.kubernetes.io/name: my-quarkus-kubernetes-name
        app.kubernetes.io/part-of: my_quarkus_kubernetes_part-of
        app.kubernetes.io/version: my_quarkus_kubernetes_version
    spec:
      containers:
      - env:
        - name: KUBERNETES_NAMESPACE
          valueFrom:
            fieldRef:
              fieldPath: metadata.namespace
        image: vagrant/getting-started:1.0-SNAPSHOT
        imagePullPolicy: IfNotPresent
        name: my-quarkus-kubernetes-name
        ports:
        - containerPort: 8090
          name: http
          protocol: TCP
      serviceAccount: my-quarkus-kubernetes-name

Remark about the labels:
As could be expected, from the labels, only the 3 supported recommended labels were changed.
So, for the next steps, I removed them again.

Remark about the metadata.name:
As you can see, also the metadata.name of the Kubernetes ServiceAccount, Service and Deployment were changed.

Each object in your cluster has a Name that is unique for that type of resource.

Most resource types require a name that can be used as a DNS subdomain name as defined in RFC 1123. This means the name must:

  • contain no more than 253 characters
  • contain only lowercase alphanumeric characters, ‘-‘ or ‘.’
  • start with an alphanumeric character
  • end with an alphanumeric character

Some resource types require their names to follow the DNS label standard as defined in RFC 1123. This means the name must:

  • contain at most 63 characters
  • contain only lowercase alphanumeric characters or ‘-‘
  • start with an alphanumeric character
  • end with an alphanumeric character

[ https://kubernetes.io/docs/concepts/overview/working-with-objects/names/]

So, you can expect a build error like the example below if you don’t conform to the name constraints (with regard to for example a ServiceAccount):


[ERROR] Failed to execute goal io.quarkus:quarkus-maven-plugin:1.7.0.Final:build (default) on project getting-started: Failed to build quarkus application: io.quarkus.builder.BuildException: Build failure: Build failed due to errors
[ERROR]         [error]: Build step io.quarkus.kubernetes.deployment.KubernetesDeployer#deploy threw an exception: io.dekorate.deps.kubernetes.client.KubernetesClientException: Failure executing: POST at: https://127.0.0.1:6443/api/v1/namespaces/default/serviceaccounts. Message: ServiceAccount "my_quarkus_kubernetes_name" is invalid: metadata.name: Invalid value: "my_quarkus_kubernetes_name": a DNS-1123 subdomain must consist of lower case alphanumeric characters, '-' or '.', and must start and end with an alphanumeric character (e.g. 'example.com', regex used for validation is '[a-z0-9]([-a-z0-9]*[a-z0-9])?(\.[a-z0-9]([-a-z0-9]*[a-z0-9])?)*'). 

[https://tools.ietf.org/html/rfc1123]

So, you can expect a build error like the example below if you don’t conform to the name constraints (with regard to for example a Service):


ERROR] Failed to execute goal io.quarkus:quarkus-maven-plugin:1.7.0.Final:build (default) on project getting-started: Failed to build quarkus application: io.quarkus.builder.BuildException: Build failure: Build failed due to errors
[ERROR]         [error]: Build step io.quarkus.kubernetes.deployment.KubernetesDeployer#deploy threw an exception: io.dekorate.deps.kubernetes.client.KubernetesClientException: Failure executing: POST at: https://127.0.0.1:6443/api/v1/namespaces/default/services. Message: Service "my.quarkus.kubernetes.name" is invalid: metadata.name: Invalid value: "my.quarkus.kubernetes.name": a DNS-1035 label must consist of lower case alphanumeric characters or '-', start with an alphabetic character, and end with an alphanumeric character (e.g. 'my-name',  or 'abc-123', regex used for validation is '[a-z]([-a-z0-9]*[a-z0-9])?').

[https://tools.ietf.org/html/rfc1035]

Using custom Labels

In a previous article I describe how I deployed applications (based on the booksservice) to Minikube. I created a development (DEV) and a testing (TST) environment. In the DEV environment the applications (version 1.0 and 2.0) were using an H2 in-memory database. In the TST environment the application (version 1.0) were using an external MySQL database.

I described how, in the Kubernetes manifest files, I used custom labels, so a ReplicaSet could manage pods with labels that matched the selector. In my case these labels were for example:

Label key Label value
app booksservice
version 1.0
environment development

I also used Environment variables, for example to set up the active Spring profile.
[https://technology.amis.nl/2019/03/05/using-a-restful-web-service-spring-boot-application-in-minikube-together-with-an-external-dockerized-mysql-database/]

Quarkus offers the ability to add additional custom labels. Just apply the following configuration:

quarkus.kubernetes.labels.<label key>=<label value>

Then, following the guide, I changed the code of src/main/resources/application.properties by adding the following:

# Kubernetes manifest custom labels
quarkus.kubernetes.labels.app=getting-started
quarkus.kubernetes.labels.version=1.0
quarkus.kubernetes.labels.environment=development

Remark about label keys:
For creating valid label keys, please see:
https://kubernetes.io/docs/concepts/overview/working-with-objects/labels/#syntax-and-character-set

Remark about label values:
The label values must be strings. In yaml, that means all numeric values must be quoted.
[https://github.com/kubernetes/kubernetes/issues/57509]

Later on, following this code guide, I also tried using the following command and the Kubernetes manifest (with content shown further below) to create the resources:

kubectl apply -f /vagrant/applications/getting-started/target/kubernetes/kubernetes.yml

But this resulted in the following error about the label with key version and value 1.0:


unable to decode "/vagrant/applications/getting-started/target/kubernetes/kubernetes.yml": resource.metadataOnlyObject.ObjectMeta: v1.ObjectMeta.Namespace: Name: Labels: ReadString: expects " or n, but found 1, error found in #10 byte of ...|version":1},"name":"|..., bigger context ...|s_version","environment":"development","version":1},"name":"my-quarkus-kubernetes-name","namespace":|...

Unfortunately, getting quotes around a numeric label value, wasn’t easy.
I tried quarkus.kubernetes.labels.version=”1.0″ in application.properties, but this resulted in the target/kubernetes/kubernetes.yml Kubernetes manifest, in:

version: ‘”1.0″‘

For now, I left this label value without quotes and didn’t proceed with using the kubectl command mentioned above.

In order to recreate the Kubernetes manifests, I used the following command on the Linux Command Prompt:

./mvnw package

Below, you can see the content of the target/kubernetes/kubernetes.yml Kubernetes manifest, provided by the Quarkus project packaging:
[in bold, I highlighted the changes (except app.quarkus.io/build-timestamp)]

---
apiVersion: v1
kind: ServiceAccount
metadata:
  annotations:
    app.quarkus.io/build-timestamp: 2020-09-09 - 19:30:15 +0000
  labels:
    app.kubernetes.io/name: my-quarkus-kubernetes-name
    app.kubernetes.io/part-of: my_quarkus_kubernetes_part-of
    app.kubernetes.io/version: my_quarkus_kubernetes_version
    app: getting-started
    environment: development
    version: 1.0
  name: my-quarkus-kubernetes-name
---
apiVersion: v1
kind: Service
metadata:
  annotations:
    app.quarkus.io/build-timestamp: 2020-09-09 - 19:30:15 +0000
  labels:
    app.kubernetes.io/name: my-quarkus-kubernetes-name
    app.kubernetes.io/part-of: my_quarkus_kubernetes_part-of
    app.kubernetes.io/version: my_quarkus_kubernetes_version
    app: getting-started
    environment: development
    version: 1.0
  name: my-quarkus-kubernetes-name
spec:
  ports:
  - name: http
    port: 8090
    targetPort: 8090
  selector:
    app.kubernetes.io/name: my-quarkus-kubernetes-name
    app.kubernetes.io/part-of: my_quarkus_kubernetes_part-of
    app.kubernetes.io/version: my_quarkus_kubernetes_version
  type: ClusterIP
---
apiVersion: apps/v1
kind: Deployment
metadata:
  annotations:
    app.quarkus.io/build-timestamp: 2020-09-09 - 19:30:15 +0000
  labels:
    app.kubernetes.io/name: my-quarkus-kubernetes-name
    app.kubernetes.io/part-of: my_quarkus_kubernetes_part-of
    app.kubernetes.io/version: my_quarkus_kubernetes_version
    app: getting-started
    environment: development
    version: 1.0
  name: my-quarkus-kubernetes-name
spec:
  replicas: 1
  selector:
    matchLabels:
      app.kubernetes.io/name: my-quarkus-kubernetes-name
      app.kubernetes.io/part-of: my_quarkus_kubernetes_part-of
      app.kubernetes.io/version: my_quarkus_kubernetes_version
  template:
    metadata:
      annotations:
        app.quarkus.io/build-timestamp: 2020-09-09 - 19:30:15 +0000
      labels:
        app.kubernetes.io/name: my-quarkus-kubernetes-name
        app.kubernetes.io/part-of: my_quarkus_kubernetes_part-of
        app.kubernetes.io/version: my_quarkus_kubernetes_version
        app: getting-started
        environment: development
        version: 1.0
    spec:
      containers:
      - env:
        - name: KUBERNETES_NAMESPACE
          valueFrom:
            fieldRef:
              fieldPath: metadata.namespace
        image: vagrant/getting-started:1.0-SNAPSHOT
        imagePullPolicy: IfNotPresent
        name: my-quarkus-kubernetes-name
        ports:
        - containerPort: 8090
          name: http
          protocol: TCP
      serviceAccount: my-quarkus-kubernetes-name

Remark:
As you can see, only the objects (for example Service) metadata labels were changed, the selector labels aren’t changed.

Service, selector: Route service traffic to pods with label keys and values matching this selector.
[https://kubernetes.io/docs/reference/generated/kubernetes-api/v1.19/#service-v1-core]

Deployment, selector: Label selector for pods. Existing ReplicaSets whose pods are selected by this will be the ones affected by this deployment. It must match the pod template’s labels.
[https://kubernetes.io/docs/reference/generated/kubernetes-api/v1.19/#deploymentspec-v1-apps]

Customizing the annotations

Out of the box, the generated resources will be annotated with version control related information that can be used either by tooling, or by the user for troubleshooting purposes.

Although the code guide talks about the following:

“annotations”: {
“app.quarkus.io/vcs-url” : “<some url>”,
“app.quarkus.io/commit-id” : “<some git SHA>”,
}

As mentioned before the generated manifest actually has the following annotation:

app.quarkus.io/build-timestamp

Remark:
With regard to the two annotations mentioned in the code guide, please see:
https://github.com/quarkusio/quarkus/issues/9280

Using custom annotations

Custom annotations can be added in a way similar to labels.

Just apply the following configuration:

quarkus.kubernetes.annotations.<label key>=<label value>

Then, following the guide, I changed the code of src/main/resources/application.properties by adding the following:

# Kubernetes manifest custom annotations
quarkus.kubernetes.annotations.my_key1=key1_value
quarkus.kubernetes.annotations.my_key2=key2_value

In order to recreate the Kubernetes manifests, I used the following command on the Linux Command Prompt:

./mvnw package

Below, you can see the content of the target/kubernetes/kubernetes.yml Kubernetes manifest, provided by the Quarkus project packaging:
[in bold, I highlighted the changes (except app.quarkus.io/build-timestamp)]

---
apiVersion: v1
kind: ServiceAccount
metadata:
  annotations:
    my_key1: key1_value
    my_key2: key2_value
    app.quarkus.io/build-timestamp: 2020-09-10 - 19:12:44 +0000
  labels:
    app.kubernetes.io/name: my-quarkus-kubernetes-name
    app.kubernetes.io/part-of: my_quarkus_kubernetes_part-of
    app.kubernetes.io/version: my_quarkus_kubernetes_version
    app: getting-started
    environment: development
    version: 1.0
  name: my-quarkus-kubernetes-name
---
apiVersion: v1
kind: Service
metadata:
  annotations:
    my_key1: key1_value
    my_key2: key2_value
    app.quarkus.io/build-timestamp: 2020-09-10 - 19:12:44 +0000
  labels:
    app.kubernetes.io/name: my-quarkus-kubernetes-name
    app.kubernetes.io/part-of: my_quarkus_kubernetes_part-of
    app.kubernetes.io/version: my_quarkus_kubernetes_version
    app: getting-started
    environment: development
    version: 1.0
  name: my-quarkus-kubernetes-name
spec:
  ports:
  - name: http
    port: 8090
    targetPort: 8090
  selector:
    app.kubernetes.io/name: my-quarkus-kubernetes-name
    app.kubernetes.io/part-of: my_quarkus_kubernetes_part-of
    app.kubernetes.io/version: my_quarkus_kubernetes_version
  type: ClusterIP
---
apiVersion: apps/v1
kind: Deployment
metadata:
  annotations:
    my_key1: key1_value
    my_key2: key2_value
    app.quarkus.io/build-timestamp: 2020-09-10 - 19:12:44 +0000
  labels:
    app.kubernetes.io/name: my-quarkus-kubernetes-name
    app.kubernetes.io/part-of: my_quarkus_kubernetes_part-of
    app.kubernetes.io/version: my_quarkus_kubernetes_version
    app: getting-started
    environment: development
    version: 1.0
  name: my-quarkus-kubernetes-name
spec:
  replicas: 1
  selector:
    matchLabels:
      app.kubernetes.io/name: my-quarkus-kubernetes-name
      app.kubernetes.io/part-of: my_quarkus_kubernetes_part-of
      app.kubernetes.io/version: my_quarkus_kubernetes_version
  template:
    metadata:
      annotations:
        my_key1: key1_value
        my_key2: key2_value
        app.quarkus.io/build-timestamp: 2020-09-10 - 19:12:44 +0000
      labels:
        app.kubernetes.io/name: my-quarkus-kubernetes-name
        app.kubernetes.io/part-of: my_quarkus_kubernetes_part-of
        app.kubernetes.io/version: my_quarkus_kubernetes_version
        app: getting-started
        environment: development
        version: 1.0
    spec:
      containers:
      - env:
        - name: KUBERNETES_NAMESPACE
          valueFrom:
            fieldRef:
              fieldPath: metadata.namespace
        image: vagrant/getting-started:1.0-SNAPSHOT
        imagePullPolicy: IfNotPresent
        name: my-quarkus-kubernetes-name
        ports:
        - containerPort: 8090
          name: http
          protocol: TCP
      serviceAccount: my-quarkus-kubernetes-name

So, I conclude this article. I shared with you the steps I took trying out the Quarkus code guide “Quarkus – Kubernetes extension”, and more specific the steps related to using custom labels and annotations.

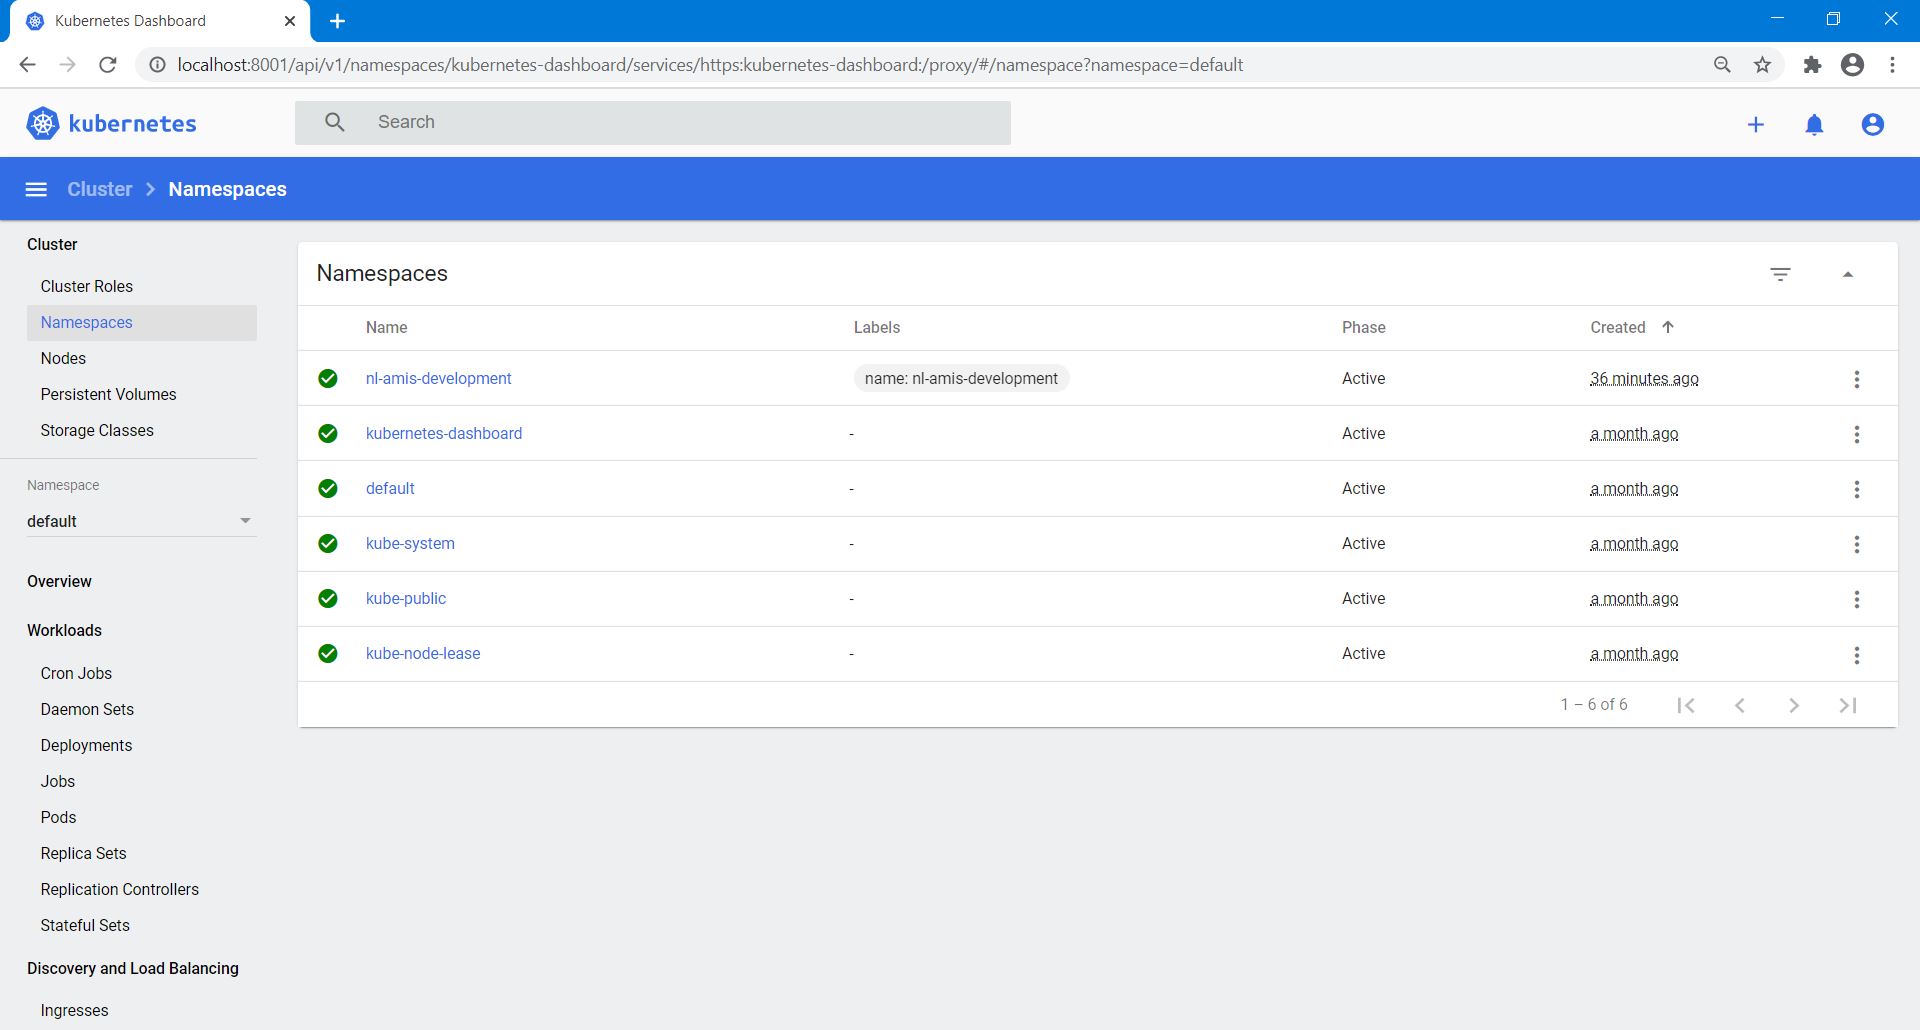
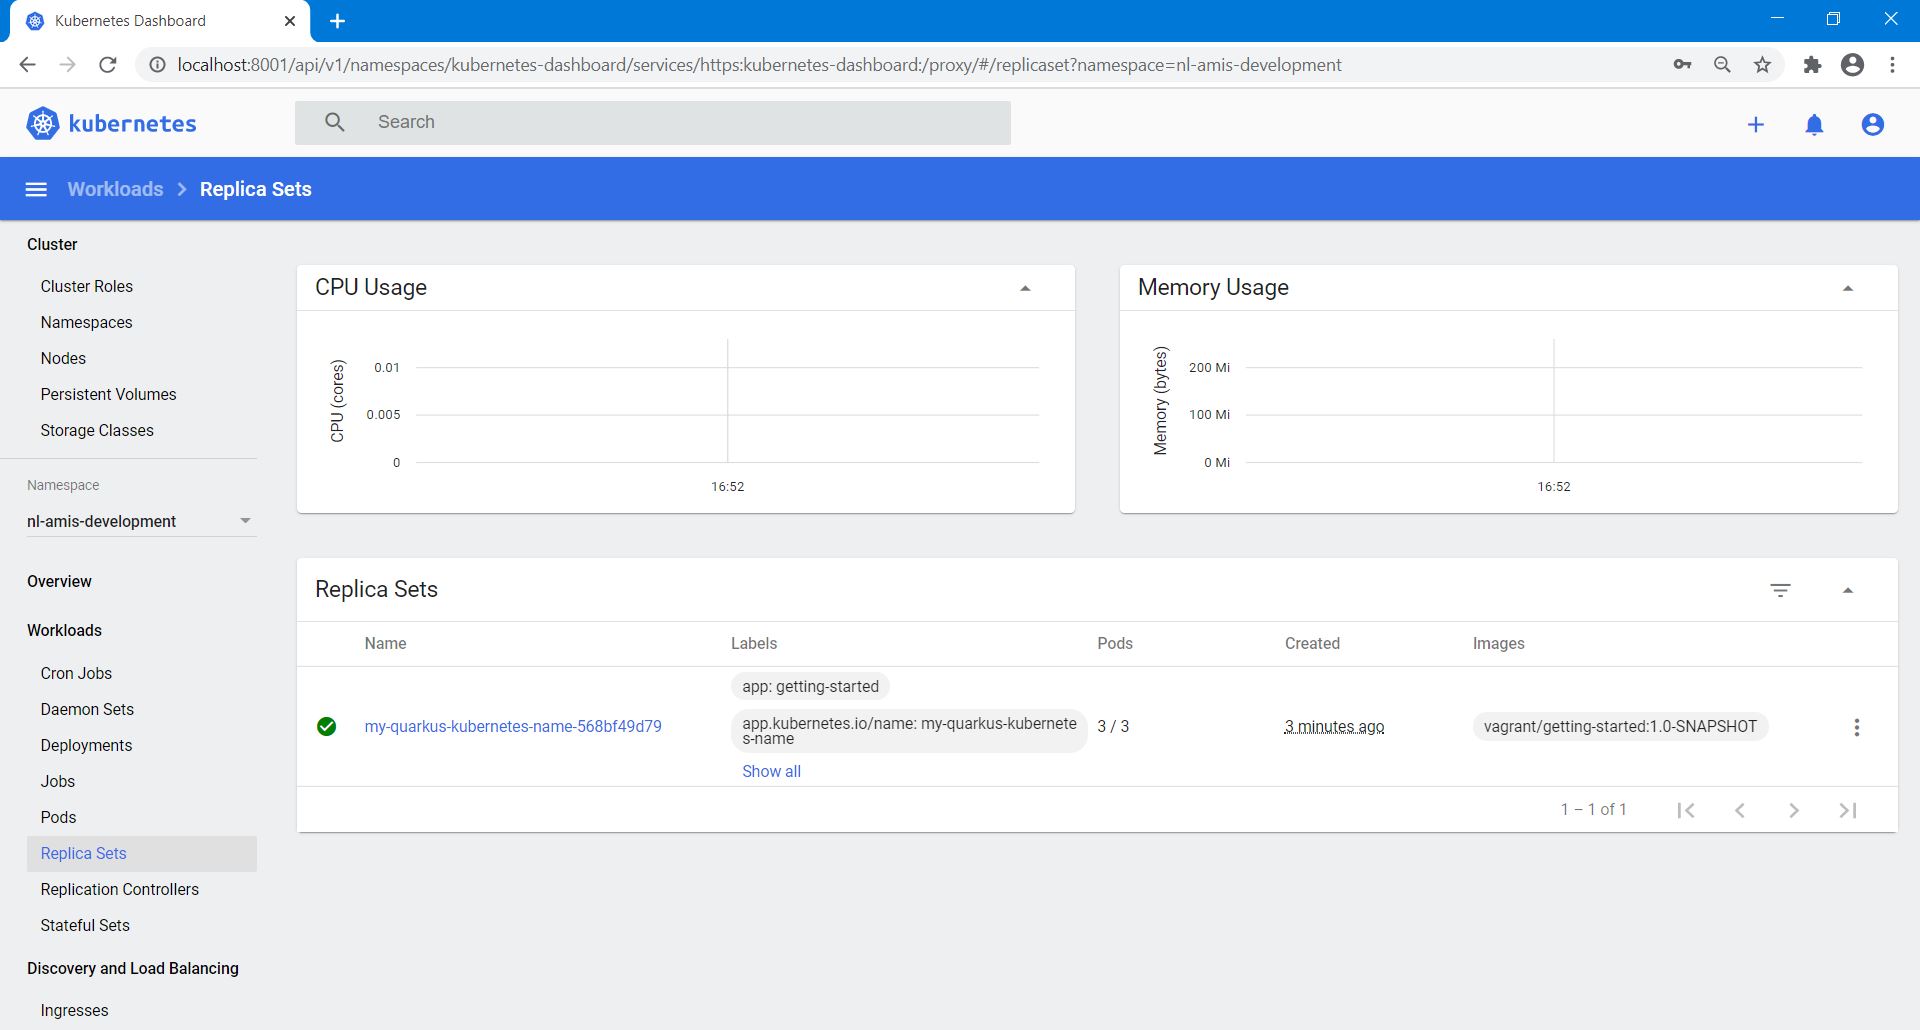
In a next article, you can read more about other steps I took (continuing with the code guide), for example using namespaces and the automatic deployment of the generated resources to a target platform, in my case K3s (lightweight certified Kubernetes distribution).

The post Quarkus – Supersonic Subatomic Java, trying out Quarkus guide “Quarkus – Kubernetes extension” (part 1) appeared first on AMIS, Data Driven Blog.

Quarkus – Supersonic Subatomic Java, trying out Quarkus guide “Quarkus – Kubernetes extension” (part 2)

$
0
0

In this article, you can read more about the Quarkus code guide I tried out, related to the following topic:

  • The ability to automatically generate Kubernetes resources by Quarkus

The guide covers generating and deploying Kubernetes resources based on sane defaults and user supplied configuration. In this article, I will focus on the steps I took related to customizing the namespace, the service account name, the number of replicas and the type of service.
[https://quarkus.io/guides/deploying-to-kubernetes]

Quarkus guide “Quarkus – Kubernetes extension”

I continue where I left the previous time, with the steps from the Quarkus guide “Quarkus – Kubernetes extension”, still using the code in my existing “getting-started” project (as described in my previous article) . You may remember that amongst the other files, two files named kubernetes.json and kubernetes.yml were created in the target/kubernetes/ directory.
If you look at either file you will see that it contains a Kubernetes ServiceAccount, Service and a Deployment.
[https://technology.amis.nl/2020/09/27/quarkus-supersonic-subatomic-java-trying-out-quarkus-guide-quarkus-kubernetes-extension-part-1/]

Kubernetes Namespaces

Namespaces are intended for use in environments with many users spread across multiple teams, or projects. For clusters with a few to tens of users, you should not need to create or think about namespaces at all. Start using namespaces when you need the features they provide.

Namespaces provide a scope for names. Names of resources need to be unique within a namespace, but not across namespaces. Namespaces cannot be nested inside one another and each Kubernetes resource can only be in one namespace.

Namespaces are a way to divide cluster resources between multiple users (via resource quota).
[https://kubernetes.io/docs/concepts/overview/working-with-objects/namespaces/#when-to-use-multiple-namespaces]

Kubernetes Resource Quotas

When several users or teams share a cluster with a fixed number of nodes, there is a concern that one team could use more than its fair share of resources.

Resource quotas are a tool for administrators to address this concern.

A resource quota, defined by a ResourceQuota object, provides constraints that limit aggregate resource consumption per namespace. It can limit the quantity of objects that can be created in a namespace by type, as well as the total amount of compute resources that may be consumed by resources in that project.
[https://kubernetes.io/docs/concepts/policy/resource-quotas/]

Customizing the namespaces

In a previous article I describe how I deployed applications (based on the booksservice) to Minikube.
I described how, in the Kubernetes manifest files, I used namespaces. In my case these namespaces were for example:

  • nl-amis-development
  • nl-amis-testing

[https://technology.amis.nl/2019/03/05/using-a-restful-web-service-spring-boot-application-in-minikube-together-with-an-external-dockerized-mysql-database/]

A namespace can be added by applying the following configuration:

quarkus.kubernetes.namespace

I changed the code of src/main/resources/application.properties by adding the following:

# Kubernetes manifest namespaces
quarkus.kubernetes.namespace=nl-amis-development

In order to recreate the Kubernetes manifests, I used the following command on the Linux Command Prompt:

./mvnw package

Below, you can see the content of the target/kubernetes/kubernetes.yml Kubernetes manifests, provided by the Quarkus project packaging:
[in bold, I highlighted the changes (except app.quarkus.io/build-timestamp)]

---
apiVersion: v1
kind: ServiceAccount
metadata:
  annotations:
    my_key1: key1_value
    my_key2: key2_value
    app.quarkus.io/build-timestamp: 2020-09-12 - 10:02:17 +0000
  labels:
    app.kubernetes.io/name: my-quarkus-kubernetes-name
    app.kubernetes.io/part-of: my_quarkus_kubernetes_part-of
    app.kubernetes.io/version: my_quarkus_kubernetes_version
    app: getting-started
    environment: development
    version: 1.0
  name: my-quarkus-kubernetes-name
  namespace: nl-amis-development
---
apiVersion: v1
kind: Service
metadata:
  annotations:
    my_key1: key1_value
    my_key2: key2_value
    app.quarkus.io/build-timestamp: 2020-09-12 - 10:02:17 +0000
  labels:
    app.kubernetes.io/name: my-quarkus-kubernetes-name
    app.kubernetes.io/part-of: my_quarkus_kubernetes_part-of
    app.kubernetes.io/version: my_quarkus_kubernetes_version
    app: getting-started
    environment: development
    version: 1.0
  name: my-quarkus-kubernetes-name
  namespace: nl-amis-development
spec:
  ports:
  - name: http
    port: 8090
    targetPort: 8090
  selector:
    app.kubernetes.io/name: my-quarkus-kubernetes-name
    app.kubernetes.io/part-of: my_quarkus_kubernetes_part-of
    app.kubernetes.io/version: my_quarkus_kubernetes_version
  type: ClusterIP
---
apiVersion: apps/v1
kind: Deployment
metadata:
  annotations:
    my_key1: key1_value
    my_key2: key2_value
    app.quarkus.io/build-timestamp: 2020-09-12 - 10:02:17 +0000
  labels:
    app.kubernetes.io/name: my-quarkus-kubernetes-name
    app.kubernetes.io/part-of: my_quarkus_kubernetes_part-of
    app.kubernetes.io/version: my_quarkus_kubernetes_version
    app: getting-started
    environment: development
    version: 1.0
  name: my-quarkus-kubernetes-name
  namespace: nl-amis-development
spec:
  replicas: 1
  selector:
    matchLabels:
      app.kubernetes.io/name: my-quarkus-kubernetes-name
      app.kubernetes.io/part-of: my_quarkus_kubernetes_part-of
      app.kubernetes.io/version: my_quarkus_kubernetes_version
  template:
    metadata:
      annotations:
        my_key1: key1_value
        my_key2: key2_value
        app.quarkus.io/build-timestamp: 2020-09-12 - 10:02:17 +0000
      labels:
        app.kubernetes.io/name: my-quarkus-kubernetes-name
        app.kubernetes.io/part-of: my_quarkus_kubernetes_part-of
        app.kubernetes.io/version: my_quarkus_kubernetes_version
        app: getting-started
        environment: development
        version: 1.0
      namespace: nl-amis-development
    spec:
      containers:
      - env:
        - name: KUBERNETES_NAMESPACE
          valueFrom:
            fieldRef:
              fieldPath: metadata.namespace
        image: vagrant/getting-started:1.0-SNAPSHOT
        imagePullPolicy: IfNotPresent
        name: my-quarkus-kubernetes-name
        ports:
        - containerPort: 8090
          name: http
          protocol: TCP
      serviceAccount: my-quarkus-kubernetes-name

Remark:
The Kubernetes manifest for the Namespace itself isn’t generated. Which is to be expected because a namespace can be used by several Kubernetes manifests generated from several Quarkus applications.

In the Deployment, the environment variable KUBERNETES_NAMESPACE is used. Its value is derived from the Pod’s metadata.namespace field, which in my case results to nl-amis-development.

The field in this example is a Pod field. It is not a field of the Container in the Pod.

When the ‘namespace’ field is not added to the ‘metadata’ section of the generated manifest, this means that when the manifests are applied to a cluster, the namespace will be resolved from the current Kubernetes context (see https://kubernetes.io/docs/concepts/configuration/organize-cluster-access-kubeconfig/#context for more details).
[https://quarkus.io/guides/all-config]

In order to display a list of Kubernetes contexts, I used the following command on the Linux Command Prompt:
[https://kubernetes.io/docs/reference/kubectl/cheatsheet/#kubectl-context-and-configuration]

kubectl config get-contexts

With the following output:


CURRENT   NAME      CLUSTER   AUTHINFO   NAMESPACE
*         default   default   default

In order to display the current Kubernetes context, I used the following command on the Linux Command Prompt:
[https://kubernetes.io/docs/reference/kubectl/cheatsheet/#kubectl-context-and-configuration]

kubectl config current-context

With the following output:


default

In order to view the config, I used the following command on the Linux Command Prompt:
[https://kubernetes.io/docs/reference/kubectl/cheatsheet/#kubectl-context-and-configuration]

kubectl config view

With the following output:


apiVersion: v1
clusters:
- cluster:
    certificate-authority-data: LS0tLS1CRUdJTiBDRVJUSUZJQ0FURS0tLS0tCk1JSUJWVENCL3FBREFnRUNBZ0VBTUFvR0NDcUdTTTQ5QkFNQ01DTXhJVEFmQmdOVkJBTU1HR3N6Y3kxelpYSjIKWlhJdFkyRkFNVFU1TnpnMk1ERTFNVEFlRncweU1EQTRNVGt4T0RBeU16RmFGdzB6TURBNE1UY3hPREF5TXpGYQpNQ014SVRBZkJnTlZCQU1NR0dzemN5MXpaWEoyWlhJdFkyRkFNVFU1TnpnMk1ERTFNVEJaTUJNR0J5cUdTTTQ5CkFnRUdDQ3FHU000OUF3RUhBMElBQkxVOGFhUWhKdE5URG5ORkhDUlBrUEhnL2FHTUxldDhSbnNkektLSXdySmgKZzFmeTFNR283dXp3NThXYXhtMlkwNGtaYXlSZXRoVlRSNGpWUnRoK0J5eWpJekFoTUE0R0ExVWREd0VCL3dRRQpBd0lDcERBUEJnTlZIUk1CQWY4RUJUQURBUUgvTUFvR0NDcUdTTTQ5QkFNQ0EwWUFNRU1DSHdnN1J6c2trb2grClVrUldsVXNwK1ZRMjVkNjRxVHFwK1huTzVmTjVYdWdDSUdhWm8zbDVZVCtuSW1HQjZad1QwanM5STY4dTY4b0oKblRpeHZGTndrWWxyCi0tLS0tRU5EIENFUlRJRklDQVRFLS0tLS0K
    server: https://127.0.0.1:6443
  name: default
contexts:
- context:
    cluster: default
                                  
    user: default
  name: default
current-context: default
kind: Config
preferences: {}
users:
- name: default
  user:
    password: cfb31936a4fc771b81540abfef608679
    username: admin

So, the default context is used, implying, the namespace default is used when the metadata.namespace field is not set.

Namespace default is the default namespace for objects with no other namespace
[https://kubernetes.io/docs/concepts/overview/working-with-objects/namespaces/]

Customizing the service account

The service account name can be set by applying the following configuration:

quarkus.kubernetes.service-account

I changed the code of src/main/resources/application.properties by adding the following:

# Kubernetes manifest service-account
quarkus.kubernetes.service-account=my-quarkus-kubernetes-service-account

In order to recreate the Kubernetes manifests, I used the following command on the Linux Command Prompt:

./mvnw package

Below, you can see the content of the target/kubernetes/kubernetes.yml Kubernetes manifests, provided by the Quarkus project packaging:
[in bold, I highlighted the changes (except app.quarkus.io/build-timestamp)]

---
apiVersion: v1
kind: ServiceAccount
metadata:
  annotations:
    my_key1: key1_value
    my_key2: key2_value
    app.quarkus.io/build-timestamp: 2020-09-12 - 11:06:21 +0000
  labels:
    app.kubernetes.io/name: my-quarkus-kubernetes-name
    app.kubernetes.io/part-of: my_quarkus_kubernetes_part-of
    app.kubernetes.io/version: my_quarkus_kubernetes_version
    app: getting-started
    environment: development
    version: 1.0
  name: my-quarkus-kubernetes-name
  namespace: nl-amis-development
---
apiVersion: v1
kind: Service
metadata:
  annotations:
    my_key1: key1_value
    my_key2: key2_value
    app.quarkus.io/build-timestamp: 2020-09-12 - 11:06:21 +0000
  labels:
    app.kubernetes.io/name: my-quarkus-kubernetes-name
    app.kubernetes.io/part-of: my_quarkus_kubernetes_part-of
    app.kubernetes.io/version: my_quarkus_kubernetes_version
    app: getting-started
    environment: development
    version: 1.0
  name: my-quarkus-kubernetes-name
  namespace: nl-amis-development
spec:
  ports:
  - name: http
    port: 8090
    targetPort: 8090
  selector:
    app.kubernetes.io/name: my-quarkus-kubernetes-name
    app.kubernetes.io/part-of: my_quarkus_kubernetes_part-of
    app.kubernetes.io/version: my_quarkus_kubernetes_version
  type: ClusterIP
---
apiVersion: apps/v1
kind: Deployment
metadata:
  annotations:
    my_key1: key1_value
    my_key2: key2_value
    app.quarkus.io/build-timestamp: 2020-09-12 - 11:06:21 +0000
  labels:
    app.kubernetes.io/name: my-quarkus-kubernetes-name
    app.kubernetes.io/part-of: my_quarkus_kubernetes_part-of
    app.kubernetes.io/version: my_quarkus_kubernetes_version
    app: getting-started
    environment: development
    version: 1.0
  name: my-quarkus-kubernetes-name
  namespace: nl-amis-development
spec:
  replicas: 1
  selector:
    matchLabels:
      app.kubernetes.io/name: my-quarkus-kubernetes-name
      app.kubernetes.io/part-of: my_quarkus_kubernetes_part-of
      app.kubernetes.io/version: my_quarkus_kubernetes_version
  template:
    metadata:
      annotations:
        my_key1: key1_value
        my_key2: key2_value
        app.quarkus.io/build-timestamp: 2020-09-12 - 11:06:21 +0000
      labels:
        app.kubernetes.io/name: my-quarkus-kubernetes-name
        app.kubernetes.io/part-of: my_quarkus_kubernetes_part-of
        app.kubernetes.io/version: my_quarkus_kubernetes_version
        app: getting-started
        environment: development
        version: 1.0
      namespace: nl-amis-development
    spec:
      containers:
      - env:
        - name: KUBERNETES_NAMESPACE
          valueFrom:
            fieldRef:
              fieldPath: metadata.namespace
        image: vagrant/getting-started:1.0-SNAPSHOT
        imagePullPolicy: IfNotPresent
        name: my-quarkus-kubernetes-name
        ports:
        - containerPort: 8090
          name: http
          protocol: TCP
      serviceAccount: my-quarkus-kubernetes-service-account

Remark about the Deloyment, serviceAccount part:
You can see that serviceAccount is used. However, serviceAccount is a depreciated alias for serviceAccountName. Deprecated: Use serviceAccountName instead. ServiceAccountName is the name of the ServiceAccount to use to run this pod. More info: https://kubernetes.io/docs/tasks/configure-pod-container/configure-service-account/
[https://kubernetes.io/docs/reference/generated/kubernetes-api/v1.19/#podspec-v1-core]

To use a non-default service account, simply set the spec.serviceAccountName field of a pod to the name of the service account you wish to use.

The service account has to exist at the time the pod is created, or it will be rejected.
[https://kubernetes.io/docs/tasks/configure-pod-container/configure-service-account/]

Remark about the ServiceAccount metadata.name:
As you can see, the metadata.name of the ServiceAccount isn’t changed! So, the service account that is used to run the pod, refers to a non-existing service account!

Customizing the number of replicas

The number of desired pods can be set by applying the following configuration:

quarkus.kubernetes.replicas

Then, following the guide, I changed the code of src/main/resources/application.properties by adding the following:

# Kubernetes manifest service-account
quarkus.kubernetes.replicas=3

In order to recreate the Kubernetes manifests, I used the following command on the Linux Command Prompt:

./mvnw package

Below, you can see the content of the target/kubernetes/kubernetes.yml Kubernetes manifests, provided by the Quarkus project packaging:
[in bold, I highlighted the changes (except app.quarkus.io/build-timestamp)]

---
apiVersion: v1
kind: ServiceAccount
metadata:
  annotations:
    my_key1: key1_value
    my_key2: key2_value
    app.quarkus.io/build-timestamp: 2020-09-13 - 08:22:47 +0000
  labels:
    app.kubernetes.io/name: my-quarkus-kubernetes-name
    app.kubernetes.io/part-of: my_quarkus_kubernetes_part-of
    app.kubernetes.io/version: my_quarkus_kubernetes_version
    app: getting-started
    environment: development
    version: 1.0
  name: my-quarkus-kubernetes-name
  namespace: nl-amis-development
---
apiVersion: v1
kind: Service
metadata:
  annotations:
    my_key1: key1_value
    my_key2: key2_value
    app.quarkus.io/build-timestamp: 2020-09-13 - 08:22:47 +0000
  labels:
    app.kubernetes.io/name: my-quarkus-kubernetes-name
    app.kubernetes.io/part-of: my_quarkus_kubernetes_part-of
    app.kubernetes.io/version: my_quarkus_kubernetes_version
    app: getting-started
    environment: development
    version: 1.0
  name: my-quarkus-kubernetes-name
  namespace: nl-amis-development
spec:
  ports:
  - name: http
    port: 8090
    targetPort: 8090
  selector:
    app.kubernetes.io/name: my-quarkus-kubernetes-name
    app.kubernetes.io/part-of: my_quarkus_kubernetes_part-of
    app.kubernetes.io/version: my_quarkus_kubernetes_version
  type: ClusterIP
---
apiVersion: apps/v1
kind: Deployment
metadata:
  annotations:
    my_key1: key1_value
    my_key2: key2_value
    app.quarkus.io/build-timestamp: 2020-09-13 - 08:22:47 +0000
  labels:
    app.kubernetes.io/name: my-quarkus-kubernetes-name
    app.kubernetes.io/part-of: my_quarkus_kubernetes_part-of
    app.kubernetes.io/version: my_quarkus_kubernetes_version
    app: getting-started
    environment: development
    version: 1.0
  name: my-quarkus-kubernetes-name
  namespace: nl-amis-development
spec:
  replicas: 3
  selector:
    matchLabels:
      app.kubernetes.io/name: my-quarkus-kubernetes-name
      app.kubernetes.io/part-of: my_quarkus_kubernetes_part-of
      app.kubernetes.io/version: my_quarkus_kubernetes_version
  template:
    metadata:
      annotations:
        my_key1: key1_value
        my_key2: key2_value
        app.quarkus.io/build-timestamp: 2020-09-13 - 08:22:47 +0000
      labels:
        app.kubernetes.io/name: my-quarkus-kubernetes-name
        app.kubernetes.io/part-of: my_quarkus_kubernetes_part-of
        app.kubernetes.io/version: my_quarkus_kubernetes_version
        app: getting-started
        environment: development
        version: 1.0
      namespace: nl-amis-development
    spec:
      containers:
      - env:
        - name: KUBERNETES_NAMESPACE
          valueFrom:
            fieldRef:
              fieldPath: metadata.namespace
        image: vagrant/getting-started:1.0-SNAPSHOT
        imagePullPolicy: IfNotPresent
        name: my-quarkus-kubernetes-name
        ports:
        - containerPort: 8090
          name: http
          protocol: TCP
      serviceAccount: my-quarkus-kubernetes-service-account

Customizing the service type

The type of service that will be generated for the application can be set by applying the following configuration:
[https://quarkus.io/guides/all-config]

quarkus.kubernetes.service-type

For some parts of your application (for example, frontends) you may want to expose a Service onto an external IP address, that’s outside of your cluster.
Kubernetes ServiceTypes allow you to specify what kind of Service you want. The default is ClusterIP.
[https://kubernetes.io/docs/concepts/services-networking/service/#publishing-services-service-types]

The service type values and their behaviors are:

Type Behavior
ClusterIP Exposes the Service on a cluster-internal IP. Choosing this value makes the Service only reachable from within the cluster. This is the default ServiceType.
NodePort Exposes the Service on each Node's IP at a static port (the NodePort). A ClusterIP Service, to which the NodePort Service routes, is automatically created. You'll be able to contact the NodePort Service, from outside the cluster, by requesting <NodeIP>:<NodePort>.
LoadBalancer Exposes the Service externally using a cloud provider's load balancer. NodePort and ClusterIP Services, to which the external load balancer routes, are automatically created.
ExternalName Maps the Service to the contents of the externalName field (e.g. foo.bar.example.com), by returning a CNAME record with its value. No proxying of any kind is set up.

You can also use Ingress to expose your Service. Ingress is not a Service type, but it acts as the entry point for your cluster. It lets you consolidate your routing rules into a single resource as it can expose multiple services under the same IP address.
[https://kubernetes.io/docs/concepts/services-networking/service/#publishing-services-service-types]

In a previous article I describe how I deployed applications (based on the booksservice) to Minikube.
I described how, in the Kubernetes manifest files, I used nodePort as the type of service, because, on my Windows laptop, I also wanted to be able to use Postman (for sending requests). Via port forwarding this was made possible.
[https://technology.amis.nl/2019/04/23/using-vagrant-and-shell-scripts-to-further-automate-setting-up-my-demo-environment-from-scratch-including-elasticsearch-fluentd-and-kibana-efk-within-minikube/]

When the serviceType is set to node-port, you have to set the nodePort, via:
[https://quarkus.io/guides/all-config]

quarkus.kubernetes.node-port

I changed the code of src/main/resources/application.properties by adding the following:

# Kubernetes manifest service-type
quarkus.kubernetes.service-type=node-port
quarkus.kubernetes.node-port=30010

In order to recreate the Kubernetes manifests, I used the following command on the Linux Command Prompt:

./mvnw package

Below, you can see the content (only the Service part) of the target/kubernetes/kubernetes.yml Kubernetes manifests, provided by the Quarkus project packaging:
[in bold, I highlighted the changes (except app.quarkus.io/build-timestamp)]


apiVersion: v1
kind: Service
metadata:
  annotations:
    my_key1: key1_value
    my_key2: key2_value
    app.quarkus.io/build-timestamp: 2020-09-13 - 08:58:44 +0000
  labels:
    app.kubernetes.io/name: my-quarkus-kubernetes-name
    app.kubernetes.io/part-of: my_quarkus_kubernetes_part-of
    app.kubernetes.io/version: my_quarkus_kubernetes_version
    app: getting-started
    environment: development
    version: 1.0
  name: my-quarkus-kubernetes-name
  namespace: nl-amis-development
spec:
  ports:
  - name: http
    port: 8090
    targetPort: 8090
  selector:
    app.kubernetes.io/name: my-quarkus-kubernetes-name
    app.kubernetes.io/part-of: my_quarkus_kubernetes_part-of
    app.kubernetes.io/version: my_quarkus_kubernetes_version
  type: NodePort

Remark:
The node-port (nodePort: 30010) wasn’t set as expected!

In the previous article, I mentioned earlier, I used the following Kubernetes manifest file for a Service:
[https://technology.amis.nl/2019/03/05/using-a-restful-web-service-spring-boot-application-in-minikube-together-with-an-external-dockerized-mysql-database/]

kind: Service
apiVersion: v1
metadata:
  name: booksservice-v1-0-service
  namespace: nl-amis-development
  labels:
    app: booksservice
    version: "1.0"
    environment: development
spec:
  selector:
    app: booksservice
    version: "1.0"
    environment: development
  type: NodePort
  ports:
  - protocol: TCP
    nodePort: 30010
    port: 9190
    targetPort: 9090

Just a reminder about ports:

Field Description
nodePort The port on each node on which this service is exposed when type=NodePort or LoadBalancer. Usually assigned by the system. If specified, it will be allocated to the service if unused or else creation of the service will fail. Default is to auto-allocate a port if the ServiceType of this Service requires one. More info: https://kubernetes.io/docs/concepts/services-networking/service/#type-nodeport
port The port that will be exposed by this service.
targetPort Number or name of the port to access on the pods targeted by the service. Number must be in the range 1 to 65535. Name must be an IANA_SVC_NAME. If this is a string, it will be looked up as a named port in the target Pod's container ports. If this is not specified, the value of the 'port' field is used (an identity map). This field is ignored for services with clusterIP=None, and should be omitted or set equal to the 'port' field. More info: https://kubernetes.io/docs/concepts/services-networking/service/#defining-a-service

[https://kubernetes.io/docs/reference/generated/kubernetes-api/v1.19/#serviceport-v1-core]

In line with the example above I wanted to set the port and targetPort.

The host port can be set by applying the following configuration:
[https://quarkus.io/guides/all-config]

quarkus.kubernetes.ports.”ports”.host-port

The port number which refers to the container port can be set by applying the following configuration:
[https://quarkus.io/guides/all-config]

quarkus.kubernetes.ports.”ports”.container-port

I changed the code of src/main/resources/application.properties by adding the following:

quarkus.kubernetes.ports."ports".host-port=8190
quarkus.kubernetes.ports."ports".container-port=8090

In order to recreate the Kubernetes manifests, I used the following command on the Linux Command Prompt:

./mvnw package

Below, you can see the content of the target/kubernetes/kubernetes.yml Kubernetes manifests, provided by the Quarkus project packaging:
[in bold, I highlighted the changes (except app.quarkus.io/build-timestamp)]


---
apiVersion: v1
kind: ServiceAccount
metadata:
  annotations:
    my_key1: key1_value
    my_key2: key2_value
    app.quarkus.io/build-timestamp: 2020-09-13 - 15:02:01 +0000
  labels:
    app.kubernetes.io/name: my-quarkus-kubernetes-name
    app.kubernetes.io/part-of: my_quarkus_kubernetes_part-of
    app.kubernetes.io/version: my_quarkus_kubernetes_version
    app: getting-started
    environment: development
    version: 1.0
  name: my-quarkus-kubernetes-name
  namespace: nl-amis-development
---
apiVersion: v1
kind: Service
metadata:
  annotations:
    my_key1: key1_value
    my_key2: key2_value
    app.quarkus.io/build-timestamp: 2020-09-13 - 15:02:01 +0000
  labels:
    app.kubernetes.io/name: my-quarkus-kubernetes-name
    app.kubernetes.io/part-of: my_quarkus_kubernetes_part-of
    app.kubernetes.io/version: my_quarkus_kubernetes_version
    app: getting-started
    environment: development
    version: 1.0
  name: my-quarkus-kubernetes-name
  namespace: nl-amis-development
spec:
  ports:
  - name: ports
    port: 8090
    targetPort: 8190
  selector:
    app.kubernetes.io/name: my-quarkus-kubernetes-name
    app.kubernetes.io/part-of: my_quarkus_kubernetes_part-of
    app.kubernetes.io/version: my_quarkus_kubernetes_version
  type: NodePort
---
apiVersion: apps/v1
kind: Deployment
metadata:
  annotations:
    my_key1: key1_value
    my_key2: key2_value
    app.quarkus.io/build-timestamp: 2020-09-13 - 15:02:01 +0000
  labels:
    app.kubernetes.io/name: my-quarkus-kubernetes-name
    app.kubernetes.io/part-of: my_quarkus_kubernetes_part-of
    app.kubernetes.io/version: my_quarkus_kubernetes_version
    app: getting-started
    environment: development
    version: 1.0
  name: my-quarkus-kubernetes-name
  namespace: nl-amis-development
spec:
  replicas: 3
  selector:
    matchLabels:
      app.kubernetes.io/name: my-quarkus-kubernetes-name
      app.kubernetes.io/part-of: my_quarkus_kubernetes_part-of
      app.kubernetes.io/version: my_quarkus_kubernetes_version
  template:
    metadata:
      annotations:
        my_key1: key1_value
        my_key2: key2_value
        app.quarkus.io/build-timestamp: 2020-09-13 - 15:02:01 +0000
      labels:
        app.kubernetes.io/name: my-quarkus-kubernetes-name
        app.kubernetes.io/part-of: my_quarkus_kubernetes_part-of
        app.kubernetes.io/version: my_quarkus_kubernetes_version
        app: getting-started
        environment: development
        version: 1.0
      namespace: nl-amis-development
    spec:
      containers:
      - env:
        - name: KUBERNETES_NAMESPACE
          valueFrom:
            fieldRef:
              fieldPath: metadata.namespace
        image: vagrant/getting-started:1.0-SNAPSHOT
        imagePullPolicy: IfNotPresent
        name: my-quarkus-kubernetes-name
        ports:
        - containerPort: 8090
          hostPort: 8190
          name: ports
          protocol: TCP
      serviceAccount: my-quarkus-kubernetes-service-account

Although the nodePort wasn’t set, I proceeded with the next steps of the code guide. But more about that, you can read in a next article.

So, I conclude this article. I shared with you the steps I took trying out the Quarkus code guide “Quarkus – Kubernetes extension”, and more specific the steps related to customizing the namespace, the service account name, the number of replicas and the type of service.

By the way, the code guide also covers topics like environment variables, and adding readiness and liveness probes. I skipped those for now.

In a next article, you can read more about the steps I took (continuing with the code guide) with regard to the automatic deployment of the generated resources to a target platform, in my case K3s (lightweight certified Kubernetes distribution).

The post Quarkus – Supersonic Subatomic Java, trying out Quarkus guide “Quarkus – Kubernetes extension” (part 2) appeared first on AMIS, Data Driven Blog.


Quarkus – Supersonic Subatomic Java, trying out Quarkus guide “Quarkus – Kubernetes extension” (part 3)

$
0
0

In this article, you can read more about the Quarkus code guide I tried out, related to the following topic:

  • The ability to automatically generate Kubernetes resources by Quarkus

The guide covers generating and deploying Kubernetes resources based on sane defaults and user supplied configuration. In this article, I will focus on the automatic deployment of the generated resources to a target platform, in my case K3s (lightweight certified Kubernetes distribution).

Quarkus guide “Quarkus – Kubernetes extension”

I continue where I left the previous time, with the steps from the Quarkus guide “Quarkus – Kubernetes extension”, still using the code in my existing “getting-started” project (as described in my previous article) . You may remember that amongst the other files, two files named kubernetes.json and kubernetes.yml were created in the target/kubernetes/ directory.
If you look at either file you will see that it contains a Kubernetes ServiceAccount, Service and a Deployment.
[https://technology.amis.nl/2020/10/03/quarkus-supersonic-subatomic-java-trying-out-quarkus-guide-quarkus-kubernetes-extension-part-2/]

By the way, Quarkus has the ability to push a created container image to a registry before deploying the application to the target platform. I skipped trying that out for now.

Deployment targets

By default, when no deployment-target is set, then only vanilla Kubernetes resources are generated and deployed to a cluster (if quarkus.kubernetes.deploy has been set to true). That was fine by me.

Please see the documentation, for generating resources and deploying to a Kubernetes cluster like:
[https://quarkus.io/guides/deploying-to-kubernetes]

In my demo environment I had K3s (lightweight certified Kubernetes distribution) installed.
[https://k3s.io/]

Automatic deployment

To trigger building and deploying a container image you need to enable the quarkus.kubernetes.deploy flag (the flag is disabled by default – furthermore it has no effect during test runs or dev mode).
[https://quarkus.io/guides/deploying-to-kubernetes#deployment]

In order to build and deploy a container image, I used the following command on the Linux Command Prompt:

./mvnw clean package -Dquarkus.kubernetes.deploy=true

Unfortunately, I got the following build error, related to my demo environment:


[ERROR] Failed to execute goal io.quarkus:quarkus-maven-plugin:1.7.0.Final:build (default) on project getting-started: Failed to build quarkus application: io.quarkus.builder.BuildException: Build failure: Build failed due to errors
[ERROR]         [error]: Build step io.quarkus.kubernetes.deployment.KubernetesDeployer#deploy threw an exception: java.lang.RuntimeException: Although a Kubernetes deployment was requested, it however cannot take place because there was an error during communication with the API Server at 'https://kubernetes.default.svc/'

So, apparently the Kubernetes API Server could not be contacted.

The code guide (after reading a few lines further down) gave me an answer about what was wrong.

When deployment is enabled, the Kubernetes extension will select the resources specified by quarkus.kubernetes.deployment.target and deploy them. This assumes that a .kube/config is available in your user directory that points to the target Kubernetes cluster. In other words, the extension will use whatever cluster kubectl uses. The same applies to credentials.
[https://quarkus.io/guides/deploying-to-kubernetes#deploying]

In order to create the .kube/config file in my user (/home/vagrant) directory on my demo environment, I used the following command on the Linux Command Prompt:

With the following output:


total 20
drwxr-xr-x 7 vagrant vagrant 4096 Sep 13 15:18 ..
drwxr-x--- 3 vagrant vagrant 4096 Sep 13 15:18 cache
drwxr-x--- 3 vagrant vagrant 4096 Sep 13 15:40 http-cache
drwxr-x--- 4 vagrant vagrant 4096 Sep 13 17:18 .
-rw-rw-r-- 1 vagrant vagrant 1044 Sep 13 17:39 config

In order to build and deploy a container image, again I used the following command on the Linux Command Prompt:

cd /vagrant/applications/getting-started
./mvnw clean package -Dquarkus.kubernetes.deploy=true

With the following output:


[INFO] Scanning for projects...
[INFO]
[INFO] ----------------------< org.acme:getting-started >----------------------
[INFO] Building getting-started 1.0-SNAPSHOT
[INFO] --------------------------------[ jar ]---------------------------------
[INFO]
[INFO] --- maven-clean-plugin:2.5:clean (default-clean) @ getting-started ---
[INFO] Deleting /vagrant/applications/getting-started/target
[INFO]
[INFO] --- quarkus-maven-plugin:1.7.0.Final:prepare (default) @ getting-started ---
[INFO]
[INFO] --- maven-resources-plugin:2.6:resources (default-resources) @ getting-started ---
[INFO] Using 'UTF-8' encoding to copy filtered resources.
[INFO] Copying 4 resources
[INFO]
[INFO] --- maven-compiler-plugin:3.8.1:compile (default-compile) @ getting-started ---
[INFO] Changes detected - recompiling the module!
[INFO] Compiling 2 source files to /vagrant/applications/getting-started/target/classes
[INFO]
[INFO] --- quarkus-maven-plugin:1.7.0.Final:prepare-tests (default) @ getting-started ---
[INFO]
[INFO] --- maven-resources-plugin:2.6:testResources (default-testResources) @ getting-started ---
[INFO] Using 'UTF-8' encoding to copy filtered resources.
[INFO] skip non existing resourceDirectory /vagrant/applications/getting-started/src/test/resources
[INFO]
[INFO] --- maven-compiler-plugin:3.8.1:testCompile (default-testCompile) @ getting-started ---
[INFO] Changes detected - recompiling the module!
[INFO] Compiling 2 source files to /vagrant/applications/getting-started/target/test-classes
[INFO]
[INFO] --- maven-surefire-plugin:3.0.0-M5:test (default-test) @ getting-started ---
[INFO]
[INFO] -------------------------------------------------------
[INFO]  T E S T S
[INFO] -------------------------------------------------------
[INFO] Running org.acme.getting.started.GreetingResourceTest
2020-09-21 13:51:09,412 WARN  [io.qua.config] (main) Unrecognized configuration key "quarkus.kubernetes.deploy" was provided; it will be ignored; verify that the dependency extension for this configuration is set or you did not make a typo
2020-09-21 13:51:10,202 INFO  [io.quarkus] (main) Quarkus 1.7.0.Final on JVM started in 4.759s. Listening on: http://0.0.0.0:8081
2020-09-21 13:51:10,202 INFO  [io.quarkus] (main) Profile test activated.
2020-09-21 13:51:10,203 INFO  [io.quarkus] (main) Installed features: [cdi, kubernetes, resteasy]
[INFO] Tests run: 2, Failures: 0, Errors: 0, Skipped: 0, Time elapsed: 13.899 s - in org.acme.getting.started.GreetingResourceTest
2020-09-21 13:51:14,017 INFO  [io.quarkus] (main) Quarkus stopped in 0.045s
[INFO]
[INFO] Results:
[INFO]
[INFO] Tests run: 2, Failures: 0, Errors: 0, Skipped: 0
[INFO]
[INFO]
[INFO] --- maven-jar-plugin:2.4:jar (default-jar) @ getting-started ---
[INFO] Building jar: /vagrant/applications/getting-started/target/getting-started-1.0-SNAPSHOT.jar
[INFO]
[INFO] --- quarkus-maven-plugin:1.7.0.Final:build (default) @ getting-started ---
[INFO] [org.jboss.threads] JBoss Threads version 3.1.1.Final
[WARNING] [io.quarkus.kubernetes.deployment.KubernetesDeployer] A Kubernetes deployment was requested, but the container image to be built will not be pushed to any registry because "quarkus.container-image.registry" has not been set. The Kubernetes deployment will only work properly if the cluster is using the local Docker daemon. For that reason 'ImagePullPolicy' is being force-set to 'IfNotPresent'.
[INFO] [io.quarkus.deployment.pkg.steps.JarResultBuildStep] Building thin jar: /vagrant/applications/getting-started/target/getting-started-1.0-SNAPSHOT-runner.jar
[WARNING] [io.quarkus.kubernetes.deployment.KubernetesProcessor] No registry was set for the container image, so 'ImagePullPolicy' is being force-set to 'IfNotPresent'.
[INFO] Checking for existing resources in: /vagrant/applications/getting-started/src/main/kubernetes.
[INFO] [io.quarkus.kubernetes.deployment.KubernetesDeploy] Kubernetes API Server at 'https://127.0.0.1:6443/' successfully contacted.
[INFO] [io.quarkus.container.image.docker.deployment.DockerWorking] Docker daemon found. Version:'19.03.12'
[INFO] [io.quarkus.container.image.docker.deployment.DockerProcessor] Building docker image for jar.
[INFO] [io.quarkus.container.image.docker.deployment.DockerProcessor] Executing the following command to build docker image: 'docker build -f /vagrant/applications/getting-started/src/main/docker/Dockerfile.jvm -t vagrant/getting-started:1.0-SNAPSHOT /vagrant/applications/getting-started'
[INFO] [io.quarkus.container.image.docker.deployment.DockerProcessor] Sending build context to Docker daemon  11.09MB
[INFO] [io.quarkus.container.image.docker.deployment.DockerProcessor]
[INFO] [io.quarkus.container.image.docker.deployment.DockerProcessor] Step 1/11 : FROM registry.access.redhat.com/ubi8/ubi-minimal:8.1
[INFO] [io.quarkus.container.image.docker.deployment.DockerProcessor]  ---> 91d23a64fdf2
[INFO] [io.quarkus.container.image.docker.deployment.DockerProcessor] Step 2/11 : ARG JAVA_PACKAGE=java-11-openjdk-headless
[INFO] [io.quarkus.container.image.docker.deployment.DockerProcessor]  ---> Using cache
[INFO] [io.quarkus.container.image.docker.deployment.DockerProcessor]  ---> 3818465cc8fa
[INFO] [io.quarkus.container.image.docker.deployment.DockerProcessor] Step 3/11 : ARG RUN_JAVA_VERSION=1.3.8
[INFO] [io.quarkus.container.image.docker.deployment.DockerProcessor]  ---> Using cache
[INFO] [io.quarkus.container.image.docker.deployment.DockerProcessor]  ---> c45c7ada9216
[INFO] [io.quarkus.container.image.docker.deployment.DockerProcessor] Step 4/11 : ENV LANG='en_US.UTF-8' LANGUAGE='en_US:en'
[INFO] [io.quarkus.container.image.docker.deployment.DockerProcessor]  ---> Using cache
[INFO] [io.quarkus.container.image.docker.deployment.DockerProcessor]  ---> eea2c4e04c6c
[INFO] [io.quarkus.container.image.docker.deployment.DockerProcessor] Step 5/11 : RUN microdnf install curl ca-certificates ${JAVA_PACKAGE}     && microdnf update     && microdnf clean all     && mkdir /deployments     && chown 1001 /deployments     && chmod "g+rwX" /deployments     && chown 1001:root /deployments     && curl https://repo1.maven.org/maven2/io/fabric8/run-java-sh/${RUN_JAVA_VERSION}/run-java-sh-${RUN_JAVA_VERSION}-sh.sh -o /deployments/run-java.sh     && chown 1001 /deployments/run-java.sh     && chmod 540 /deployments/run-java.sh     && echo "securerandom.source=file:/dev/urandom" >> /etc/alternatives/jre/lib/security/java.security
[INFO] [io.quarkus.container.image.docker.deployment.DockerProcessor]  ---> Using cache
[INFO] [io.quarkus.container.image.docker.deployment.DockerProcessor]  ---> eedc98908837
[INFO] [io.quarkus.container.image.docker.deployment.DockerProcessor] Step 6/11 : ENV JAVA_OPTIONS="-Dquarkus.http.host=0.0.0.0 -Djava.util.logging.manager=org.jboss.logmanager.LogManager"
[INFO] [io.quarkus.container.image.docker.deployment.DockerProcessor]  ---> Using cache
[INFO] [io.quarkus.container.image.docker.deployment.DockerProcessor]  ---> ef0d7a761730
[INFO] [io.quarkus.container.image.docker.deployment.DockerProcessor] Step 7/11 : COPY target/lib/* /deployments/lib/
[INFO] [io.quarkus.container.image.docker.deployment.DockerProcessor]  ---> d8153bf53db2
[INFO] [io.quarkus.container.image.docker.deployment.DockerProcessor] Step 8/11 : COPY target/*-runner.jar /deployments/app.jar
[INFO] [io.quarkus.container.image.docker.deployment.DockerProcessor]  ---> 29c8cb2728a9
[INFO] [io.quarkus.container.image.docker.deployment.DockerProcessor] Step 9/11 : EXPOSE 8080
[INFO] [io.quarkus.container.image.docker.deployment.DockerProcessor]  ---> Running in 357e10f70946
[INFO] [io.quarkus.container.image.docker.deployment.DockerProcessor] Removing intermediate container 357e10f70946
[INFO] [io.quarkus.container.image.docker.deployment.DockerProcessor]  ---> 6c0c45ae950a
[INFO] [io.quarkus.container.image.docker.deployment.DockerProcessor] Step 10/11 : USER 1001
[INFO] [io.quarkus.container.image.docker.deployment.DockerProcessor]  ---> Running in cc1e69f157cd
[INFO] [io.quarkus.container.image.docker.deployment.DockerProcessor] Removing intermediate container cc1e69f157cd
[INFO] [io.quarkus.container.image.docker.deployment.DockerProcessor]  ---> 4f1a7ea4cc5f
[INFO] [io.quarkus.container.image.docker.deployment.DockerProcessor] Step 11/11 : ENTRYPOINT [ "/deployments/run-java.sh" ]
[INFO] [io.quarkus.container.image.docker.deployment.DockerProcessor]  ---> Running in 6b9c8969b315
[INFO] [io.quarkus.container.image.docker.deployment.DockerProcessor] Removing intermediate container 6b9c8969b315
[INFO] [io.quarkus.container.image.docker.deployment.DockerProcessor]  ---> a4f6437458b3
[INFO] [io.quarkus.container.image.docker.deployment.DockerProcessor] Successfully built a4f6437458b3
[INFO] [io.quarkus.container.image.docker.deployment.DockerProcessor] Successfully tagged vagrant/getting-started:1.0-SNAPSHOT
[INFO] [io.quarkus.container.image.docker.deployment.DockerProcessor] Built container image vagrant/getting-started:1.0-SNAPSHOT (a4f6437458b3)

[INFO] [io.quarkus.kubernetes.deployment.KubernetesDeployer] Deploying to kubernetes server: https://127.0.0.1:6443/ in namespace: default.
[INFO] [io.quarkus.kubernetes.deployment.KubernetesDeployer] Applied: ServiceAccount my-quarkus-kubernetes-name.
[INFO] [io.quarkus.kubernetes.deployment.KubernetesDeployer] Applied: Service my-quarkus-kubernetes-name.
[INFO] [io.quarkus.kubernetes.deployment.KubernetesDeployer] Applied: Deployment my-quarkus-kubernetes-name.
[INFO] [io.quarkus.deployment.QuarkusAugmentor] Quarkus augmentation completed in 15738ms
[INFO] ------------------------------------------------------------------------
[INFO] BUILD SUCCESS
[INFO] ------------------------------------------------------------------------
[INFO] Total time:  43.627 s
[INFO] Finished at: 2020-09-21T13:51:30Z
[INFO] ------------------------------------------------------------------------
vagrant@ubuntu-bionic:/vagrant/applications/getting-started$

Remark about the namespace:
As you can see in the output, namespace default is used, although in the Kubernetes manifests I used namespace nl-amis-development. This is to be expected because my custom namespace does not yet exist.

In order to check the resources that where created, I used the following command on the Linux Command Prompt:

kubectl get all --all-namespaces

With the following output:

NAMESPACE              NAME                                             READY   STATUS      RESTARTS   AGE
kube-system            pod/metrics-server-7566d596c8-gxrjt              1/1     Running     0          32d
kube-system            pod/helm-install-traefik-7mps6                   0/1     Completed   0          32d
kube-system            pod/local-path-provisioner-6d59f47c7-vtb4t       1/1     Running     0          32d
kube-system            pod/coredns-8655855d6-qxqhf                      1/1     Running     0          32d
kube-system            pod/svclb-traefik-hdxqf                          2/2     Running     0          32d
kube-system            pod/traefik-758cd5fc85-m4cvj                     1/1     Running     0          32d
kubernetes-dashboard   pod/kubernetes-dashboard-7b544877d5-l4qfb        1/1     Running     0          32d
kubernetes-dashboard   pod/dashboard-metrics-scraper-6b4884c9d5-hdxmn   1/1     Running     0          32d

NAMESPACE              NAME                                 TYPE           CLUSTER-IP      EXTERNAL-IP   PORT(S)                      AGE
default                service/kubernetes                   ClusterIP      10.43.0.1       <none>        443/TCP                      32d
kube-system            service/kube-dns                     ClusterIP      10.43.0.10      <none>        53/UDP,53/TCP,9153/TCP       32d
kube-system            service/metrics-server               ClusterIP      10.43.183.35    <none>        443/TCP                      32d
kube-system            service/traefik-prometheus           ClusterIP      10.43.50.120    <none>        9100/TCP                     32d
kube-system            service/traefik                      LoadBalancer   10.43.116.205   10.0.2.15     80:30676/TCP,443:31713/TCP   32d
kubernetes-dashboard   service/kubernetes-dashboard         ClusterIP      10.43.175.253   <none>        443/TCP                      32d
kubernetes-dashboard   service/dashboard-metrics-scraper    ClusterIP      10.43.5.8       <none>        8000/TCP                     32d
default                service/my-quarkus-kubernetes-name   NodePort       10.43.220.219   <none>        8090:31939/TCP               15m

NAMESPACE     NAME                           DESIRED   CURRENT   READY   UP-TO-DATE   AVAILABLE   NODE SELECTOR   AGE
kube-system   daemonset.apps/svclb-traefik   1         1         1       1            1           <none>          32d

NAMESPACE              NAME                                         READY   UP-TO-DATE   AVAILABLE   AGE
kube-system            deployment.apps/metrics-server               1/1     1            1           32d
kube-system            deployment.apps/local-path-provisioner       1/1     1            1           32d
kube-system            deployment.apps/coredns                      1/1     1            1           32d
kube-system            deployment.apps/traefik                      1/1     1            1           32d
kubernetes-dashboard   deployment.apps/kubernetes-dashboard         1/1     1            1           32d
kubernetes-dashboard   deployment.apps/dashboard-metrics-scraper    1/1     1            1           32d
default                deployment.apps/my-quarkus-kubernetes-name   0/3     0            0           15m

NAMESPACE              NAME                                                    DESIRED   CURRENT   READY   AGE
kube-system            replicaset.apps/metrics-server-7566d596c8               1         1         1       32d
kube-system            replicaset.apps/local-path-provisioner-6d59f47c7        1         1         1       32d
kube-system            replicaset.apps/coredns-8655855d6                       1         1         1       32d
kube-system            replicaset.apps/traefik-758cd5fc85                      1         1         1       32d
kubernetes-dashboard   replicaset.apps/kubernetes-dashboard-7b544877d5         1         1         1       32d
kubernetes-dashboard   replicaset.apps/dashboard-metrics-scraper-6b4884c9d5    1         1         1       32d
default                replicaset.apps/my-quarkus-kubernetes-name-7845545ff5   3         0         0       15m

NAMESPACE     NAME                             COMPLETIONS   DURATION   AGE
kube-system   job.batch/helm-install-traefik   1/1           41s        32d

In order to check the ServiceAccount that was created, I used the following command on the Linux Command Prompt:

kubectl get serviceAccounts

With the following output:


NAME                         SECRETS   AGE
default                      1         32d
my-quarkus-kubernetes-name   1         18m

Remark:
Several resources are created, but no Pods!

When I checked the resources via the Kubernetes Dashboard, I saw the following error message:

So, as expected, an error occurred because the ServiceAccount with name my-quarkus-kubernetes-service-account does not exist. As I remarked earlier in my previous article, the service account that is used to run the pod, refers to a non-existing service account.
[https://technology.amis.nl/2020/10/03/quarkus-supersonic-subatomic-java-trying-out-quarkus-guide-quarkus-kubernetes-extension-part-2/]

To work around this problem. I opted to remark the configuration I set earlier in src/main/resources/application.properties.

# Kubernetes manifest service-account
#quarkus.kubernetes.service-account=my-quarkus-kubernetes-service-account

Creating the namespace

For creating the namespace, I used an existing yaml file, with the following content:

apiVersion: v1
kind: Namespace
metadata:
  name: "nl-amis-development"
  labels:
    name: "nl-amis-development"

In order to create the namespace, I used the following command on the Linux Command Prompt:

kubectl apply -f /vagrant/yaml/namespace-development.yaml

With the following output:


namespace/nl-amis-development created

Deleting the created resources

In order to delete the created Service, I used the following command on the Linux Command Prompt:

kubectl delete -n default service my-quarkus-kubernetes-name

With the following output:


service “my-quarkus-kubernetes-name” deleted

In order to delete the created ReplicaSet, I used the following command on the Linux Command Prompt:

kubectl delete -n default replicaset my-quarkus-kubernetes-name-7845545ff5

With the following output:


replicaset.apps “my-quarkus-kubernetes-name-7845545ff5” deleted

In order to delete the created Deployment, I used the following command on the Linux Command Prompt:

kubectl delete -n default deployment my-quarkus-kubernetes-name

With the following output:


deployment.apps “my-quarkus-kubernetes-name” deleted

In order to delete the created ServiceAccount, I used the following command on the Linux Command Prompt:

kubectl delete -n default serviceAccounts my-quarkus-kubernetes-name

With the following output:


serviceaccount “my-quarkus-kubernetes-name” deleted

Automatic deployment with a namespace created beforehand

In order to build and deploy a container image, again I used the following command on the Linux Command Prompt:

./mvnw clean package -Dquarkus.kubernetes.deploy=true

With the following output:


[INFO] Scanning for projects...
[INFO]
[INFO] ----------------------< org.acme:getting-started >----------------------
[INFO] Building getting-started 1.0-SNAPSHOT
[INFO] --------------------------------[ jar ]---------------------------------
[INFO]
[INFO] --- maven-clean-plugin:2.5:clean (default-clean) @ getting-started ---
[INFO] Deleting /vagrant/applications/getting-started/target
[INFO]
[INFO] --- quarkus-maven-plugin:1.7.0.Final:prepare (default) @ getting-started ---
[INFO]
[INFO] --- maven-resources-plugin:2.6:resources (default-resources) @ getting-started ---
[INFO] Using 'UTF-8' encoding to copy filtered resources.
[INFO] Copying 4 resources
[INFO]
[INFO] --- maven-compiler-plugin:3.8.1:compile (default-compile) @ getting-started ---
[INFO] Changes detected - recompiling the module!
[INFO] Compiling 2 source files to /vagrant/applications/getting-started/target/classes
[INFO]
[INFO] --- quarkus-maven-plugin:1.7.0.Final:prepare-tests (default) @ getting-started ---
[INFO]
[INFO] --- maven-resources-plugin:2.6:testResources (default-testResources) @ getting-started ---
[INFO] Using 'UTF-8' encoding to copy filtered resources.
[INFO] skip non existing resourceDirectory /vagrant/applications/getting-started/src/test/resources
[INFO]
[INFO] --- maven-compiler-plugin:3.8.1:testCompile (default-testCompile) @ getting-started ---
[INFO] Changes detected - recompiling the module!
[INFO] Compiling 2 source files to /vagrant/applications/getting-started/target/test-classes
[INFO]
[INFO] --- maven-surefire-plugin:3.0.0-M5:test (default-test) @ getting-started ---
[INFO]
[INFO] -------------------------------------------------------
[INFO]  T E S T S
[INFO] -------------------------------------------------------
[INFO] Running org.acme.getting.started.GreetingResourceTest
2020-09-21 14:46:03,627 WARN  [io.qua.config] (main) Unrecognized configuration key "quarkus.kubernetes.deploy" was provided; it will be ignored; verify that the dependency extension for this configuration is set or you did not make a typo
2020-09-21 14:46:04,421 INFO  [io.quarkus] (main) Quarkus 1.7.0.Final on JVM started in 4.530s. Listening on: http://0.0.0.0:8081
2020-09-21 14:46:04,422 INFO  [io.quarkus] (main) Profile test activated.
2020-09-21 14:46:04,422 INFO  [io.quarkus] (main) Installed features: [cdi, kubernetes, resteasy]
[INFO] Tests run: 2, Failures: 0, Errors: 0, Skipped: 0, Time elapsed: 13.133 s - in org.acme.getting.started.GreetingResourceTest
2020-09-21 14:46:08,139 INFO  [io.quarkus] (main) Quarkus stopped in 0.032s
[INFO]
[INFO] Results:
[INFO]
[INFO] Tests run: 2, Failures: 0, Errors: 0, Skipped: 0
[INFO]
[INFO]
[INFO] --- maven-jar-plugin:2.4:jar (default-jar) @ getting-started ---
[INFO] Building jar: /vagrant/applications/getting-started/target/getting-started-1.0-SNAPSHOT.jar
[INFO]
[INFO] --- quarkus-maven-plugin:1.7.0.Final:build (default) @ getting-started ---
[INFO] [org.jboss.threads] JBoss Threads version 3.1.1.Final
[WARNING] [io.quarkus.kubernetes.deployment.KubernetesDeployer] A Kubernetes deployment was requested, but the container image to be built will not be pushed to any registry because "quarkus.container-image.registry" has not been set. The Kubernetes deployment will only work properly if the cluster is using the local Docker daemon. For that reason 'ImagePullPolicy' is being force-set to 'IfNotPresent'.
[INFO] [io.quarkus.deployment.pkg.steps.JarResultBuildStep] Building thin jar: /vagrant/applications/getting-started/target/getting-started-1.0-SNAPSHOT-runner.jar
[WARNING] [io.quarkus.kubernetes.deployment.KubernetesProcessor] No registry was set for the container image, so 'ImagePullPolicy' is being force-set to 'IfNotPresent'.
[INFO] Checking for existing resources in: /vagrant/applications/getting-started/src/main/kubernetes.
[INFO] [io.quarkus.kubernetes.deployment.KubernetesDeploy] Kubernetes API Server at 'https://127.0.0.1:6443/' successfully contacted.
[INFO] [io.quarkus.container.image.docker.deployment.DockerWorking] Docker daemon found. Version:'19.03.12'
[INFO] [io.quarkus.container.image.docker.deployment.DockerProcessor] Building docker image for jar.
[INFO] [io.quarkus.container.image.docker.deployment.DockerProcessor] Executing the following command to build docker image: 'docker build -f /vagrant/applications/getting-started/src/main/docker/Dockerfile.jvm -t vagrant/getting-started:1.0-SNAPSHOT /vagrant/applications/getting-started'
[INFO] [io.quarkus.container.image.docker.deployment.DockerProcessor] Sending build context to Docker daemon  11.09MB
[INFO] [io.quarkus.container.image.docker.deployment.DockerProcessor]
[INFO] [io.quarkus.container.image.docker.deployment.DockerProcessor] Step 1/11 : FROM registry.access.redhat.com/ubi8/ubi-minimal:8.1
[INFO] [io.quarkus.container.image.docker.deployment.DockerProcessor]  ---> 91d23a64fdf2
[INFO] [io.quarkus.container.image.docker.deployment.DockerProcessor] Step 2/11 : ARG JAVA_PACKAGE=java-11-openjdk-headless
[INFO] [io.quarkus.container.image.docker.deployment.DockerProcessor]  ---> Using cache
[INFO] [io.quarkus.container.image.docker.deployment.DockerProcessor]  ---> 3818465cc8fa
[INFO] [io.quarkus.container.image.docker.deployment.DockerProcessor] Step 3/11 : ARG RUN_JAVA_VERSION=1.3.8
[INFO] [io.quarkus.container.image.docker.deployment.DockerProcessor]  ---> Using cache
[INFO] [io.quarkus.container.image.docker.deployment.DockerProcessor]  ---> c45c7ada9216
[INFO] [io.quarkus.container.image.docker.deployment.DockerProcessor] Step 4/11 : ENV LANG='en_US.UTF-8' LANGUAGE='en_US:en'
[INFO] [io.quarkus.container.image.docker.deployment.DockerProcessor]  ---> Using cache
[INFO] [io.quarkus.container.image.docker.deployment.DockerProcessor]  ---> eea2c4e04c6c
[INFO] [io.quarkus.container.image.docker.deployment.DockerProcessor] Step 5/11 : RUN microdnf install curl ca-certificates ${JAVA_PACKAGE}     && microdnf update     && microdnf clean all     && mkdir /deployments     && chown 1001 /deployments     && chmod "g+rwX" /deployments     && chown 1001:root /deployments     && curl https://repo1.maven.org/maven2/io/fabric8/run-java-sh/${RUN_JAVA_VERSION}/run-java-sh-${RUN_JAVA_VERSION}-sh.sh -o /deployments/run-java.sh     && chown 1001 /deployments/run-java.sh     && chmod 540 /deployments/run-java.sh     && echo "securerandom.source=file:/dev/urandom" >> /etc/alternatives/jre/lib/security/java.security
[INFO] [io.quarkus.container.image.docker.deployment.DockerProcessor]  ---> Using cache
[INFO] [io.quarkus.container.image.docker.deployment.DockerProcessor]  ---> eedc98908837
[INFO] [io.quarkus.container.image.docker.deployment.DockerProcessor] Step 6/11 : ENV JAVA_OPTIONS="-Dquarkus.http.host=0.0.0.0 -Djava.util.logging.manager=org.jboss.logmanager.LogManager"
[INFO] [io.quarkus.container.image.docker.deployment.DockerProcessor]  ---> Using cache
[INFO] [io.quarkus.container.image.docker.deployment.DockerProcessor]  ---> ef0d7a761730
[INFO] [io.quarkus.container.image.docker.deployment.DockerProcessor] Step 7/11 : COPY target/lib/* /deployments/lib/
[INFO] [io.quarkus.container.image.docker.deployment.DockerProcessor]  ---> Using cache
[INFO] [io.quarkus.container.image.docker.deployment.DockerProcessor]  ---> d8153bf53db2
[INFO] [io.quarkus.container.image.docker.deployment.DockerProcessor] Step 8/11 : COPY target/*-runner.jar /deployments/app.jar
[INFO] [io.quarkus.container.image.docker.deployment.DockerProcessor]  ---> 3df12d03be99
[INFO] [io.quarkus.container.image.docker.deployment.DockerProcessor] Step 9/11 : EXPOSE 8080
[INFO] [io.quarkus.container.image.docker.deployment.DockerProcessor]  ---> Running in bb78b4896889
[INFO] [io.quarkus.container.image.docker.deployment.DockerProcessor] Removing intermediate container bb78b4896889
[INFO] [io.quarkus.container.image.docker.deployment.DockerProcessor]  ---> e16d4e1becbb
[INFO] [io.quarkus.container.image.docker.deployment.DockerProcessor] Step 10/11 : USER 1001
[INFO] [io.quarkus.container.image.docker.deployment.DockerProcessor]  ---> Running in b451ee1e0bfa
[INFO] [io.quarkus.container.image.docker.deployment.DockerProcessor] Removing intermediate container b451ee1e0bfa
[INFO] [io.quarkus.container.image.docker.deployment.DockerProcessor]  ---> 753eaa08a26d
[INFO] [io.quarkus.container.image.docker.deployment.DockerProcessor] Step 11/11 : ENTRYPOINT [ "/deployments/run-java.sh" ]
[INFO] [io.quarkus.container.image.docker.deployment.DockerProcessor]  ---> Running in 505c90dddf04
[INFO] [io.quarkus.container.image.docker.deployment.DockerProcessor] Removing intermediate container 505c90dddf04
[INFO] [io.quarkus.container.image.docker.deployment.DockerProcessor]  ---> d2af95734312
[INFO] [io.quarkus.container.image.docker.deployment.DockerProcessor] Successfully built d2af95734312
[INFO] [io.quarkus.container.image.docker.deployment.DockerProcessor] Successfully tagged vagrant/getting-started:1.0-SNAPSHOT
[INFO] [io.quarkus.container.image.docker.deployment.DockerProcessor] Built container image vagrant/getting-started:1.0-SNAPSHOT (d2af95734312)

[INFO] [io.quarkus.kubernetes.deployment.KubernetesDeployer] Deploying to kubernetes server: https://127.0.0.1:6443/ in namespace: default.
[INFO] [io.quarkus.kubernetes.deployment.KubernetesDeployer] Applied: ServiceAccount my-quarkus-kubernetes-name.
[INFO] [io.quarkus.kubernetes.deployment.KubernetesDeployer] Applied: Service my-quarkus-kubernetes-name.
[INFO] [io.quarkus.kubernetes.deployment.KubernetesDeployer] Applied: Deployment my-quarkus-kubernetes-name.
[INFO] [io.quarkus.deployment.QuarkusAugmentor] Quarkus augmentation completed in 12056ms
[INFO] ------------------------------------------------------------------------
[INFO] BUILD SUCCESS
[INFO] ------------------------------------------------------------------------
[INFO] Total time:  38.809 s
[INFO] Finished at: 2020-09-21T14:46:21Z
[INFO] ------------------------------------------------------------------------
vagrant@ubuntu-bionic:/vagrant/applications/getting-started$

So, the output is similar as the one from before, when the namespace didn’t already exist!

Remark about the namespace:
As you can see in the output, namespace default is used, although in the Kubernetes manifest I used namespace nl-amis-development. This is not what I expected because, this time, my custom namespace did already exist.

So, why didn’t this namespace thing work?

In order to check the resources that where created, again I used the following command on the Linux Command Prompt:

kubectl get all --all-namespaces

With the following output:


NAMESPACE              NAME                                              READY   STATUS      RESTARTS   AGE
kube-system            pod/metrics-server-7566d596c8-gxrjt               1/1     Running     0          32d
kube-system            pod/helm-install-traefik-7mps6                    0/1     Completed   0          32d
kube-system            pod/local-path-provisioner-6d59f47c7-vtb4t        1/1     Running     0          32d
kube-system            pod/coredns-8655855d6-qxqhf                       1/1     Running     0          32d
kube-system            pod/svclb-traefik-hdxqf                           2/2     Running     0          32d
kube-system            pod/traefik-758cd5fc85-m4cvj                      1/1     Running     0          32d
kubernetes-dashboard   pod/kubernetes-dashboard-7b544877d5-l4qfb         1/1     Running     0          32d
kubernetes-dashboard   pod/dashboard-metrics-scraper-6b4884c9d5-hdxmn    1/1     Running     0          32d
default                pod/my-quarkus-kubernetes-name-84995c96b7-jvzvt   1/1     Running     0          151m
default                pod/my-quarkus-kubernetes-name-84995c96b7-sqcfr   1/1     Running     0          151m
default                pod/my-quarkus-kubernetes-name-84995c96b7-2fjlp   1/1     Running     0          151m

NAMESPACE              NAME                                 TYPE           CLUSTER-IP      EXTERNAL-IP   PORT(S)                      AGE
default                service/kubernetes                   ClusterIP      10.43.0.1       <none>        443/TCP                      32d
kube-system            service/kube-dns                     ClusterIP      10.43.0.10      <none>        53/UDP,53/TCP,9153/TCP       32d
kube-system            service/metrics-server               ClusterIP      10.43.183.35    <none>        443/TCP                      32d
kube-system            service/traefik-prometheus           ClusterIP      10.43.50.120    <none>        9100/TCP                     32d
kube-system            service/traefik                      LoadBalancer   10.43.116.205   10.0.2.15     80:30676/TCP,443:31713/TCP   32d
kubernetes-dashboard   service/kubernetes-dashboard         ClusterIP      10.43.175.253   <none>        443/TCP                      32d
kubernetes-dashboard   service/dashboard-metrics-scraper    ClusterIP      10.43.5.8       <none>        8000/TCP                     32d
default                service/my-quarkus-kubernetes-name   NodePort       10.43.242.139   <none>        8090:30526/TCP               151m

NAMESPACE     NAME                           DESIRED   CURRENT   READY   UP-TO-DATE   AVAILABLE   NODE SELECTOR   AGE
kube-system   daemonset.apps/svclb-traefik   1         1         1       1            1           <none>          32d

NAMESPACE              NAME                                         READY   UP-TO-DATE   AVAILABLE   AGE
kube-system            deployment.apps/metrics-server               1/1     1            1           32d
kube-system            deployment.apps/local-path-provisioner       1/1     1            1           32d
kube-system            deployment.apps/coredns                      1/1     1            1           32d
kube-system            deployment.apps/traefik                      1/1     1            1           32d
kubernetes-dashboard   deployment.apps/kubernetes-dashboard         1/1     1            1           32d
kubernetes-dashboard   deployment.apps/dashboard-metrics-scraper    1/1     1            1           32d
default                deployment.apps/my-quarkus-kubernetes-name   3/3     3            3           151m

NAMESPACE              NAME                                                    DESIRED   CURRENT   READY   AGE
kube-system            replicaset.apps/metrics-server-7566d596c8               1         1         1       32d
kube-system            replicaset.apps/local-path-provisioner-6d59f47c7        1         1         1       32d
kube-system            replicaset.apps/coredns-8655855d6                       1         1         1       32d
kube-system            replicaset.apps/traefik-758cd5fc85                      1         1         1       32d
kubernetes-dashboard   replicaset.apps/kubernetes-dashboard-7b544877d5         1         1         1       32d
kubernetes-dashboard   replicaset.apps/dashboard-metrics-scraper-6b4884c9d5    1         1         1       32d
default                replicaset.apps/my-quarkus-kubernetes-name-84995c96b7   3         3         3       151m

NAMESPACE     NAME                             COMPLETIONS   DURATION   AGE
kube-system   job.batch/helm-install-traefik   1/1           41s        32d

The good news, however, is that the ReplicaSet was able to create the 3 Pods, because this time the correct service account name was used.

Manual deployment using the generated kubernetes.yml file

First, I wanted to check if there was a problem with the content of the generated kubernetes.yml file.

In order to manually deploy the resources, I used the following command on the Linux Command Prompt:

kubectl apply -f /vagrant/applications/getting-started/target/kubernetes/kubernetes.yml

With the following output:


unable to decode "/vagrant/applications/getting-started/target/kubernetes/kubernetes.yml": resource.metadataOnlyObject.ObjectMeta: v1.ObjectMeta.Namespace: Name: Labels: ReadString: expects " or n, but found 1, error found in #10 byte of ...|version":1},"name":"|..., bigger context ...|s_version","environment":"development","version":1},"name":"my-quarkus-kubernetes-name","namespace":|...
vagrant@ubuntu-bionic:/vagrant/applications/getting-started$

So, using the generated yaml file in this way, didn’t work. Apparently, there was something wrong with the label version and its value 1.0. There was an error for every resource that was going to be created.

For just the ServiceAccount part I created a new yaml file, with the following content:
[in bold, I highlighted the changes (except app.quarkus.io/build-timestamp)]

apiVersion: v1
kind: ServiceAccount
metadata:
  annotations:
    my_key1: key1_value
    my_key2: key2_value
    app.quarkus.io/build-timestamp: 2020-09-21 - 14:46:14 +0000
  labels:
    app.kubernetes.io/name: my-quarkus-kubernetes-name
    app.kubernetes.io/part-of: my_quarkus_kubernetes_part-of
    app.kubernetes.io/version: my_quarkus_kubernetes_version
    app: getting-started
    environment: development
    version: "1.0"
  name: my-quarkus-kubernetes-name
  namespace: nl-amis-development

Remark about a label value:
The label values must be strings. In yaml, that means all numeric values must be quoted.
[https://github.com/kubernetes/kubernetes/issues/57509]

As I also mentioned in my previous article, I tried to get the quotes around the label value by changing the configuration (using quarkus.kubernetes.labels.version) I set earlier in src/main/resources/application.properties, but I didn’t succeed. So, I changed it manually.
[https://technology.amis.nl/2020/10/03/quarkus-supersonic-subatomic-java-trying-out-quarkus-guide-quarkus-kubernetes-extension-part-2/]

Then, I used the following command on the Linux Command Prompt:

kubectl apply -f /vagrant/yaml/serviceaccount-getting-started.yaml

With the following output:


serviceaccount/my-quarkus-kubernetes-name created

In order to check the ServiceAccount that was created, I used the following command on the Linux Command Prompt:

kubectl get serviceAccounts --all-namespaces

With the following output:


NAMESPACE              NAME                                     SECRETS   AGE
kube-system            pv-protection-controller                 1         32d
kube-system            certificate-controller                   1         32d
kube-system            generic-garbage-collector                1         32d
kube-system            cronjob-controller                       1         32d
kube-system            node-controller                          1         32d
kube-system            service-controller                       1         32d
kube-system            coredns                                  1         32d
kube-system            clusterrole-aggregation-controller       1         32d
kube-system            endpoint-controller                      1         32d
kube-system            replication-controller                   1         32d
kube-system            daemon-set-controller                    1         32d
kube-system            job-controller                           1         32d
kube-system            local-path-provisioner-service-account   1         32d
kube-system            horizontal-pod-autoscaler                1         32d
kube-system            pvc-protection-controller                1         32d
kube-system            endpointslice-controller                 1         32d
kube-system            service-account-controller               1         32d
kube-system            replicaset-controller                    1         32d
kube-system            expand-controller                        1         32d
kube-system            metrics-server                           1         32d
kube-system            pod-garbage-collector                    1         32d
kube-system            namespace-controller                     1         32d
kube-system            disruption-controller                    1         32d
kube-system            statefulset-controller                   1         32d
kube-system            ttl-controller                           1         32d
kube-system            resourcequota-controller                 1         32d
kube-system            helm-traefik                             1         32d
kube-system            deployment-controller                    1         32d
kube-system            persistent-volume-binder                 1         32d
kube-system            attachdetach-controller                  1         32d
kube-system            default                                  1         32d
kube-public            default                                  1         32d
kube-node-lease        default                                  1         32d
default                default                                  1         32d
kube-system            traefik                                  1         32d
kubernetes-dashboard   kubernetes-dashboard                     1         32d
kubernetes-dashboard   default                                  1         32d
kubernetes-dashboard   admin-user                               1         32d
nl-amis-development    default                                  1         3h13m
nl-amis-development    my-quarkus-kubernetes-name               1         4m47s

So, doing it this way, a service account is created in my custom namespace.

By the way:
Service Account Controller manages ServiceAccount inside namespaces, and ensures a ServiceAccount named “default” exists in every active namespace.
[https://kubernetes.io/docs/reference/access-authn-authz/service-accounts-admin/#service-account-controller]

Next, in a similar way like I did before, I removed all the created resources.

Deployment with namespace set in current Kubernetes context

Remember, in the Deployment, the environment variable KUBERNETES_NAMESPACE is used. Its value is derived from the Pod’s metadata.namespace field.

When the ‘namespace’ field is not added to the ‘metadata’ section of the generated manifest, this means that when the manifests are applied to a cluster, the namespace will be resolved from the current Kubernetes context (see https://kubernetes.io/docs/concepts/configuration/organize-cluster-access-kubeconfig/#context for more details).
[https://quarkus.io/guides/all-config]

In order to permanently save the namespace for all subsequent kubectl commands in that context, I used the following command on the Linux Command Prompt:
[https://kubernetes.io/docs/reference/kubectl/cheatsheet/#kubectl-context-and-configuration]

sudo kubectl config set-context --current --namespace=nl-amis-development

With the following output:

Context “default” modified.

In order to validate the current Kubernetes context, I used the following command on the Linux Command Prompt:
[https://kubernetes.io/docs/concepts/overview/working-with-objects/namespaces/#setting-the-namespace-preference]

kubectl config view --minify | grep namespace:

With the following output:

namespace: nl-amis-development

So now the kubeconfig settings are changed, on my demo environment, I had to recreate the .kube/config file in my user (/home/vagrant) directory. So, again I used the following command on the Linux Command Prompt:

With the following output:


total 20
drwxr-xr-x 7 vagrant vagrant 4096 Sep 13 15:18 ..
drwxr-x--- 3 vagrant vagrant 4096 Sep 13 15:18 cache
drwxr-x--- 4 vagrant vagrant 4096 Sep 21 13:49 .
-rw-rw-r-- 1 vagrant vagrant 1044 Sep 21 13:49 config
drwxr-x--- 3 vagrant vagrant 4096 Sep 22 14:42 http-cache

In order to build and deploy a container image, again I used the following command on the Linux Command Prompt:

cd /vagrant/applications/getting-started
./mvnw clean package -Dquarkus.kubernetes.deploy=true

With the following output:


[INFO] Scanning for projects...
[INFO]
[INFO] ----------------------< org.acme:getting-started >----------------------
[INFO] Building getting-started 1.0-SNAPSHOT
[INFO] --------------------------------[ jar ]---------------------------------
[INFO]
[INFO] --- maven-clean-plugin:2.5:clean (default-clean) @ getting-started ---
[INFO] Deleting /vagrant/applications/getting-started/target
[INFO]
[INFO] --- quarkus-maven-plugin:1.7.0.Final:prepare (default) @ getting-started ---
[INFO]
[INFO] --- maven-resources-plugin:2.6:resources (default-resources) @ getting-started ---
[INFO] Using 'UTF-8' encoding to copy filtered resources.
[INFO] Copying 4 resources
[INFO]
[INFO] --- maven-compiler-plugin:3.8.1:compile (default-compile) @ getting-started ---
[INFO] Changes detected - recompiling the module!
[INFO] Compiling 2 source files to /vagrant/applications/getting-started/target/classes
[INFO]
[INFO] --- quarkus-maven-plugin:1.7.0.Final:prepare-tests (default) @ getting-started ---
[INFO]
[INFO] --- maven-resources-plugin:2.6:testResources (default-testResources) @ getting-started ---
[INFO] Using 'UTF-8' encoding to copy filtered resources.
[INFO] skip non existing resourceDirectory /vagrant/applications/getting-started/src/test/resources
[INFO]
[INFO] --- maven-compiler-plugin:3.8.1:testCompile (default-testCompile) @ getting-started ---
[INFO] Changes detected - recompiling the module!
[INFO] Compiling 2 source files to /vagrant/applications/getting-started/target/test-classes
[INFO]
[INFO] --- maven-surefire-plugin:3.0.0-M5:test (default-test) @ getting-started ---
[INFO]
[INFO] -------------------------------------------------------
[INFO]  T E S T S
[INFO] -------------------------------------------------------
[INFO] Running org.acme.getting.started.GreetingResourceTest
2020-09-22 14:50:35,938 WARN  [io.qua.config] (main) Unrecognized configuration key "quarkus.kubernetes.deploy" was provided; it will be ignored; verify that the dependency extension for this configuration is set or you did not make a typo
2020-09-22 14:50:36,914 INFO  [io.quarkus] (main) Quarkus 1.7.0.Final on JVM started in 5.126s. Listening on: http://0.0.0.0:8081
2020-09-22 14:50:36,917 INFO  [io.quarkus] (main) Profile test activated.
2020-09-22 14:50:36,917 INFO  [io.quarkus] (main) Installed features: [cdi, kubernetes, resteasy]
[INFO] Tests run: 2, Failures: 0, Errors: 0, Skipped: 0, Time elapsed: 14.502 s - in org.acme.getting.started.GreetingResourceTest
2020-09-22 14:50:41,102 INFO  [io.quarkus] (main) Quarkus stopped in 0.055s
[INFO]
[INFO] Results:
[INFO]
[INFO] Tests run: 2, Failures: 0, Errors: 0, Skipped: 0
[INFO]
[INFO]
[INFO] --- maven-jar-plugin:2.4:jar (default-jar) @ getting-started ---
[INFO] Building jar: /vagrant/applications/getting-started/target/getting-started-1.0-SNAPSHOT.jar
[INFO]
[INFO] --- quarkus-maven-plugin:1.7.0.Final:build (default) @ getting-started ---
[INFO] [org.jboss.threads] JBoss Threads version 3.1.1.Final
[WARNING] [io.quarkus.kubernetes.deployment.KubernetesDeployer] A Kubernetes deployment was requested, but the container image to be built will not be pushed to any registry because "quarkus.container-image.registry" has not been set. The Kubernetes deployment will only work properly if the cluster is using the local Docker daemon. For that reason 'ImagePullPolicy' is being force-set to 'IfNotPresent'.
[INFO] [io.quarkus.deployment.pkg.steps.JarResultBuildStep] Building thin jar: /vagrant/applications/getting-started/target/getting-started-1.0-SNAPSHOT-runner.jar
[WARNING] [io.quarkus.kubernetes.deployment.KubernetesProcessor] No registry was set for the container image, so 'ImagePullPolicy' is being force-set to 'IfNotPresent'.
[INFO] Checking for existing resources in: /vagrant/applications/getting-started/src/main/kubernetes.
[INFO] [io.quarkus.kubernetes.deployment.KubernetesDeploy] Kubernetes API Server at 'https://127.0.0.1:6443/' successfully contacted.
[INFO] [io.quarkus.container.image.docker.deployment.DockerWorking] Docker daemon found. Version:'19.03.12'
[INFO] [io.quarkus.container.image.docker.deployment.DockerProcessor] Building docker image for jar.
[INFO] [io.quarkus.container.image.docker.deployment.DockerProcessor] Executing the following command to build docker image: 'docker build -f /vagrant/applications/getting-started/src/main/docker/Dockerfile.jvm -t vagrant/getting-started:1.0-SNAPSHOT /vagrant/applications/getting-started'
[INFO] [io.quarkus.container.image.docker.deployment.DockerProcessor] Sending build context to Docker daemon  11.09MB
[INFO] [io.quarkus.container.image.docker.deployment.DockerProcessor]
[INFO] [io.quarkus.container.image.docker.deployment.DockerProcessor] Step 1/11 : FROM registry.access.redhat.com/ubi8/ubi-minimal:8.1
[INFO] [io.quarkus.container.image.docker.deployment.DockerProcessor]  ---> 91d23a64fdf2
[INFO] [io.quarkus.container.image.docker.deployment.DockerProcessor] Step 2/11 : ARG JAVA_PACKAGE=java-11-openjdk-headless
[INFO] [io.quarkus.container.image.docker.deployment.DockerProcessor]  ---> Using cache
[INFO] [io.quarkus.container.image.docker.deployment.DockerProcessor]  ---> 3818465cc8fa
[INFO] [io.quarkus.container.image.docker.deployment.DockerProcessor] Step 3/11 : ARG RUN_JAVA_VERSION=1.3.8
[INFO] [io.quarkus.container.image.docker.deployment.DockerProcessor]  ---> Using cache
[INFO] [io.quarkus.container.image.docker.deployment.DockerProcessor]  ---> c45c7ada9216
[INFO] [io.quarkus.container.image.docker.deployment.DockerProcessor] Step 4/11 : ENV LANG='en_US.UTF-8' LANGUAGE='en_US:en'
[INFO] [io.quarkus.container.image.docker.deployment.DockerProcessor]  ---> Using cache
[INFO] [io.quarkus.container.image.docker.deployment.DockerProcessor]  ---> eea2c4e04c6c
[INFO] [io.quarkus.container.image.docker.deployment.DockerProcessor] Step 5/11 : RUN microdnf install curl ca-certificates ${JAVA_PACKAGE}     && microdnf update     && microdnf clean all     && mkdir /deployments     && chown 1001 /deployments     && chmod "g+rwX" /deployments     && chown 1001:root /deployments     && curl https://repo1.maven.org/maven2/io/fabric8/run-java-sh/${RUN_JAVA_VERSION}/run-java-sh-${RUN_JAVA_VERSION}-sh.sh -o /deployments/run-java.sh     && chown 1001 /deployments/run-java.sh     && chmod 540 /deployments/run-java.sh     && echo "securerandom.source=file:/dev/urandom" >> /etc/alternatives/jre/lib/security/java.security
[INFO] [io.quarkus.container.image.docker.deployment.DockerProcessor]  ---> Using cache
[INFO] [io.quarkus.container.image.docker.deployment.DockerProcessor]  ---> eedc98908837
[INFO] [io.quarkus.container.image.docker.deployment.DockerProcessor] Step 6/11 : ENV JAVA_OPTIONS="-Dquarkus.http.host=0.0.0.0 -Djava.util.logging.manager=org.jboss.logmanager.LogManager"
[INFO] [io.quarkus.container.image.docker.deployment.DockerProcessor]  ---> Using cache
[INFO] [io.quarkus.container.image.docker.deployment.DockerProcessor]  ---> ef0d7a761730
[INFO] [io.quarkus.container.image.docker.deployment.DockerProcessor] Step 7/11 : COPY target/lib/* /deployments/lib/
[INFO] [io.quarkus.container.image.docker.deployment.DockerProcessor]  ---> Using cache
[INFO] [io.quarkus.container.image.docker.deployment.DockerProcessor]  ---> d8153bf53db2
[INFO] [io.quarkus.container.image.docker.deployment.DockerProcessor] Step 8/11 : COPY target/*-runner.jar /deployments/app.jar
[INFO] [io.quarkus.container.image.docker.deployment.DockerProcessor]  ---> 59b825cb8990
[INFO] [io.quarkus.container.image.docker.deployment.DockerProcessor] Step 9/11 : EXPOSE 8080
[INFO] [io.quarkus.container.image.docker.deployment.DockerProcessor]  ---> Running in bde06af91dbf
[INFO] [io.quarkus.container.image.docker.deployment.DockerProcessor] Removing intermediate container bde06af91dbf
[INFO] [io.quarkus.container.image.docker.deployment.DockerProcessor]  ---> 6b375d273b9d
[INFO] [io.quarkus.container.image.docker.deployment.DockerProcessor] Step 10/11 : USER 1001
[INFO] [io.quarkus.container.image.docker.deployment.DockerProcessor]  ---> Running in 4558ef2af8fb
[INFO] [io.quarkus.container.image.docker.deployment.DockerProcessor] Removing intermediate container 4558ef2af8fb
[INFO] [io.quarkus.container.image.docker.deployment.DockerProcessor]  ---> 8cf926c7f9f0
[INFO] [io.quarkus.container.image.docker.deployment.DockerProcessor] Step 11/11 : ENTRYPOINT [ "/deployments/run-java.sh" ]
[INFO] [io.quarkus.container.image.docker.deployment.DockerProcessor]  ---> Running in cd400ddd9c11
[INFO] [io.quarkus.container.image.docker.deployment.DockerProcessor] Removing intermediate container cd400ddd9c11
[INFO] [io.quarkus.container.image.docker.deployment.DockerProcessor]  ---> afb3bc1d2ea1
[INFO] [io.quarkus.container.image.docker.deployment.DockerProcessor] Successfully built afb3bc1d2ea1
[INFO] [io.quarkus.container.image.docker.deployment.DockerProcessor] Successfully tagged vagrant/getting-started:1.0-SNAPSHOT
[INFO] [io.quarkus.container.image.docker.deployment.DockerProcessor] Built container image vagrant/getting-started:1.0-SNAPSHOT (afb3bc1d2ea1)

[INFO] [io.quarkus.kubernetes.deployment.KubernetesDeployer] Deploying to kubernetes server: https://127.0.0.1:6443/ in namespace: nl-amis-development.
[INFO] [io.quarkus.kubernetes.deployment.KubernetesDeployer] Applied: ServiceAccount my-quarkus-kubernetes-name.
[INFO] [io.quarkus.kubernetes.deployment.KubernetesDeployer] Applied: Service my-quarkus-kubernetes-name.
[INFO] [io.quarkus.kubernetes.deployment.KubernetesDeployer] Applied: Deployment my-quarkus-kubernetes-name.
[INFO] [io.quarkus.deployment.QuarkusAugmentor] Quarkus augmentation completed in 12151ms
[INFO] ------------------------------------------------------------------------
[INFO] BUILD SUCCESS
[INFO] ------------------------------------------------------------------------
[INFO] Total time:  40.553 s
[INFO] Finished at: 2020-09-22T14:50:54Z
[INFO] ------------------------------------------------------------------------
vagrant@ubuntu-bionic:/vagrant/applications/getting-started$

So, this time, as you can see in the output, the correct nl-amis-development namespace is used. I am not sure however why the construction with the environment variable KUBERNETES_NAMESPACE in the generated Kubernetes manifest for Deployment didn’t work in my case. At least my work around for this problem did work.

Kubernetes Dashboard

Next, in the Web Browser on my Windows laptop, I started the Kubernetes Dashboard in my demo environment, in order to check the generated resources.

Below, you can see an overview of the Namespaces:

I changed the namespace to nl-amis-development. Below, you can see an overview of the Deployments:

Below, you can see an overview of the Replica Sets:

Below, you can see an overview of the Pods:

Here, again we can see that the ReplicaSet was able to create the 3 Pods.

Below, you can see some more details (including all the labels) of the first Pod:

I opened the log from the first Pod:

Below, you can see an overview of the Services:

I noticed something about the ports, so I clicked on Edit:

As you may remember, in my previous article I described how I changed the service type to NodePort and tried, but did not succeed, to set the values for nodePort, port and targetPort to respectively: 30010, 8190 and 8090. So, in the end, these settings were also not used in the deployed Service!

Then I closed the “Edit a resource” window.

Below, you can see some more details of the Service:

Here you can see the endpoints of the 3 Pods, I will be using later on.

So, this confirmed to me that everything was up and running.

For every one of the 3 Pods I quickly checked if they worked. Below you see the check I did for the first Pod (with the endpoint we saw earlier).

I used the following command on the Linux Command Prompt:

curl http://10.42.0.25:8090/hello

With the following output:


hello quarkus!

I used the following command on the Linux Command Prompt:

curl http://10.42.0.25:8090/hello/greeting/readers

With the following output:


hello readers

For the other two Pods, I did the same, using the host 10.42.0.26 and 10.42.0.27.

Besides already being able to use the Kubernetes Dashboard (in a Web Browser) on my Windows laptop (via port forwarding), I also wanted to be able to use a Web Browser on my Windows laptop, for sending requests to the Kubernetes my-quarkus-kubernetes-name Service on my guest (Ubuntu).

In order to determine the IP of the K3s node, I used the following command on the Linux Command Prompt, as I described in a previous article:
[https://technology.amis.nl/2020/04/30/creating-a-re-usable-vagrant-box-from-an-existing-vm-with-ubuntu-and-k3s-with-the-kubernetes-dashboard-and-adding-mysql-using-vagrant-and-oracle-virtualbox/]

nodeIP=$(kubectl get node ubuntu-bionic -o yaml | grep address: | grep -E -o "([0-9]{1,3}[\.]){3}[0-9]{1,3}")
echo "---$nodeIP---"

With the following output:


—10.0.2.15—

In order to forward local port 8090 to port 32171 on the K3s node ($nodeIP), I used the following command on the Linux Command Prompt, as I described in a previous article:
[https://technology.amis.nl/2020/04/30/creating-a-re-usable-vagrant-box-from-an-existing-vm-with-ubuntu-and-k3s-with-the-kubernetes-dashboard-and-adding-mysql-using-vagrant-and-oracle-virtualbox/]

socat tcp-listen:8090,fork tcp:$nodeIP:32171 &

With the following output:


[1] 19990
vagrant@ubuntu-bionic:~$

Then, in the Web Browser on my Windows laptop, I entered the URL: http://localhost:8090/hello

And I got the following result:

Then, in the Web Browser on my Windows laptop, I entered the URL: http://localhost:8090/hello/greeting/readers

And I got the following result:

So, running the application in a container using the produced executable worked.

Below, is a schematic overview of my demo environment with K3s (with the Kubernetes Dashboard) on top of an Ubuntu guest Operating System within an VirtualBox appliance, created using Vagrant:

So, I conclude this article. I shared with you the steps I took trying out the Quarkus code guide “Quarkus – Kubernetes extension”, and more specific the steps related the automatic deployment of the generated resources to a target platform, in my case K3s (lightweight certified Kubernetes distribution).

If you have read my last articles about this code quide, you know I had quite some problems trying to get the customizations I wanted into the generated Kubernetes manifests. Be aware that for a production environment you probably want to do things a bit different any way and have more control of what is going to be deployed. For a development situation it’s probably all right. At least the generated resources can provide a good base, for example for manually creating the final version of a particular resource and putting it in a version control system (like git).

I want to point out some remarks that are also made in the code guide itself, with regard to deploying to Minikube.


[https://quarkus.io/guides/deploying-to-kubernetes#deploying-to-minikube]

I also want to point out the part in the code guide about using existing resources.

Sometimes it’s desirable to either provide additional resources (e.g. a ConfigMap, a Secret, a Deployment for a database etc) or provide custom ones that will be used as a base for the generation process. Those resources can be added under src/main/kubernetes directory and can be named after the target environment (e.g. kubernetes.json, openshift.json, knative.json, or the yml equivalents). Each of these files may contain one or more Kubernetes resources.

Any resource found will be added in the generated manifests. Global modifications (e.g. labels, annotations etc) will also be applied to those resources. If one of the provided resources has the same name as one of the generated ones, then the generated resource will be created on top of the provided resource, respecting existing content when possible (e.g. existing labels, annotations, environment variables, mounts, replicas etc).

The name of the resource is determined by the application name and may be overridden by quarkus.kubernetes.name, quarkus.openshift.name and quarkus.knative.name.
[https://quarkus.io/guides/deploying-to-kubernetes#using-existing-resources]

The post Quarkus – Supersonic Subatomic Java, trying out Quarkus guide “Quarkus – Kubernetes extension” (part 3) appeared first on AMIS, Data Driven Blog.

Jenkins Pipeline: SonarQube and the OWASP Dependency-Check

$
0
0

The OWASP Foundation plays an important role in helping to improve security of software worldwide. They have created a popular and well-known awareness document called the ‘OWASP Top 10‘. This document lists the following risk: using components with known vulnerabilities.

Software nowadays can be quite complex consisting of many direct and indirect dependencies. How do you know the components and versions of those components you are using in your software, do not contain known vulnerabilities? Luckily the OWASP foundation has also provided a dependency-check tool and plugins for various build tools and CI/CD platforms to make detecting this more easy. In this blog post I’ll show how you can incorporate this in a Jenkins pipeline running on Kubernetes and using Jenkens and SonarQube to display the results of the scan.

Prerequisites

I used the environment described here. This includes a ready configured kubectl and helm installation. For the Jenkins installation and basic pipeline configuration I used the following here. In order to execute the below steps you should have at least a Kubernetes and Jenkins installation ready. If you want to use the literal code samples, you also require the Jenkins configuration as described including this.

OWASP dependency-check

The OWASP foundation provided Dependency-Check plugins for various build tools such as Ant, Gradle and Maven and a Jenkins plugin. They also have a standalone CLI tool available. Mind that the more specific a plugin you use, the more relevant the findings will be. You can for example use the Dependency-Check Jenkins plugin to perform a scan, but it will not understand how dependencies inside a pom.xml work so will not give sufficiently useful results. You will get something like below:

Dependency-Check results using the generic plugin from Jenkins

When you implement the Maven Dependency-Check plugin to produce results and the Jenkins Dependency-Check plugin to get those results visible in Jenkins, you get results which are specific to a Maven build of your Java application. This is quite useful! When using this you will get more accurate results like below.

Dependency-Check using the Java specific Maven plugin

The Jenkins Dependency-Check plugin (which can be used within a pipeline) also produces trend graphs and html reports inside Jenkins.

Trend graphs

Thus use the Maven Dependency-Check plugin to scan your project and use the Jenkins plugin to publish the results generated from the scan to Jenkins. After you have installed and configured SonarQube, you can use the same results to publish them to SonarQube.

Maven plugin configuration

You can find the pom.xml file I used here. You can execute the scan by running mvn dependency-check:check.

       <plugin>  
         <groupId>org.owasp</groupId>  
         <artifactId>dependency-check-maven</artifactId>  
         <version>6.0.2</version>  
         <executions>  
           <execution>  
             <goals>  
               <goal>check</goal>  
             </goals>  
           </execution>  
         </executions>  
         <configuration>  
           <failBuildOnCVSS>7</failBuildOnCVSS>  
           <!-- Generate all report formats -->  
           <format>ALL</format>  
           <!-- Don't use Nexus Analyzer -->  
           <centralAnalyzerEnabled>false</centralAnalyzerEnabled>  
           <!-- Am I the latest version? -->  
           <versionCheckEnabled>true</versionCheckEnabled>  
         </configuration>  
       </plugin>  

Notice the format ALL is specified. This generates an HTML, JSON, XML and CSV report in the target folder. SonarQube will use the JSON report and Jenkins the XML report. I have not looked at the central analyzer (this appears to be a feature which is part of the commercial Nexus distribution). This might help reduce build time since the vulnerability files can be shared across scans and do not need to be downloaded every time.

You can browse the HTML report yourself if you like. Using this you can confirm that the dependencies were identified and actually scanned. My scan found 0 vulnerabilities so I was worried the scan was not executed correctly but the results showed the different dependencies and how they were evaluated so they were correct. A new Spring Boot version does not contain vulnerable dependencies as it should!

Dependency-Check report shows results per dependency scanned

Installing SonarQube

There are various ways you can install SonarQube on Kubernetes. There are Docker images available which require you to create your own Kubernetes resources, but also a Helm chart. The Helm chart is really easy to use. For example, it creates a PostgreSQL database for the SonarQube installation for you without additional effort. The PostgreSQL database which is created, is of course not highly available, clustered, etc. Using Helm value overrides, you can specify your own PostgreSQL DB to use which you can setup to fit your availability needs. The default username and password is admin. Of course change this in a production environment. A small drawback is that the chart is not 100% up to date. Currently it installs version 8.3 while 8.5 is already available. I’m not sure if this is an indication not much maintenance is being done on the chart. I hope this is not the case of course, else I would not recommend it. If you do use it, keep this in mind. For a lab scenario like this one I do not care whether I get version 8.3 or 8.5.

Installing SonarQube on Kubernetes can be done with the following commands using the helm chart;

 helm repo add oteemocharts https://oteemo.github.io/charts  
 helm repo update  
 kubectl create ns sonar  
 helm install -n sonar sonar-release oteemocharts/sonarqube  

After the installation is complete, you can access it with:

 export POD_NAME=$(kubectl get pods --namespace sonar -l "app=sonarqube,release=sonar-release" -o jsonpath="{.items[0].metadata.name}")  
 kubectl -n sonar port-forward $POD_NAME 8080:9000  

And going to http://localhost:8080. Username and password are as indicated admin

SonarQube 8.3 start screen after login

Configuring SonarQube in Jenkins

In the previously described setup, you can access Jenkins with:

 export POD_NAME=$(kubectl get pods --namespace jenkins -l "app.kubernetes.io/component=jenkins-master" -l "app.kubernetes.io/instance=my-jenkins-release" -o jsonpath="{.items[0].metadata.name}")  
 printf $(kubectl get secret --namespace jenkins my-jenkins-release -o jsonpath="{.data.jenkins-admin-password}" | base64 --decode);echo  
 kubectl --namespace jenkins port-forward $POD_NAME 8081:8080   

The second line gives the password of the admin user you can use to login. The last command makes a Jenkins pod available on localhost port 8081. 

In SonarQube you can obtain a secret. The SonarQube pipeline plugin in Jenkins can be configured to use the secret to store results from the build/dependency-check in SonarQube.

Important to mind is that you should not configure the SonarQube Scanner in Jenkins. This is a generic scanner when there is no specific scanner for your build available. Since we are using a Maven build and there is a Maven scanner as plugin available, it is preferable to use that one. A similar logic holds for the dependency-check; preferably use one inside your build over a generic scanner.

Jenkins pipeline

I used the following stages in my pipeline to perform the scan and load the results in Jenkins and SonarQube.

   stage ('OWASP Dependency-Check Vulnerabilities') {  
    steps {  
     withMaven(maven : 'mvn-3.6.3') {  
      sh 'mvn dependency-check:check'  
     }  
   
     dependencyCheckPublisher pattern: 'target/dependency-check-report.xml'  
    }  
   }  
   
   stage('SonarQube analysis') {  
    steps {  
     withSonarQubeEnv(credentialsId: 'sonarqube-secret', installationName: 'sonarqube-server') {  
      withMaven(maven : 'mvn-3.6.3') {  
       sh 'mvn sonar:sonar -Dsonar.dependencyCheck.jsonReportPath=target/dependency-check-report.json -Dsonar.dependencyCheck.xmlReportPath=target/dependency-check-report.xml -Dsonar.dependencyCheck.htmlReportPath=target/dependency-check-report.html'  
      }  
     }  
    }  
   }  

As you can see they have several dependencies. They depend on the OWASP Dependency-Check plugin for publishing results and the SonarQube Scanner for Jenkins to set environment variables which contain the required credentials/secret/hostname to access SonarQube. I’m also using withMaven from the Pipeline Maven Integration plugin. As you can see, I’m using the Maven build to perform the scan and not the dependencyCheck from the Jenkins plugin. To process the results I’m using the SonarQube plugin from Maven instead of the SonarQube Scanner from Jenkins.

A challenge which I didn’t manage to solve on short notice is that Jenkins creates a temporary build container in which it executes the pipeline. After the build, the container will be disposed of. During the build process the OWASP Dependency-Check downloads vulnerability data. This takes a while (around 7 minutes on my machine). 

During a next build, since the build container had been destroyed already, it has to download all the vulnerability data again. The data needs to be stored in a persistent way so only an update of vulnerability data is required which saves a lot of time. Maybe mount a prepared tools container during the build or use an external analyzer (as indicated Sonatype Nexus provides one in their commercial version).

Executing the pipeline

When you execute the pipeline, SonarQube gets fed with various results and can also produce a measure of technical debt in your project. In this case test coverage (produced by the Maven Jacoco plugin) and data produced by the OWASP Dependency-Check. 

SonarQube makes a verdict on whether the build passes or not and this is displayed in Jenkins by the SonarQube Scanner plugin. Of course the Maven plugins can themselves also decide to break the build. The Dependency-Check can do this when high or critical vulnerabilities are discovered (scoring of 7 as specified in the pom.xml, check here).

You can of course further expand this to include more thorough code quality checks by including Maven plugins such as Checkstyle, PMD and JDepend. Using plugins like these help by making people aware of the quality of their code and can help enforce quality rules during the build process. Since it is relatively easy to implement, there is no good reason not to do this.

The post Jenkins Pipeline: SonarQube and the OWASP Dependency-Check appeared first on AMIS, Data Driven Blog.

How to dynamically Schedule EM Blackouts after PatchTuesday

$
0
0

In the organization I’m currently working for, the OS-patch schedule depends on PatchTuesday (PT) just as Microsoft, Adobe or Oracle are using. And PatchTuesday is, as you all know, the Second Tuesday of each month. But this is a schedule you can not set in the Oracle Enterprise Manager Scheduler. Also, hosts will be patched at different timestamps. Some hosts go at PT+2 (PT plus 2 days) at 3:00h and others at PT+3 at 5:30h. And when one node of a RAC is patched the other node should be in blackout as well … Still with me?!?

Why setting blackouts had to be automated …

Have look in the attached file where a complete patchround of the servers is described (You can switch to an other month by changing the date in field D1) and you get an inkling why we wanted an automated solution.
Due to this quite complicated timetable we often forgot to blackout the servers in service. That meant a “sudden” tsunami of mails from the EM Incident Manager when the final reboots were executed. And it often meant being disturbed at 3 or 5 o’clock in the morning by frantic pinging of our phones. And just to save our sleep, the blackouts had to be set automatically. Just to be sure they are set!

Here is what I came up with to rescue our good night sleep.

Some ruminations …

First I wanted to install a new scheduler, but one of the Rules of Engagement at this moment is “No New Tools”. Try to use what you already have.
My next idea was to use our EM-repository as much as possible. And I wanted to group the servers into dynamic groups in EM using their patch days and times as parameters somehow. But in order to be able to do that, each host target had to have a common attribute I could group by. And that attribute has to correlate to the patch moments somehow.

And in which language should I work? How or where should it be scheduled?

The solution develops …

The first question solved was the attribute, the servers should have in EM to be able to group them by. It came when one of the Linux admins gave us access to a site on which we could check the progress / success of the running patches. One of the fields in the table was called “PatchDay” and sorting on it showed the groups of server which are served concurrently. That is why I added the attribute “OSPatchDay” with below EMCLI -command to the host targets:

emcli add_target_property -target_type="host" -property="OSPatchDay"

And I know that all targets types got this attribute, but I only filled it for the host targets with strings like “PT+3_0500”. Originally this name is concatenated by the fields “PatchDay” (“PT+x”) and “PatchTime”. The “:” had to be dropped because otherwise the string could not be used as EM-attribute and I had no time to figure out how to escape that in EMCLI.

Then the dynamic groups were created and named, this time with the “:” in the string, like “PT+3_05:00” to make clear that these to correspond. The colon is later used as delimeter in PL/SQL to identify the timestamps more easily. And the group names are used to compose the blackout names later on.

Why adding the Partner Nodes…

So far I had enough data to query for the blackouts, but what to do about the cluster partners? Actually this question came up when the base script was already in production.

We noticed that sometimes during the patching of a RAC node the partner agents react to the absent node by preparing a node eviction when the downtime becomes too long. At times the eviction actually takes place. That does not seem to happen when the second node is also in blackout.
For that reason we opted for a second blackout on the partner node, saving us time, we don’t have to spend evaluating and/or repairing afterwards.

But that was not straight forward to implement as one might think. The grouping of the partners was the issue here. Not all the patch days needed blackouts for partners and the partners could not be grouped into dynamic groups by an attribute, at least not without creating a new one. Because a second parameter seems less meaningful in the long run or other administrators, I decided to create “shadow”-groups and fill them manually. Mayby I will implement it one day with the second attribute.

For example: If you have a look in the attached Excel sheet , “PTS+3_05:00” would be the shadow group (PTS-group) of group “PT+3_05:00” (PT-group) and it only contains cluster partners which are not themselves members of the PT-group. In this case servers001 t/m 005 are not in the shadow group, but all other named partners are. Also, all servers without partners are never members of a PTS-group, nor have they the need for a shadow group.

As for the script, after some intense brooding, this issue was quite easy to solve. You will see why it was simple to amend, when you have a look at Script1.txt.

Now, I have groups of servers I could schedule to blackout, one question remained: Which scripting tools to use and how to schedule it?

Chosing the programming language(s)…

In PL/SQL it is easy to determine PT and create the date and time components from the EM-repository data, but I don’t dare to insert them as blackouts into the repository somewhere directly.
EM blackouts are best administered via the EM GUI, EMCTL or EMCLI. The last option is best for scripting, but is often used in conjunction with Python, which I’m not very much acquainted with. But I can script for Linux in bash, ksh or posix. That would mean I had to script in PL/SQL for a shell-script, which then has to log in into EMCLI, execute a couple of commands and then log off again. And I had to obfuscate all used passwords…
… but that is what I did.

And it became …

First, I searched the internet for a query to determine PT for the current month. Then I had a good look at the EMCLI-commands I needed to set or remove a blackout. Then I looked in my script-archive for an example of creating a good logging in order to get a readable report and I got inspired by Carlos Sierra’s eDB360 and the orachk tool. Only, that my resulting script is not even close to the sophistication of these two scripting examples.

The first script is a PL/SQL-script (see Script1.txt) which is scheduled as a EM job executing an SQL-script on the first of each month and it creates a shell-script full of EMCLI-commands like Script2.txt.
I could have scheduled the script on the EM-repos database, but it is more inconvenient to schedule SQL-scripts in the database scheduler than to create a SQL-job for the EM itself (which is actually the same database). And when the EM-machine itself gets patched and rebooted, a DB-scheduler job might be skipped afterwards, while EM-jobs are automatically re-scheduled when the OMS restarts.

The second script is scheduled in the crontab of the EM server on the 6th of the month. That gives us enough time to check and change, or repeat if necessary. It starts with the login to EMCLI, cleans the old blackouts of last month (if there are any), sets the blackouts for the planned servers and than adds the blackouts for the partner nodes. Finally it logs out and all is done.
And we can sleep without being disturbed by frantic mailing about “server down” in the Dead of Night…

Please, have fun with the scripts and as always, feel free to comment!

The post How to dynamically Schedule EM Blackouts after PatchTuesday appeared first on AMIS, Data Driven Blog - Oracle & Microsoft Azure.

How to APIfy WhatsApp – Programmatic interaction with WhatsApp from Node using Playwright

$
0
0

Sending WhatsApp messages from services and applications has been a frequent request from our customers. It also was something I would have liked to use in workshops and demonstrations. It appeals to people. However, WhatsApp does not provide an open API for sending or receiving messages. There is a business service that companies can leverage – through global solution providers and provided a contract is in place. Too much fuzz for simple use cases – if you even can get in. There is a plan B: a very simple way to build your own API for WhatsApp – on top of the WhatsApp Web UI using a simple Node application and leveraging the Playwright browser automation library. Note that Playwright is also available for Python, Go, C# and Java.

An extensive introduction of Playwright can be read in my previous article What you could do if you had a free, tireless browser operator?! Introducing Playwright. In short: Playwright is an open source software library that gives us a deus in machina – a robot in our browser do perform power operations. This opens up opportunities from automated testing to tactical integration and RPA (Robotic Process Automation), and from deep

link bookmarks, screen scraping, web app health monitoring (smoketests) and customized web applications. Playwright is a fairly new (2020), open-source, JavaScript-based, cross-browser automation library for end-to-end testing, created by a team at Microsoft – that used to work at Google and created the popular Puppeteer tool.image

This article describes a Node application that runs an embedded browser through Playwright. This browser is navigated to the WhatsApp Web application. The Node application then programmatically locates the contact to which a message is to be sent in the web page, and types the message to be sent into the text box. Finally, it clicks on the send button to publish the message.

The Node application can handle many requests for sending messages. It would be easy to extend the module with additional functionality – for retrieving messages, for sending images, for sending messages to multiple contacts, for spellchecking and expanding acronyms and abbreviations, for translating and for listening for incoming messages and publishing events when they arrive. It would also be easy wrap the module in a true REST API that can be used in integrations and applications.

Creating the Node application to talk to WhatsApp Web

Creating a Node application that works with WhatsApp Web through Playwright requires of course a Node run time environment with Playwright installed. Then a Node application is created that navigates to WhatsApp Web and keeps the browser running for a long time.

image

[CODE language=”javascript”]
const { chromium } = require(‘playwright’);

const WHATSAPP_WEB_URL = “https://web.whatsapp.com/”

const sleep = (milliseconds) => {
return new Promise(resolve => setTimeout(resolve, milliseconds))
}
(async () => {
const browser = await chromium.launch({ headless: false })
const context = await browser.newContext()
const page = await context.newPage();

await page.goto(WHATSAPP_WEB_URL);

// inspect the user interface elements to manipulate for locating the contact, typing and sending tyhe message
// find the CSS selectors for the relevant elements

await sleep(50000000) // 1000* 50 seconds
await browser.close()
})()
[/CODE]When this application is executed, an incognito browser window opens and a QR code is presented. You need to scan this QR code in the WhatsApp app on your mobile phone – every time the Node application is restarted. image

I want to try to find out if in cookies or local storage perhaps the confirmation of the QR Code verification is stored and if so it can be initialized by the Node application so this manual step can be skipped.

After successful verification, the WhatsApp Web UI is opened. Now it is time to bring out the browser developer tools (ctrl+shift+i) and inspect the relevant elements to discover the CSS selectors. The next figure describes the selectors I determined:

image

Selector ‘._1awRl’  is used to locate the search field for entering the name of the contact. We use ‘span[title=”${whatsappContact}”]’ to find the element for the contact that can be clicked upon to bring up the list of recent messages in the right pane.

With ‘text=Type a message’ we find the box into which a new message can be entered. And finally  ‘button._2Ujuu’ is used to identify the Send button to be clicked to submit the message. With these four selectors – there is not much left to program:

  • enter contact name in search field
  • click on name of contact
  • enter message in text box
  • click on button to send message

The code that takes care of this is shown below:

[CODE language=”javascript”]
const { chromium } = require(‘playwright’);
const { trapEventsOnPage } = require(“../playwrightHelper”);

const WHATSAPP_WEB_URL = “https://web.whatsapp.com/”
const whatsappContact = “Mezelf, mij en ik”

const message = “My message from the WhatsApp robot”

const sleep = (milliseconds) => {
return new Promise(resolve => setTimeout(resolve, milliseconds))
}
(async () => {
const browser = await chromium.launch({ headless: false })
const context = await browser.newContext()
const page = await context.newPage();

await page.goto(WHATSAPP_WEB_URL);

// wait for element search box
await page.waitForSelector(‘._1awRl’)
// enter name of contact in search box
await page.fill(‘._1awRl’, whatsappContact);

// page filters list of contacts
await page.waitForSelector(`span[title=”${whatsappContact}”]`)
// click on the contact – this refreshes the right pane with recent messages and a box for sending new messages
await page.click(`span[title=”${whatsappContact}”]`)

// wait for the field to send a message
await page.waitForSelector(‘text=Type a message’)
// type the message to send
await page.type(‘text=Type a message’, message)
// click button to send message
await page.click(‘button._2Ujuu’)
await browser.close()
})()

[/CODE]

Resources

Code for this article on GitHub: https://github.com/lucasjellema/playwright-scenarios/tree/main/whatsapp 

My earlier article: An extensive introduction of Playwright What you could do if you had a free, tireless browser operator?! Introducing Playwright

The post How to APIfy WhatsApp – Programmatic interaction with WhatsApp from Node using Playwright appeared first on AMIS, Data Driven Blog - Oracle & Microsoft Azure.

Quickly Run NodeJS Demos in Vanilla Windows Sandbox featuring Scoop

$
0
0

TL;DR – this article describes how Windows Sandbox can be used to prepare a well known environment for demonstrations, tutorials, tests etc. Scoop is a great package manager for quickly installing Windows packages (Node runtime, Git client, VS Code editor, …) into the Sandbox. I have applied these concepts to a series of somewhat complex demos around the Playwright library – but the generic approach is applicable in many circumstances.

Windows Sandbox to me is a light weight Windows 10 virtual machine that I can quickly start and stop and use to install and run programs. The Windows Sandbox provides a well defined, clean environment that is fresh every time it is started. Inside the Sandbox, any user can create an isolated environment for working through a tutorial or the labs in a workshop or for doing R&D to stuff they do not want (yet) in their regular Windows environment or that should not depend on the exact layout and composition of their Windows environment.

I have created a number of quite nice demonstrations of using Playwright – the NodeJS library for automating browser interactions with web applications and websites. In order for my colleagues or any interested party to quickly try out my demonstrations – using Windows Sandbox is a nice vehicle. Because the sandbox has the same starting point for any user, my instructions will work for every user. And because the sandbox is isolated from the main Windows environment there will not be undue interference in either direction. And of course it is dead easy to get rid of the Playwright demo environment once the user is done with it.

image

To get going, the steps are simple:

  • run fresh Windows Sandbox
  • install git client and Node runtime
  • git clone my Playwright scenarios GitHub repo’
  • install Playwright library
  • run sample scenarios

I will demonstrate these steps in detail – not that there is much detail. These steps should take you less than 5 minutes.

Run Windows Sandbox

image

The resulting environment is a vanilla Windows sandbox that will be the same for all Windows users anywhere (except for small differences resulting from the exact Windows version used).

image

In the sandbox, open a Command Line Prompt (as Administrator)

image

Then type: notepad script.ps1

image

Confirm that you want Notepad to create a new file. Paste the following lines into this file (note: only three lines actually matter). Then save and close the file.

Invoke-Expression (New-Object System.Net.WebClient).DownloadString(‘https://get.scoop.sh’)

# Note: if you get an error you might need to change the execution policy (i.e. enable Powershell) with
# Set-ExecutionPolicy RemoteSigned -scope CurrentUser

# this one line is all it takes to install a git client, the latest nodejs runtime environment;
scoop install git nodejs

# if you want to install VS Code, add these commands (see https://vscodium.com/) : scoop bucket add extras and scoop install vscodium

node –version

image

Back on the command line, now execute this command:

%SystemRoot%\System32\WindowsPowerShell\v1.0\powershell.exe -NoProfile -InputFormat None -ExecutionPolicy Bypass -Command “.\script.ps1”

This will install Scoop and then use Scoop to install Node and Git (and optionally VSCodium – a spitting image of VS Code).

image

When the installation is complete and the version of the node run time is displayed, close the command line.

Start a new command line. This new command line window is required because it inherits all environment settings that were created during the installations performed by Scoop.

In this new window, execute the following lines (you can copy and paste all lines at once into the command line window):

git clone https://github.com/lucasjellema/playwright-scenarios

cd playwright-scenarios

npm install -D playwright

cd step-by-step

node step-by-step

This will clone my Playwright scenario repository from GitHub, install the Playwright library (including the binaries required to the run the Chromium browser) and run one of the scenarios.

image

After 50-70 seconds, you should see a browser opening with a Wikipedia page loaded. Press the Play option in the toolbar to kick off the scenario.image

At this point you have a Windows Sandbox with Node, git, Playwright and a set of scenarios that demonstrate some of the things we can do with Playwright.

From the command line – the root directory of the cloned repository – run the following scenarios:

  • node .\imdb\movies.js – this retrieves movie data in JSON format through the IMDb website
  • node .\floating_menu\floating-menu.js – to show how a floating toolbar can be injected into virtually any web application
  • node .\inject-shortcuts\inject-shortcut-download-all-images.js – to show how a shortcut key combination can be injected into almost any page
  • node  .\translate\translate-api – this runs a REST API at port 3000 listening for HTTP requests such as http://localhost:3000/?sourceLanguage=nl&targetLanguage=fr&sourceText=Goedendag ; This API leverages the Google Translate Web UI to perform a translation.

    image
  • node .\search\search.js – run a customized version of DuckDuckGo search engine as a demonstration how you finetune any web user interface using Playwright:

    image

Conclusion

Of course the approach I have introduced here for quickly composing a Windows environment that is exactly according to specifications is easily applicable in many different situations – where tutorials, self guided training, demonstrations, tests and other activities are planned that require a known starting situation. The Windows Sandbox is a well defined starting point. Using a tool such as Scoop, we can quickly decorate that environment with the interior we require for the circumstances.

Starting and preparing the Sandbox can perhaps be sped up just a little – for example by using the .wsb sandbox definition file with a LogonCommand that executes a PS1 script. The main challenge is getting that script inside the sandbox in a generic, reliable manner.

Resources

My article Windows Sandbox – light weight playground for R&D, tutorials and workshopshttps://technology.amis.nl/platform-technology/windows-sandbox-light-weight-playground-for-rd-tutorials-and-workshops/

Another article I wrote on installing Windows Sandbox with Chocolatey, Scoop, Git, VisualStudio Code and more

Article on use of Scoop to quickly compose Windows environment – https://dev.to/lampewebdev/my-fresh-development-setup-for-2020-vs-code-windows-10-1hm0

And another highlighting use of Scoop: https://medium.com/around-the-app-in-365-days/setting-up-a-pc-63409ee7ab33

The post Quickly Run NodeJS Demos in Vanilla Windows Sandbox featuring Scoop appeared first on AMIS, Data Driven Blog - Oracle & Microsoft Azure.

Viewing all 163 articles
Browse latest View live